Ganglion Getting Started Guide
Overview
This guide will walk you through setting up your Ganglion, connecting it to your computer, and then connecting it to yourself. Please review this guide in its entirety before starting, and consult the Ganglion Biosensing Tutorial Video. Have fun!
Note that the Ganglion is not set to be discoverable out of the box, you need the GUI.
What You Need
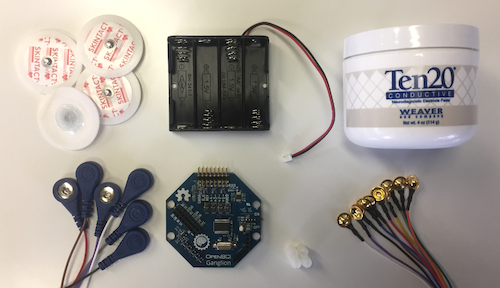
- OpenBCI Ganglion Board
- An OpenBCI Ganglion Dongle
- Lithium battery and USB charger OR 6V battery pack (AA batteries not included)
- Board Case
- EEG electrodes: OpenBCI Gold Cup Electrodes, or your own electrodes, and Electrode Paste
- or EMG electrodes: Snap Electrode Cables and Snap Electrodes.
- A computer connected to the internet
1. Your Ganglion
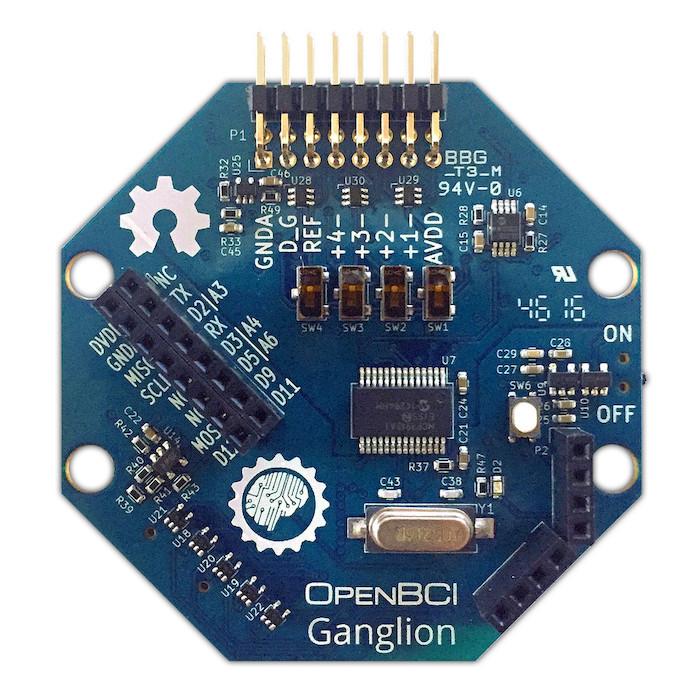
The battery connector on the back can accept 3V to 12V DC power input. Note the removable orange stickers on the four switches (SW1, SW2, SW3, SW4). For more information on the Ganglion Hardware, visit the OpenBCI Ganglion Hardware Doc.
2. OpenBCI Ganglion Dongle
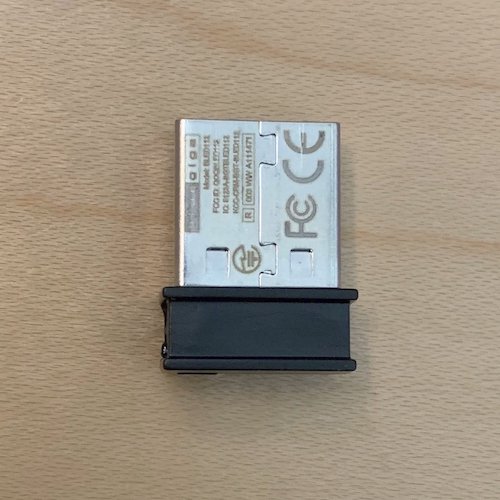
Plug the OpenBCI Ganglion Dongle into your computer before launching the GUI.
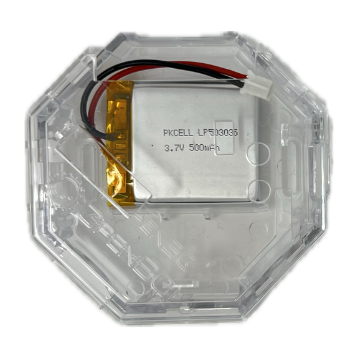
3. Your Lithium Polymer Battery and USB Charger (or 6V Battery Pack & 4 AA Batteries, pre-2023)
Fully charge the Lithium Polymer Battery, until the charger's indicator LED turns green. To do this, insert the battery's white plug into the matching slot on the USB charger (shown on the right), and connect the charger into a USB port.
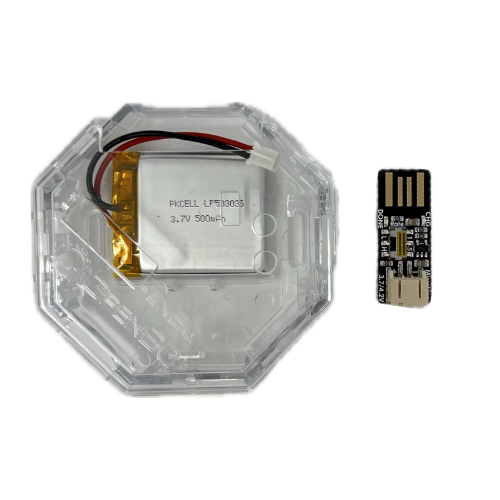
Pre-2023: Install 4 AA batteries in your battery pack
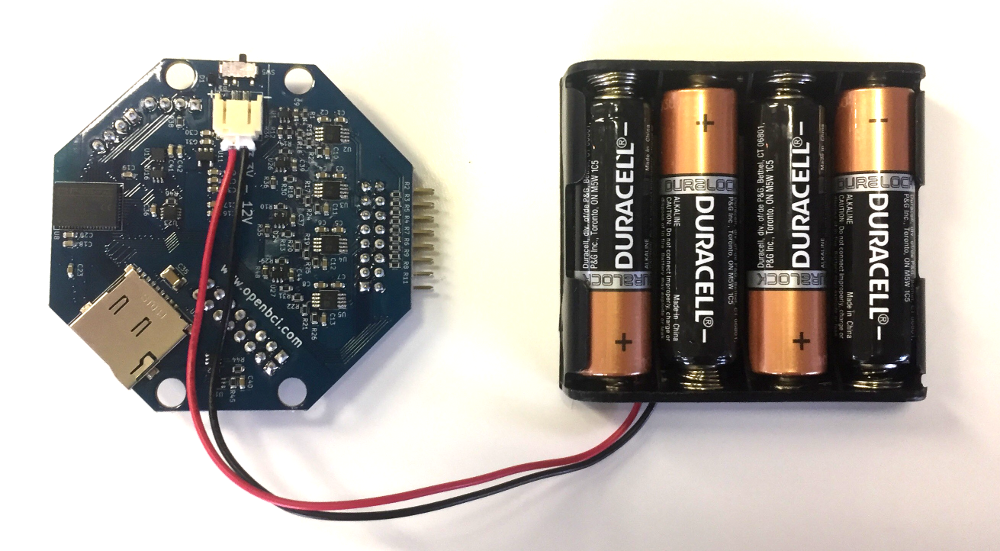
Both power source types can be plugged into the 2-pin JST, on the underside of your Ganglion board.
Turn on the power switch. You should see the BLUE LED blink gently. Blinking means that the BLE radio is not connected or paired with any computer or phone/tablet. Once the Ganglion is connected, the LED stays steady on.
Important note If you are using a non-OpenBCI battery holder (not recommended), please check the polarity (red +/black -) BEFORE powering up your OpenBCI board. A reversed polarity will burn out your board.
4. Clear Board Case
5. Gold Cup Electrodes and Paste

If you ordered OpenBCI Gold Cup Electrodes and Electrode Paste, it should come with:
- 10 passive, gold cup electrodes on a color-coded ribbon cable
- Jar of Ten20 conductive electrode paste
If you plan to work with your own electrodes, the Touch-Proof Adapter will come in handy. It will convert any electrode that terminates in the industry-standard touch-proof design to an electrode that can be plugged into any OpenBCI Board!
For best results, when plugging female header pins onto the OpenBCI board, orient the sides with the 'silver latch bit' face-up since that side is a tiny bit wider than 0.1".
Download/Install/Run the OpenBCI GUI
Please follow the step by step guide to install the OpenBCI_GUI as a standalone application.
Come back to this guide when your GUI is running!
Start Using The OpenBCI GUI
Connect the GUI to your Ganglion board
Make sure your computer's Bluetooth feature is turned on. Select LIVE (from Ganglion) from the first drop down.
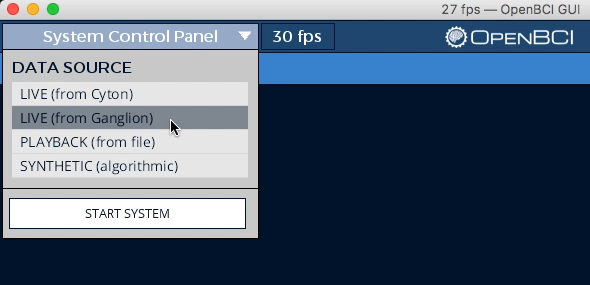
Select Bluetooth (BLED112 Dongle) as the transfer protocol.
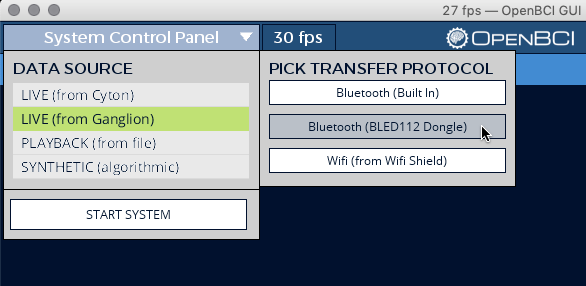
The GUI will automatically start searching for Ganglion devices.
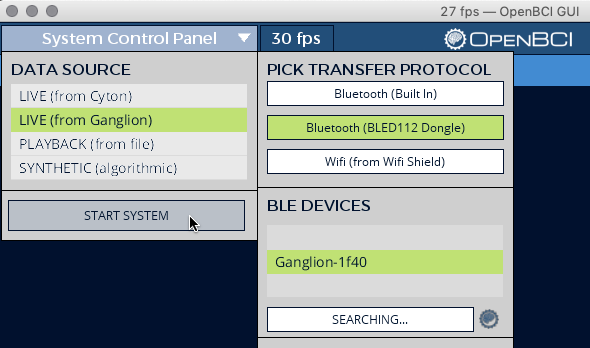
Each Ganglion has its own unique 4 character ID (in HEX), and you will see it listed in the BLE DEVICES window. If you don't see any Ganglions, check to make sure your Ganglion has a battery connected, is switched on, and the blue LED is blinking. If there are multiple Ganglions in the room, you can find yours by turning it off, clicking the REFRESH LIST button, then turn on your Ganglion again. Make a note of your Ganglion's 4 character ID.
Select the desired Ganglion device from the dropdown list.

The GUI will automatically generate a recording to a file. You have an option at this point to create your own file name, in the DATA LOG FILE window, should you choose to.

Press START SYSTEM when you're ready to begin streaming.
Navigating the GUI
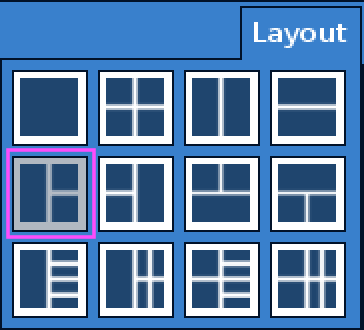
When the GUI connects, it opens up to the default window layout. For a more in-depth guide to the GUI interface and functionality, check out the OpenBCI GUI Widget Guide. For the purposes of this introductory tutorial, You should follow the following steps to setup the GUI.
Click on the Layout dropdown menu, and select the one outlined in red.
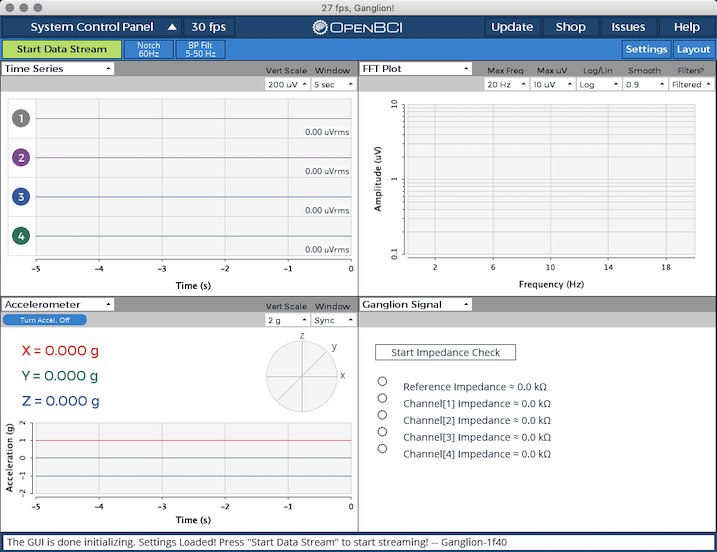
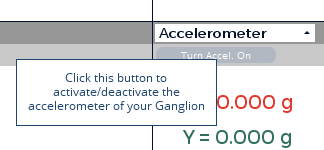
If the accelerometer is off, turn on the accelerometer by clicking the Turn Accel. On button.

Then, click Start Data Stream to stream data from your Ganglion board.
![]()
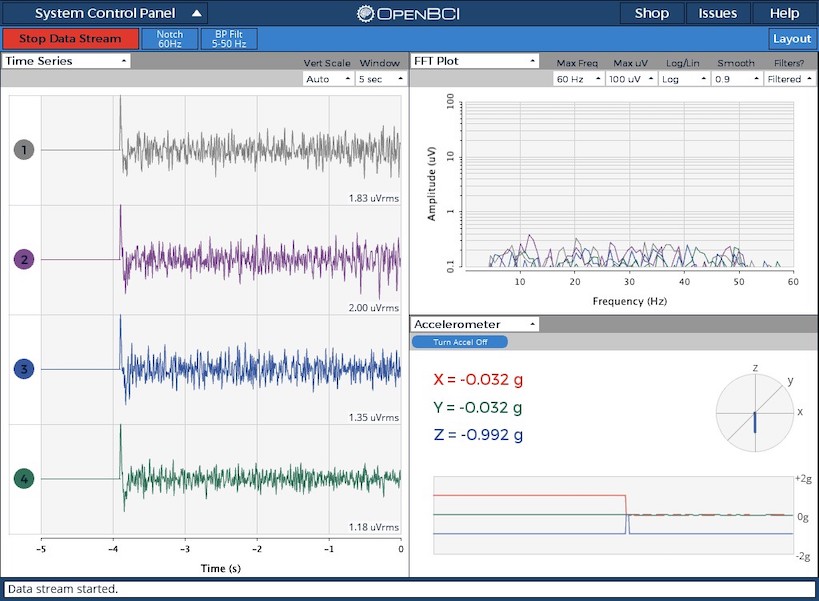
You should see the Time Series window scrolling some data to the left, the FFT Plot container will show you the power level of the signals at different frequencies. The Accelerometer window will also scroll data.
By default, the GUI stores all user data and raw EEG recordings in [USER]/Documents/OpenBCI_GUI and names each session with an autogenerated timestamp by default.
Learn about the Time Series and other built-in widgets in the GUI Widget Guide. Refer to the Ganglion Data Format guide to learn how to interpret the raw data directly from the device. However this is already handled gracefully by BrainFlow for a number of programming languages and use cases.
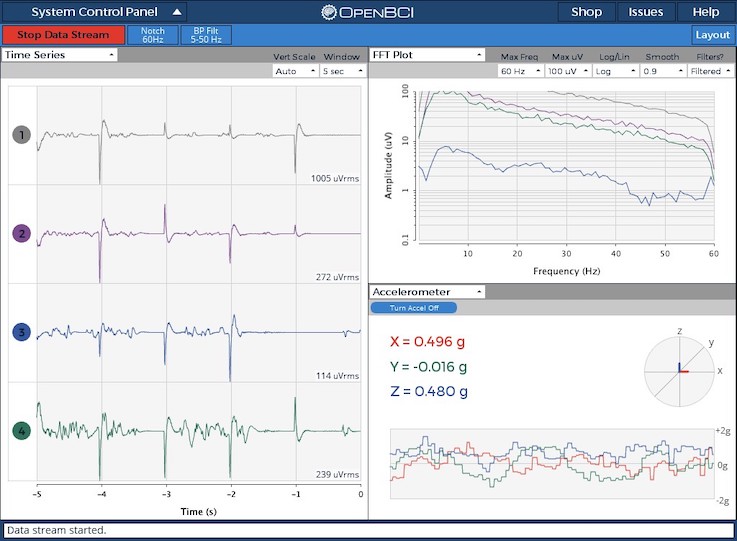
Pick up your board, and move it around. You should see the data in the Accelerometer window also move around, and if you're touching the input pin header, you will see some noise in the other windows. Nice!
NOTE: If you're having connection issues, refer to the troubleshooting tips below.
- check that you have fresh batteries
- move the Ganglion board closer to its dongle
- hit 'AUTOSCAN' a couple of times
- exit the GUI and restart the computer to reboot your USB port
Now that you've got your computer connected to the Ganglion, it's time to connect yourself!
Connect yourself to OpenBCI
To learn how to connect yourself to OpenBCI using your newly set up board, see the following tutorials: