Gelfree Electrode Cap Guide
This is a guide to setting up and cleaning your OpenBCI Gelfree Electrode Cap. Please consult the Gelfree Electrode Cap Product Page and review this guide in its entirety before starting.
You can pair the Gelfree Electrode Cap with the OpenBCI CytonDaisy 16-channel Biosensing Board or a standard bioamplifier of your choice.
This cap kit contains:
- cap with adjustable chinstrap
- labelled Ag-AgCl electrodes/cables
- measuring utensils/plastic beaker for saline conductive solution
- Hydro-link conductive inserts
- cotton swabs for scalp preparation
- towel for clean-up
The touchproof adapter cable is necessary to pair this cap with the OpenBCI CytonDaisy.
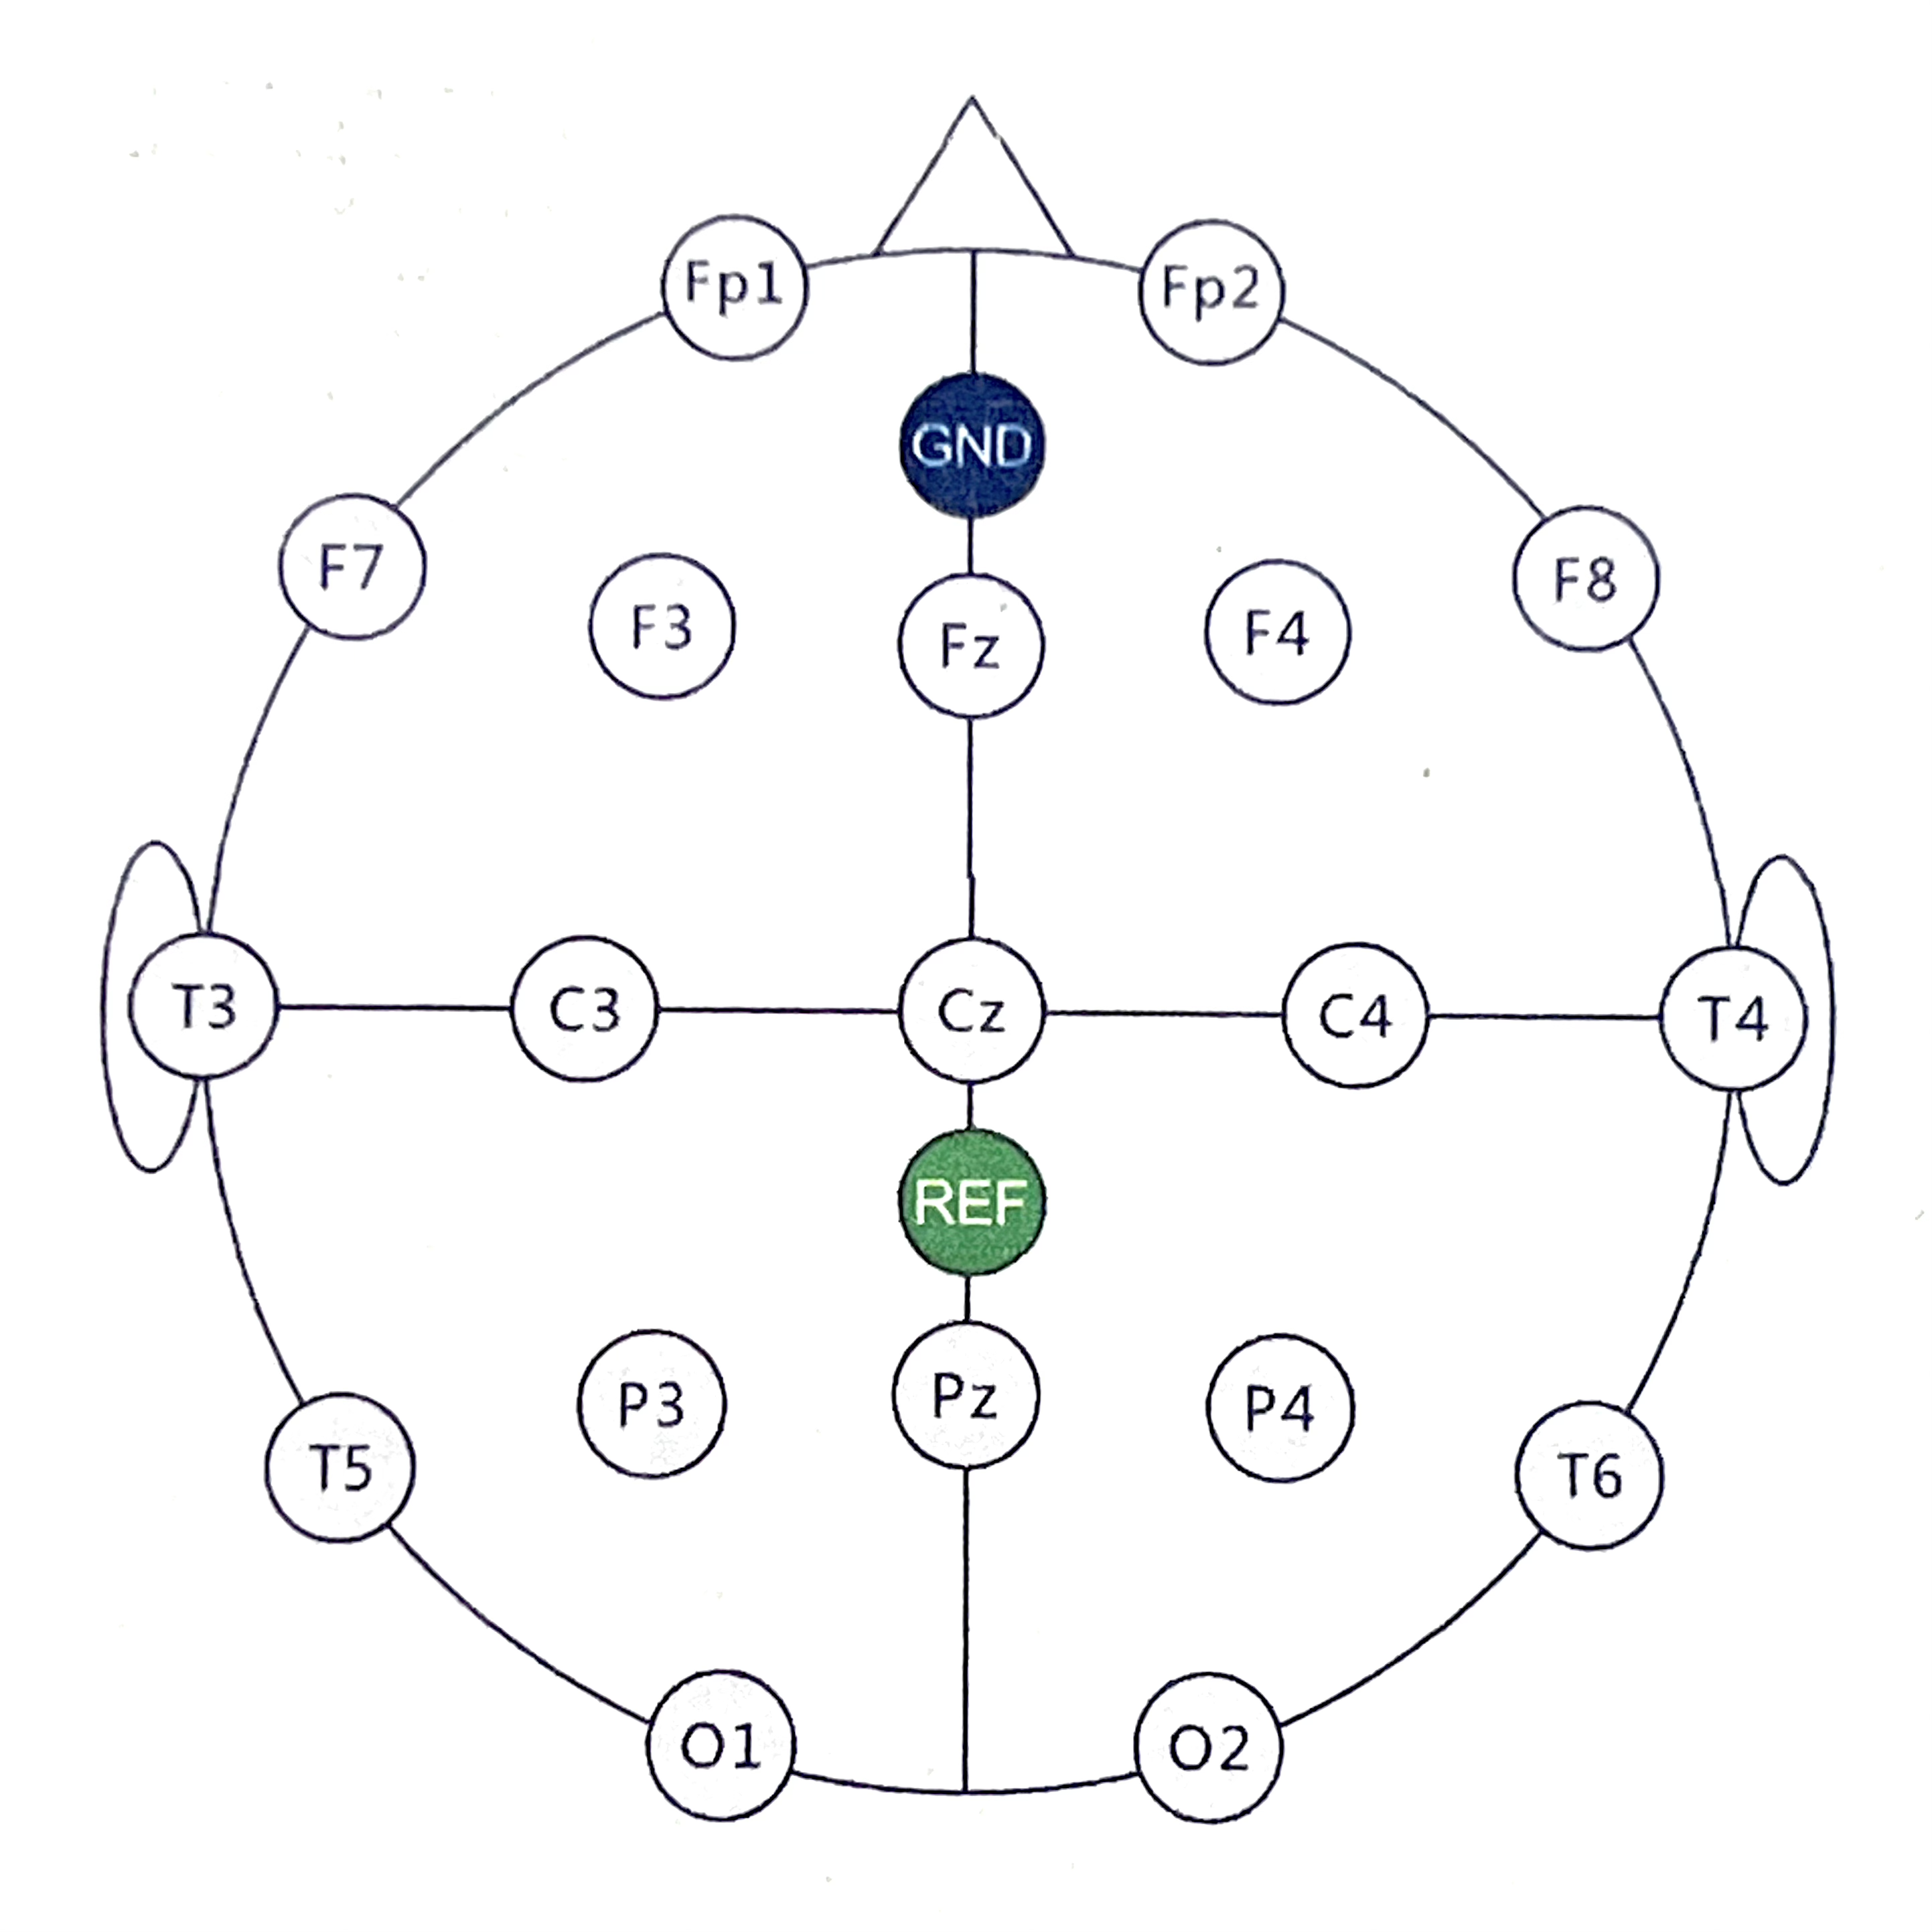
The 10-20 placement of these electrodes is as shown in the image below:
Electrode Cap With CytonDaisy Tutorial
When combined with the OpenBCI CytonDaisy 16-channel Biosensing Board, the Gelfree Electrode Cap is a semi-dry, low-cost, research-grade tool for obtaining 16 channels of EEG data.
What You'll Need
- CytonDaisy 16-channel Biosensing Board,
- Header Pin to Touchproof Adapter (HPTA) x2
- Gelfree Electrode Cap Kit
- Salt
Before Starting
Make a saline solution
- Fill the plastic beaker with 200 mL tap water.
- Stir 1 teaspoon of sodium chloride (~6 g) into it.
- Soak at least 16 Hydro-linkTM sponges in the saline solution while you proceed to the hardware set-up.
Connecting the Electrode Cap to the CytonDaisy
- Use the y-splitter cable that came with your CytonDaisy to "gang" together the bottom SRB pins on the Cyton and the Daisy module, as shown below. This will be the reference electrode for the other electrodes on the subject's head.
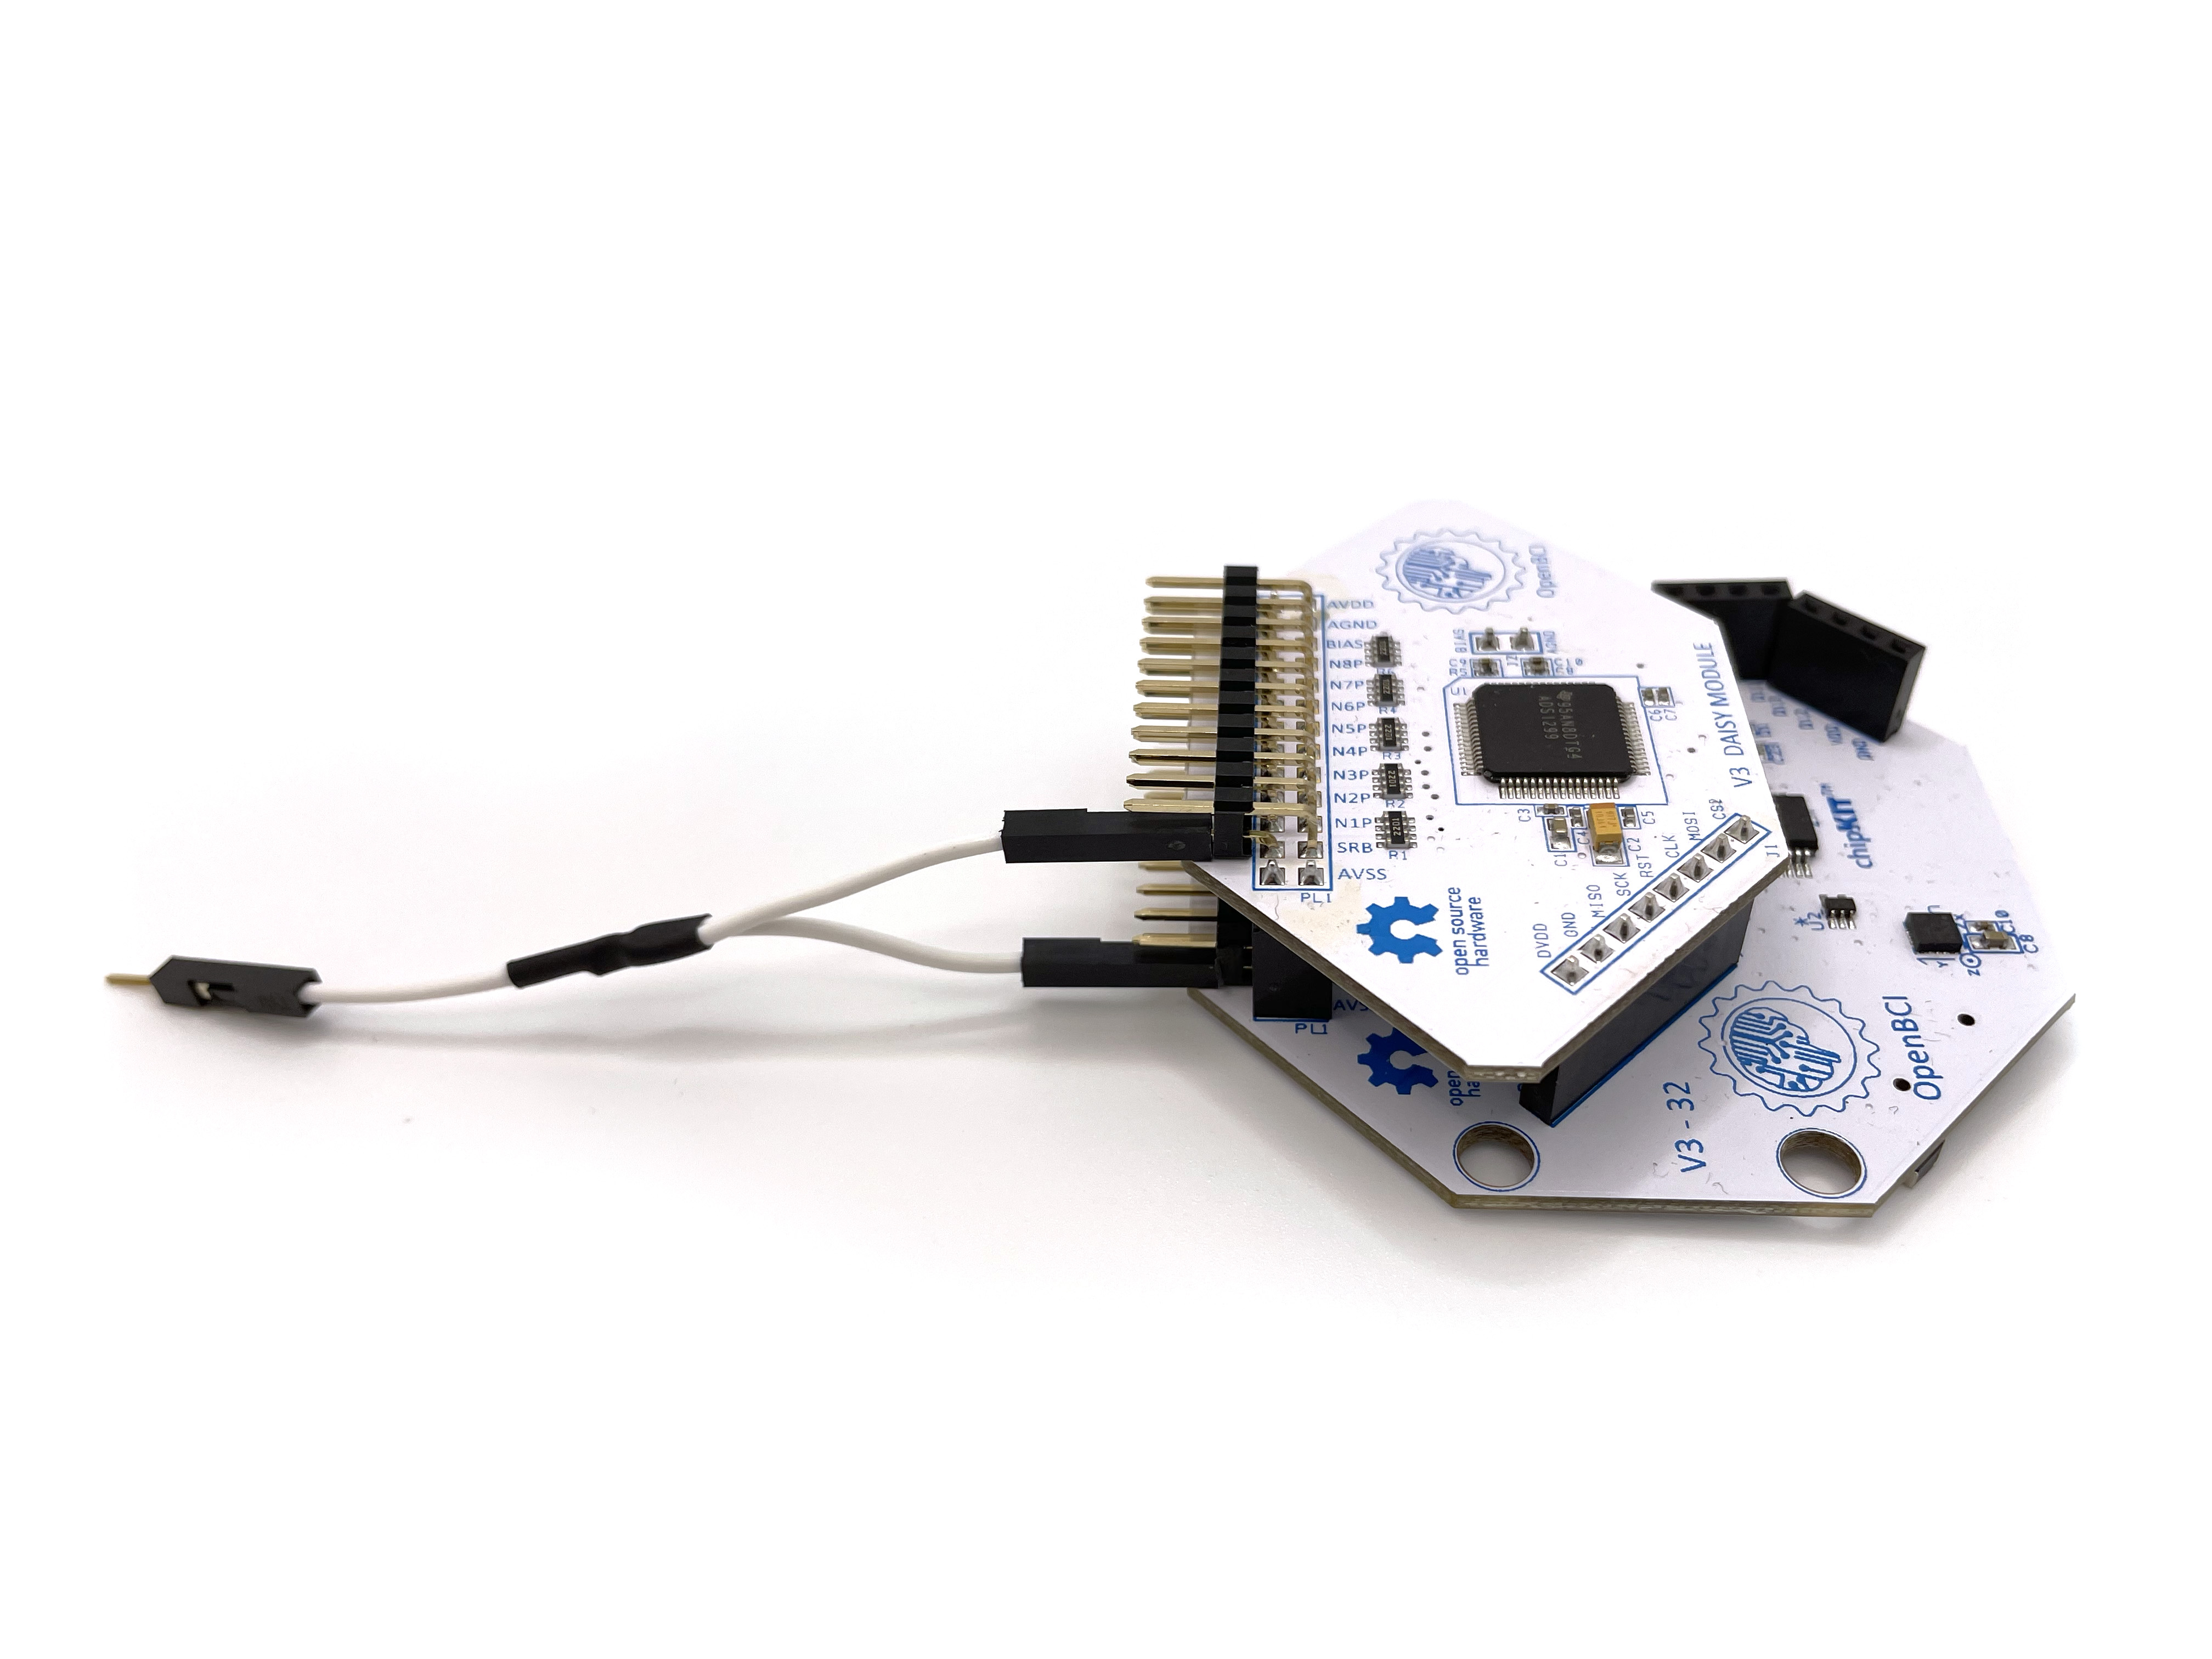
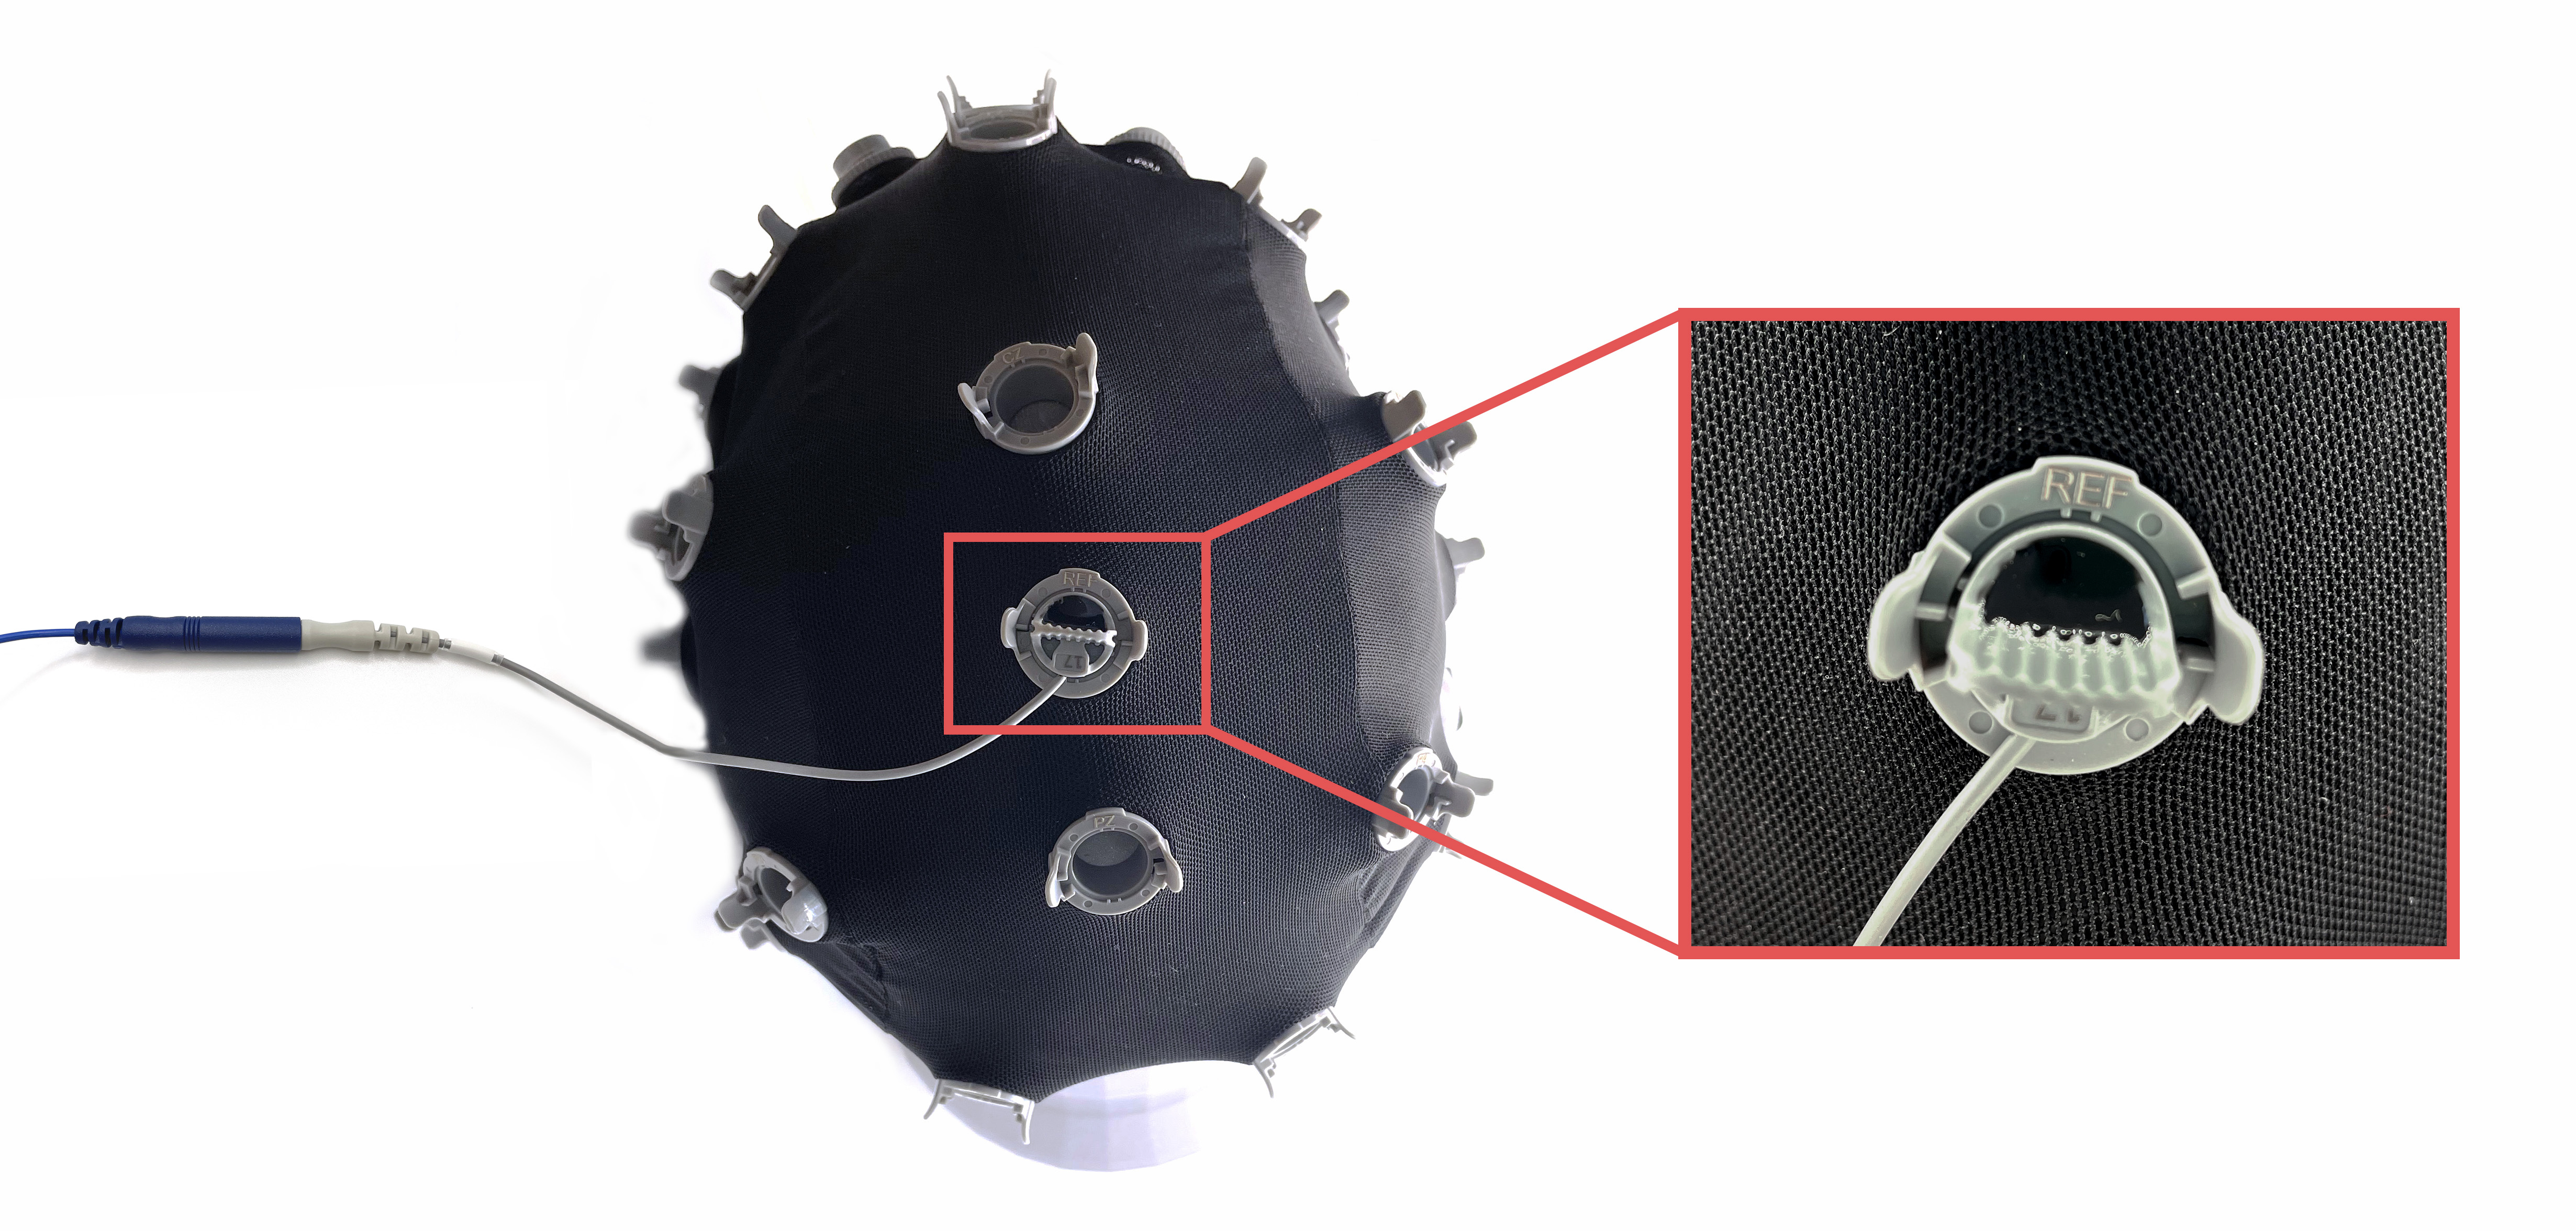
- Connect an HPTA cable to the single end of the y-splitter cable, then connect its blue termination to the gray cable, and then to the REF location of the cap, as shown below.
- Connect bottom pins N1P through N8P on the Cyton to a set of HPTA cables, shown below. These pins will be channels 1-8 on the OpenBCI GUI.
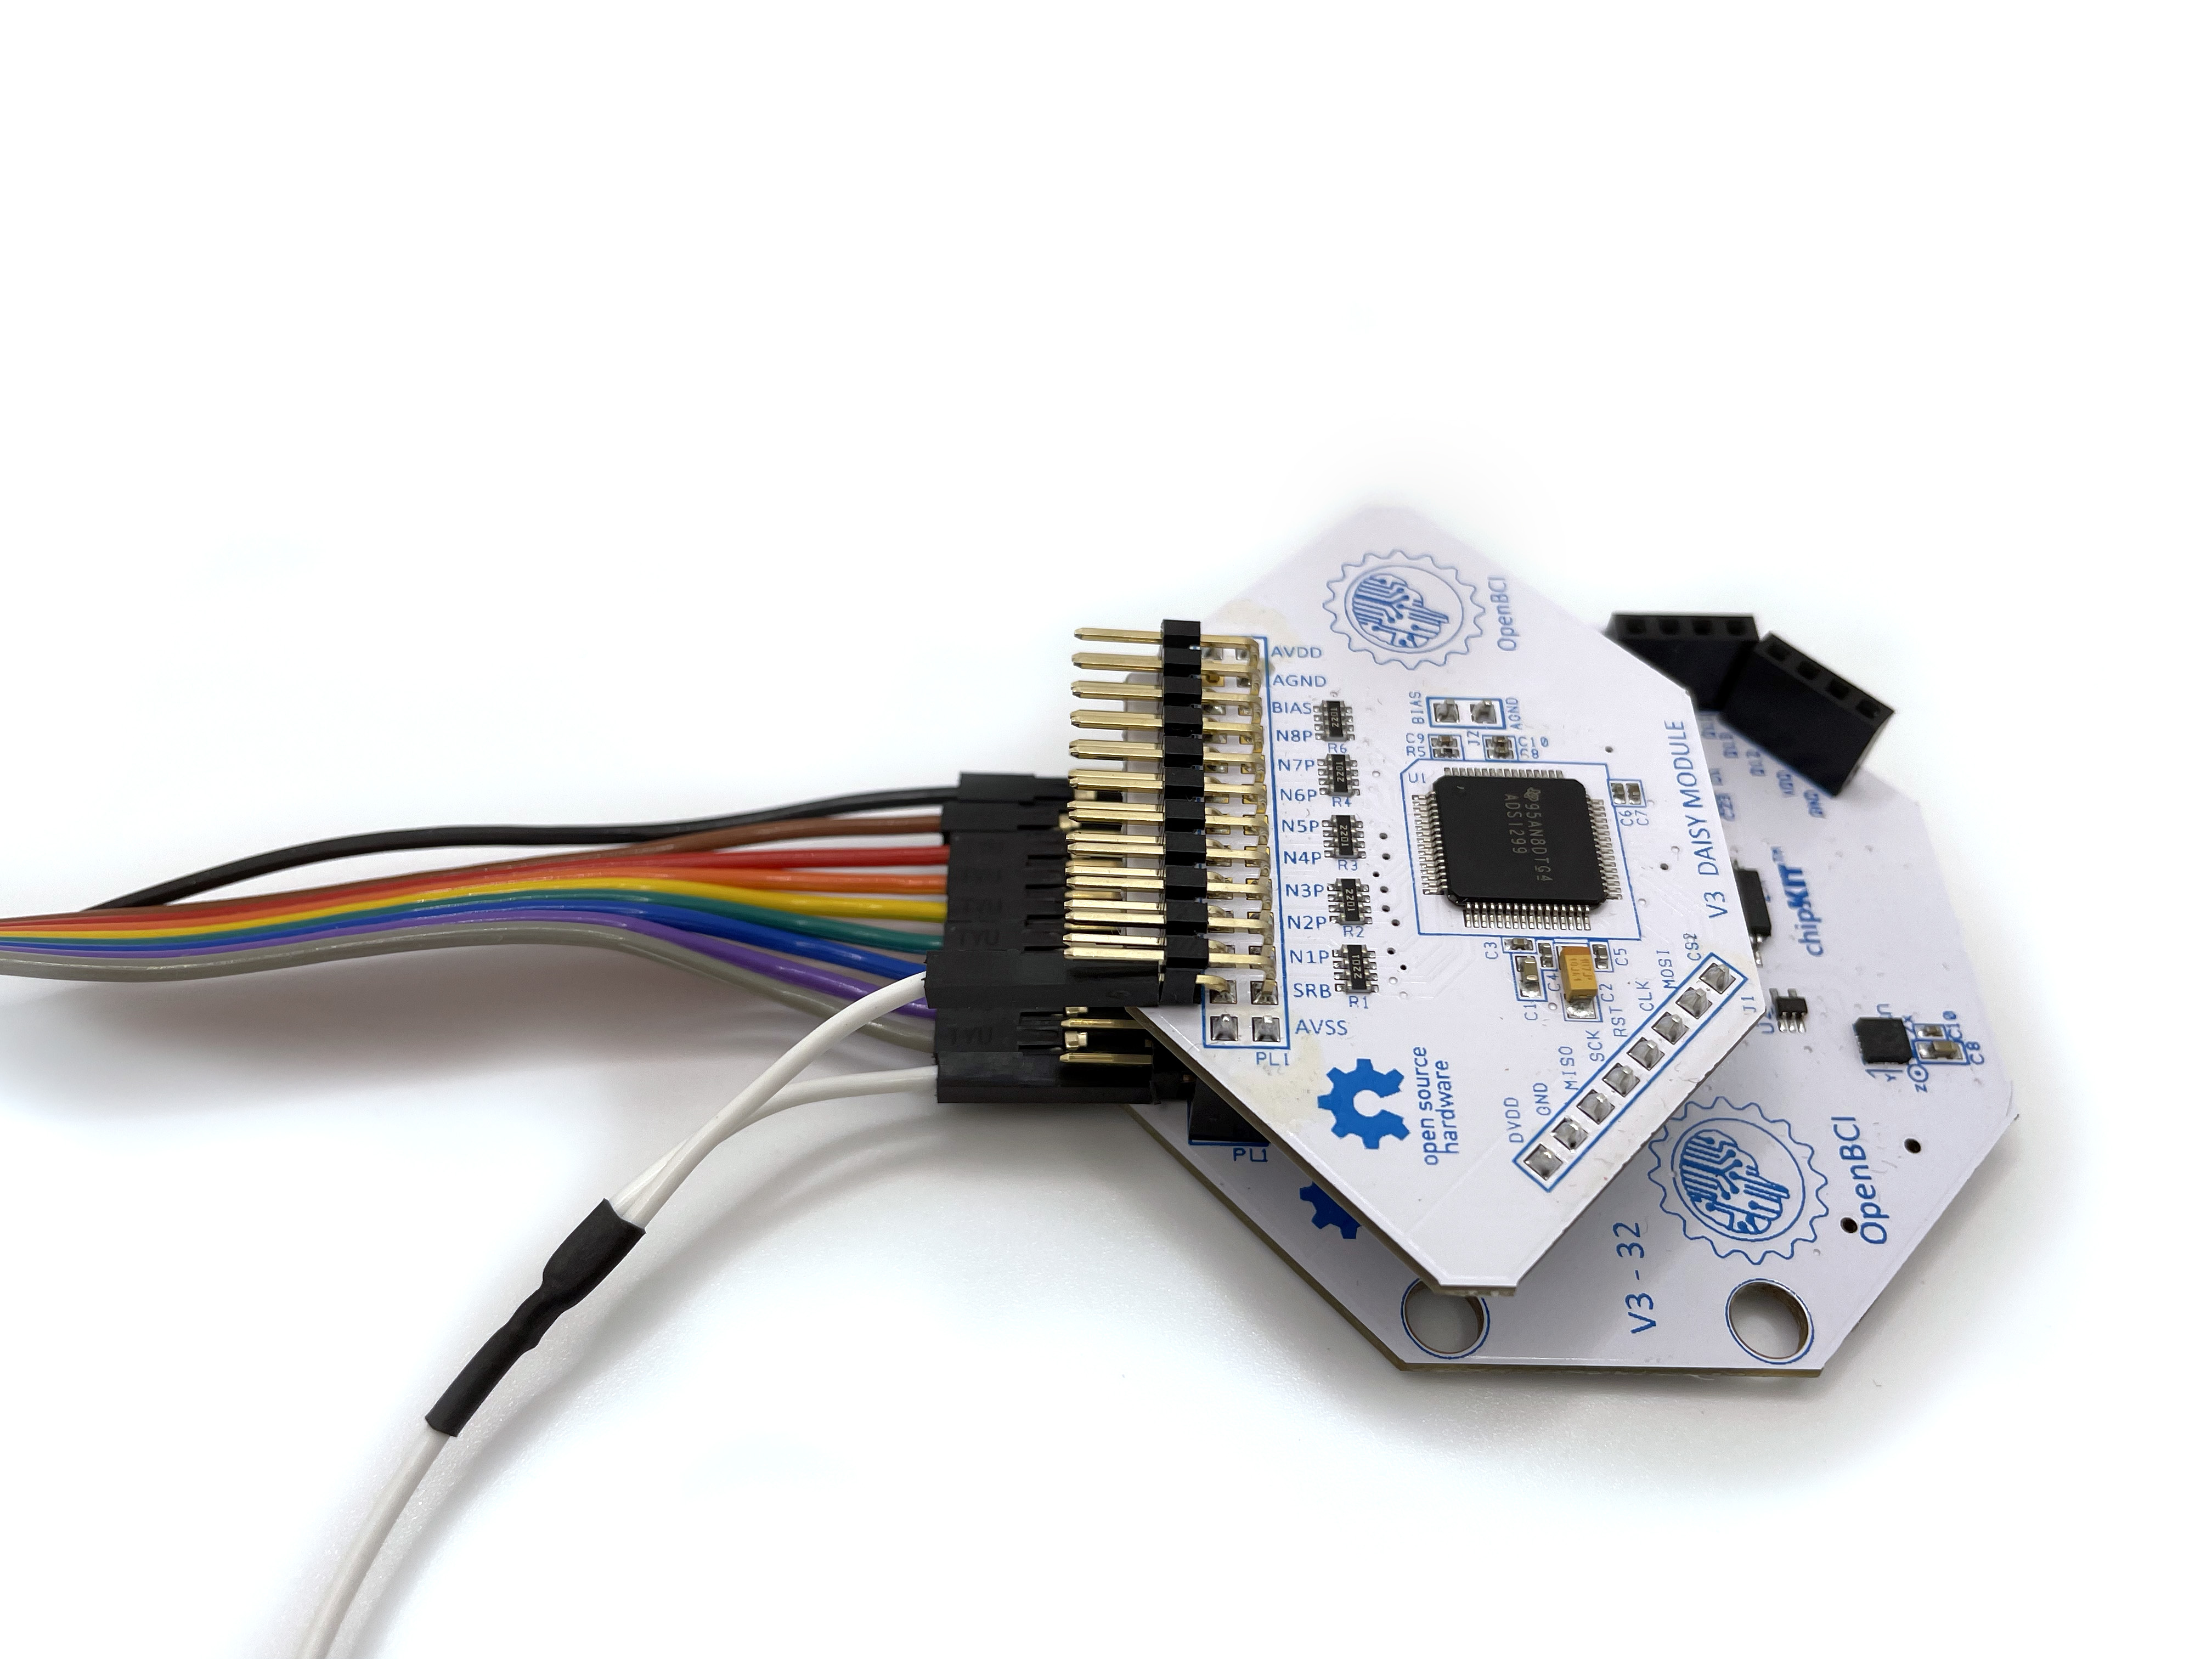
Connect top pins N1P through N8P on the Daisy module to another set of HPTA cables, shown below. These pins will be channels 9-16.
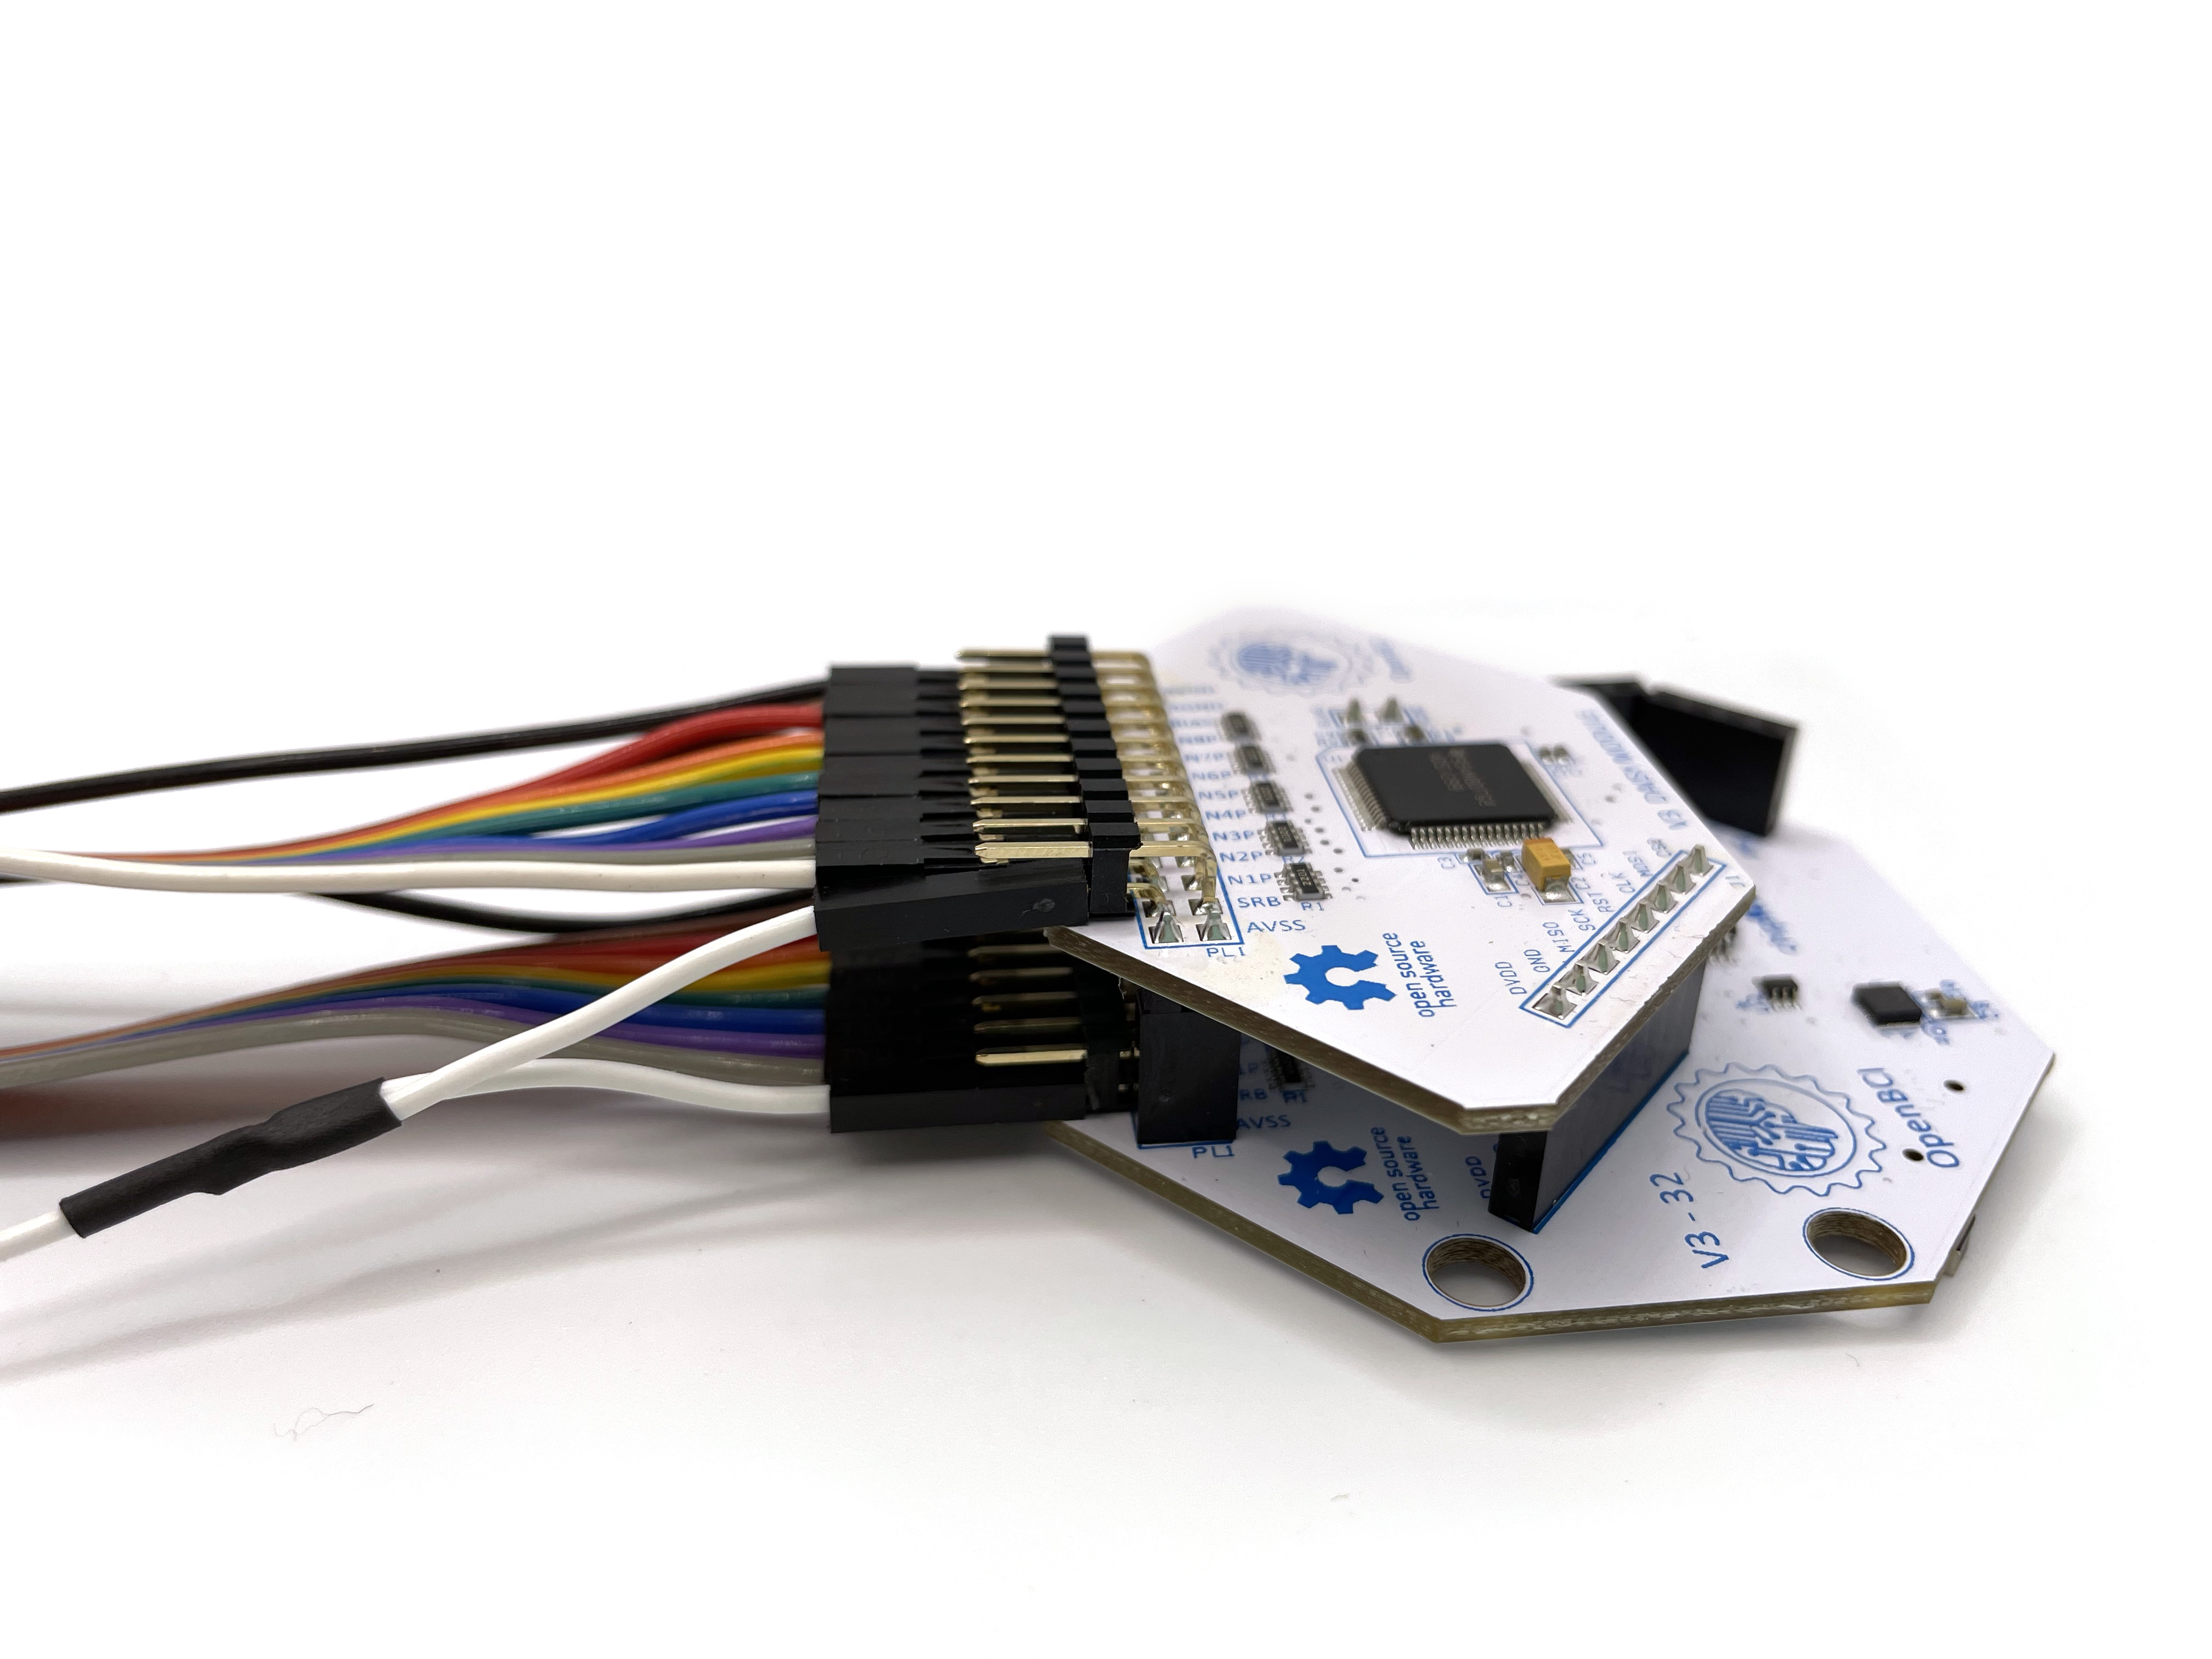
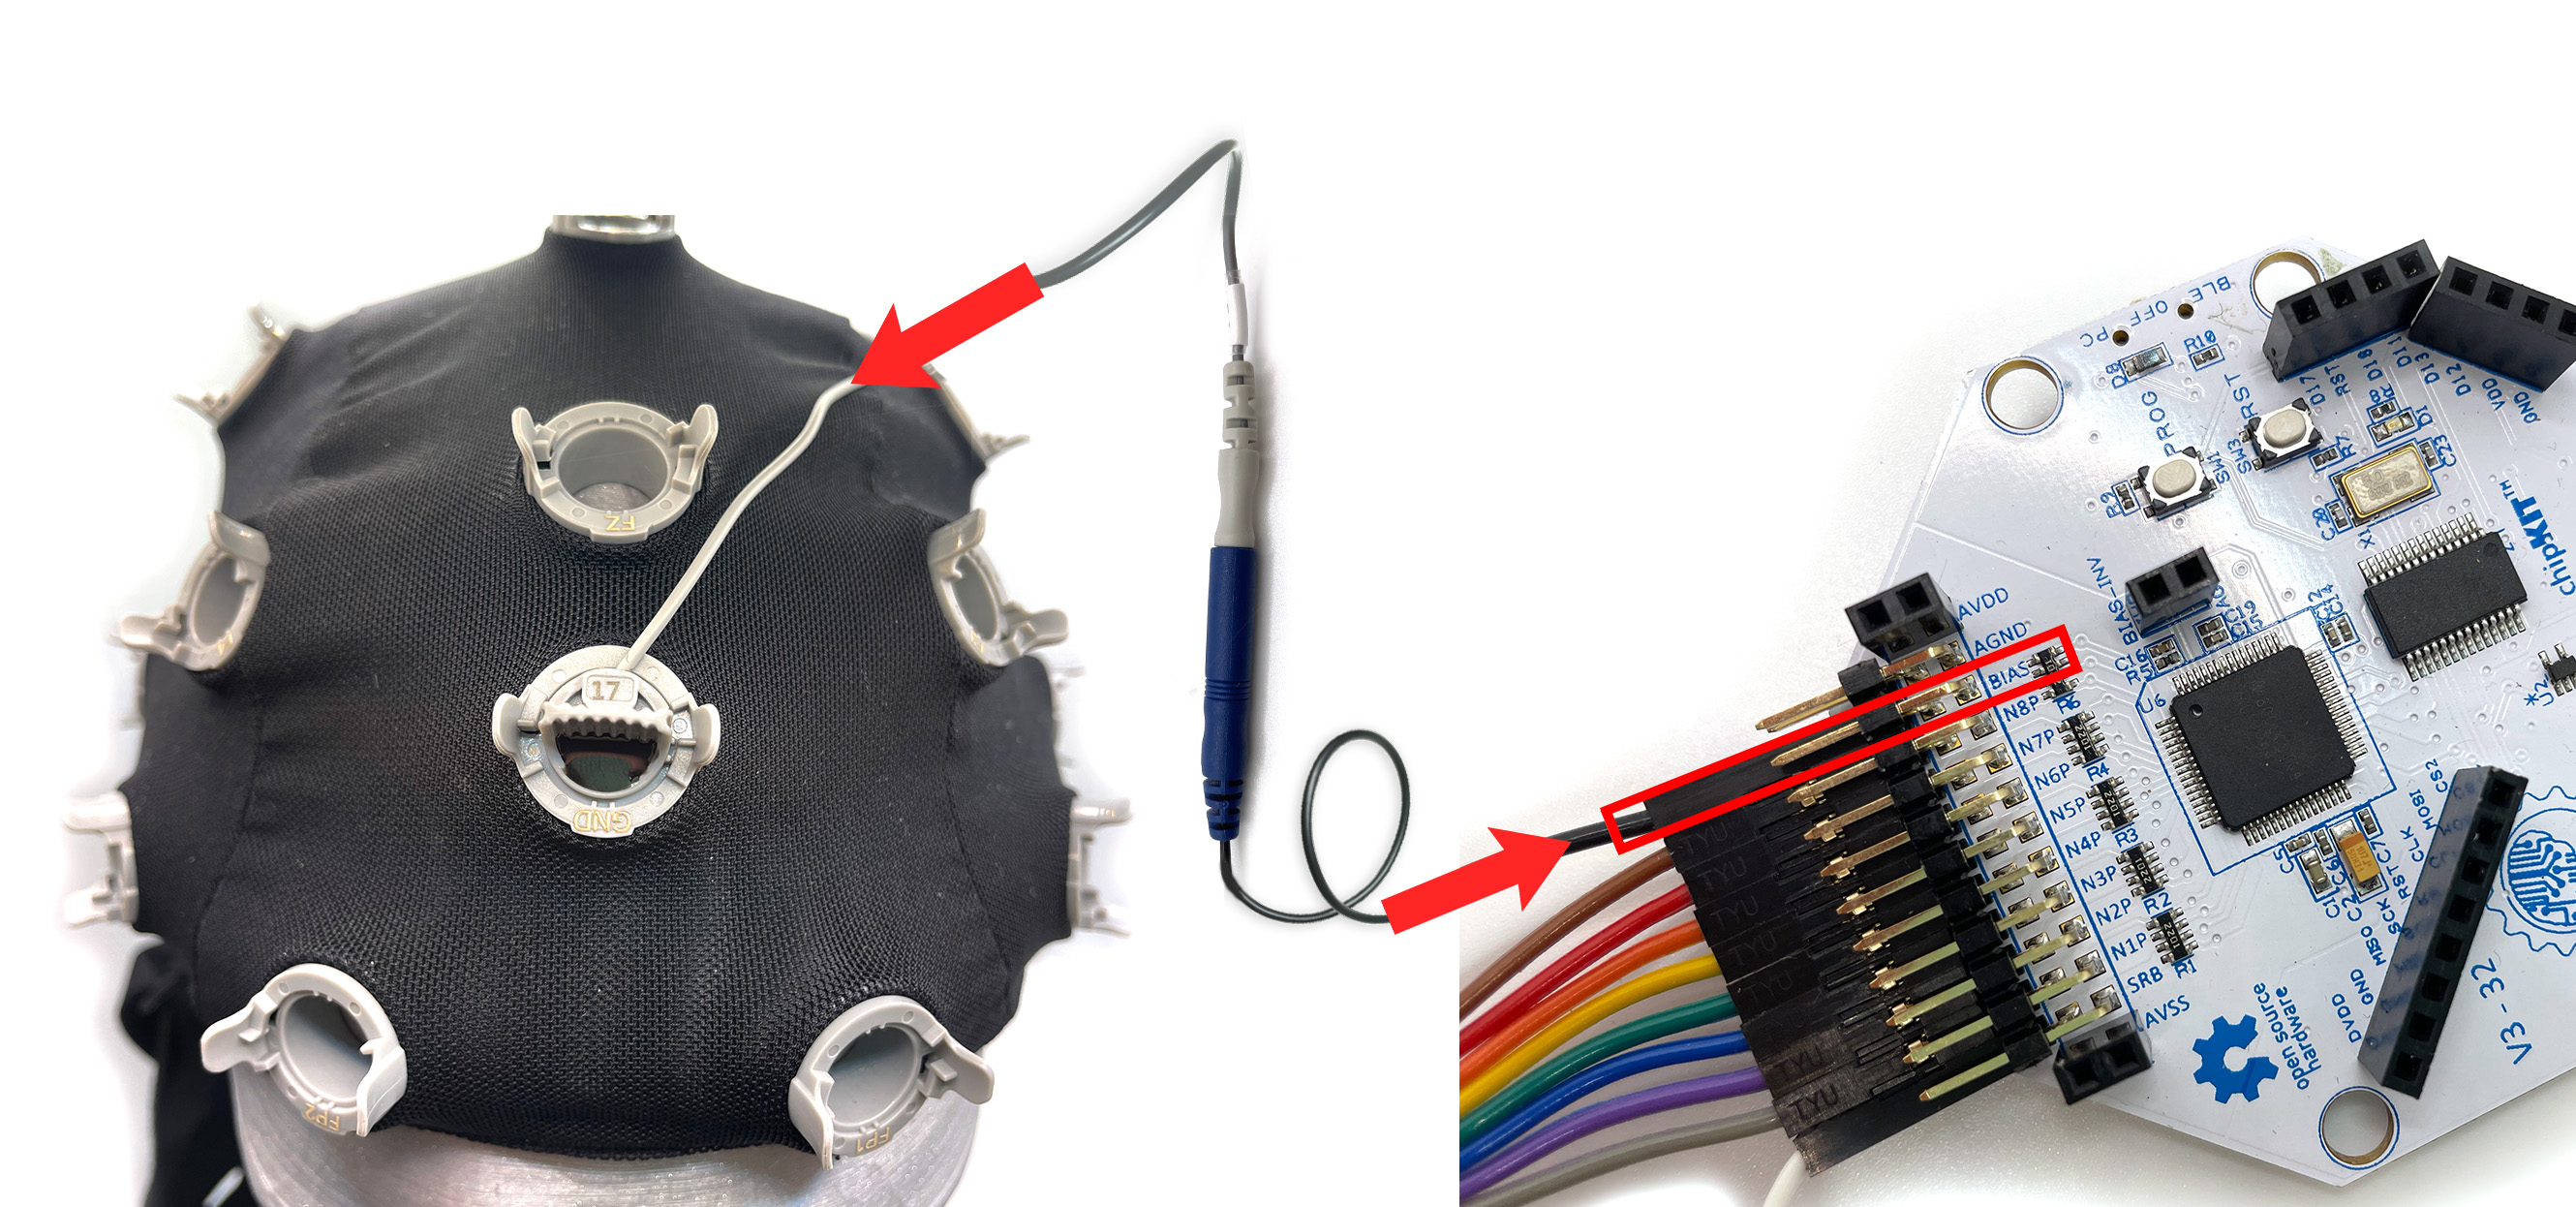
- Connect an HPTA cable to the bottom BIAS pin of the Cyton. The BIAS pin is used for noise cancelling. It is similar to a GROUND pin, which establishes a common ground between the Cyton board and your body, but it has some extra destructive interference noise cancelling techniques built in! Connect the blue termination of this HPTA cable to the gray cable, then connect the gray cable to the GND location on the cap, as shown below.
For WHY these connections are recommended, see the EEG explanation page.
-
Place the cap on the subject's head. Make sure the Cz is correctly located halfway on the midline of the head.
-
Insert the Hydro-linkTM into the electrode holder of the electrode lead wire.
Troubleshooting
Seeing a lot of noise? Check your electrode connections -
These steps can be done in any order:
-
The bottom BIAS pin of the Cyton board goes to the GND location of the cap. You would use the HPTA cable to connect them.
-
The bottom SRB pins on the Cyton and the Daisy boards should be "ganged together" using the split end of the y-splitter cable. The single end of the y-splitter cable should go to the REF location of the cap. You would use the HPTA cable to connect them.
-
The rest of the cap electrodes are completely up to you how you want to connect them to the Cyton. For example, if you want data from Fp1 (of the cap) to show up on channel 1 of the OpenBCI GUI, then connect Fp1 cable to the bottom pin N1P of the Cyton. Use the HPTA cable to connect them.
If you want Fp1 data to show up on channel 9 of the OpenBCI GUI, then connect Fp1 to the bottom pin N1P of the CytonDaisy. You can pair any cap electrode (aside from GND and REF) with any pins N1P through N8P on the Cyton and Daisy boards.
Channels 1-8 on the GUI correspond to the bottom pins N1P through N8P on the Cyton. Channels 9-16 on the GUI correspond to the bottom pins N1P through N8P on the Daisy.
Seeing high impedance values?
If you see high impedance in the GUI Impedance Check, check that the Hydro-link sponges are in good contact with the scalp and that there is enough saline solution.
After more than two hours, the saline solution should be replenished. Take the Hydro-link sponges out and submerge them in saline solution, then re-install them in the cap.
Software

Head over to the OpenBCI GUI tutorial to set up your free live-streaming software.
Use Cases for OpenBCI GUI
- OpenBCI device owners want to visualize their brainwaves!
- Many researchers, hackers, and students who purchase OpenBCI devices want to use them to acquire data as soon as their device arrives.
- Users use macOS, Windows, and Linux to acquire data
- Users want to filter incoming data in real time.
- Users want to make their own experiments to test their theories or duplicate state-of-the-art research at home.
- Users sometimes struggle to get prerequisites properly installed to get data on their own from OpenBCI Cyton and Ganglion.
- Users want to stream data into their own custom applications, such as MATLAB.
What You Can Do with OpenBCI GUI and Software Stack
-
Visualize data from every OpenBCI device: Ganglion, Cyton, and Cyton with Daisy.
-
Playback files using the GUI.
-
Run as a native application on macOS, Windows, and Linux.
-
Apply filters and other data processing tools to quickly clean raw data in real time.
-
Use the GUI as a networking system to move data out of the GUI into other apps over UDP, OSC, LSL, and Serial.
-
Send data to MATLAB, Neuropype (using LSL), and other third-party software.
-
Analyze data with Python and Brainflow.
-
Create a widget framework that allows users to create their own experiments.
-
Output data into a saved file for later offline processing.
-
Customize the layout, change the gain, toggle on/off, and check impedance of individual channels of the CytonDaisy board (or any connected OpenBCI board) directly in the GUI!
-
Access OpenBCI GUI's built-in widgets such as Band Power, Spectrogram, Accelerometer, EEG Head Plot, and much more.
If you just want to visualize EEG, EMG, or ECG data (and do some basic analysis) and save the data to start with, download the standalone OpenBCI GUI and connect it to an OpenBCI Cyton, CytonDaisy, or Ganglion!
Electrode Cap Care and Cleaning Guide
A routine schedule for cleaning and disinfecting the Electrode Cap ensures accurate EEG signals and the reuse of electrodes between different participants. Furthermore, you will preserve the excellent characteristics of your electrodes and will ensure a long product life.
Cleaning and Storage
After the measurement is finished, disconnect the electrode connectors from the CytonDaisy board. Remove the electrode holders from the bases on the cap.
- Take the Hydro-linkTM sponges out of the holders and wash the Hydro-linkTM with tap water at least three times, squeezing out the water during each wash. Then let the Hydro-linkTM dry in air.
- Rinse the electrode holders and the Gelfree BCI cap with tap water.
- Ensure that everything is dry before storing it in a dry place away from sunlight.
Cleaning frequency: after each use.
Disinfection:
Disinfection should be carried out only after the cleaning procedure and only when necessary. Please consider hygienic measures recommended by your local authorities. It is recommended to use a very low concentration of disinfectant solution to disinfect the Gelfree BCI cap, electrodes, and Hydro-linkTM. Please follow the instructions provided by the manufacturer of the selected disinfectant solution. Only apply the minimum concentration and minimum soaking time required. Make sure that the items to be disinfected are fully covered with a fairly diluted disinfectant. After disinfection, thoroughly rinse the items with distilled water and let them dry in air. The recommended disinfectants are as follows: Perfektan TB (Dr. Schumacher GmbH), Envirocide (Metrex), Metricide (Metrex), Cavicide (Metrex), or just diluted household bleach. If you are unable to purchase the brands mentioned above in your region, a disinfecting product with similar proportions and active ingredients is recommended.
Technical Specifications
| Metric | Values |
|---|---|
| AC Impedance | < 2.5 kΩ·cm2 at 10 Hz |
| DC offset voltage | < 30 mV |
| Potential Drift | < ±5 mV/10min |
| Electrode-scalp impedance | < 20 kΩ (at 10 Hz) |
Questions, comments, suggestions? Email support@openbci.com