EMG Scrolling
In this tutorial, we will show you how to scroll up and down on your computer screen without touching the keyboard. To do this, we will read the peaks in EMG signals your arm muscles produce when you flex them and use those to scroll.
Check out an example video of this tutorial being put into action!
The following instructions are written for use with Windows 10.
Materials Required
- OpenBCI Cyton Board
- Solid Gel Electrodes or IDUN Dryode
- EMG/ECG Snap Electrode Cables
- Computer with downloaded OpenBCI GUI
Step 1: Hardware Assembly.
Follow the EMG Getting Started tutorial to connect the electrodes to your body and the Cyton board, and read data from it using the OpenBCI GUI. For this tutorial, you will need to connect both arms—one to Channel 1 and the other to Channel 2. Only one ground is needed.
Step 2: Software Setup.
Download and install Python (either version 2 or 3). Python might already be installed on your computer. Type python --version to check if you have Python version 2 or 3 installed. To use this program, you need the following Python packages installed:
- pylsl : use
python -m pip install pylslfrom the Python folder in the command line to install it. - pyautogui : use
python -m pip install pyautoguito install it.
Step 3: Data Stream using the GUI.
Follow the networking tutorial to learn how to stream data using LSL from the GUI. For this project, you will need to stream the EMG data using the Networking Widget. Your Networking settings should look as follows:
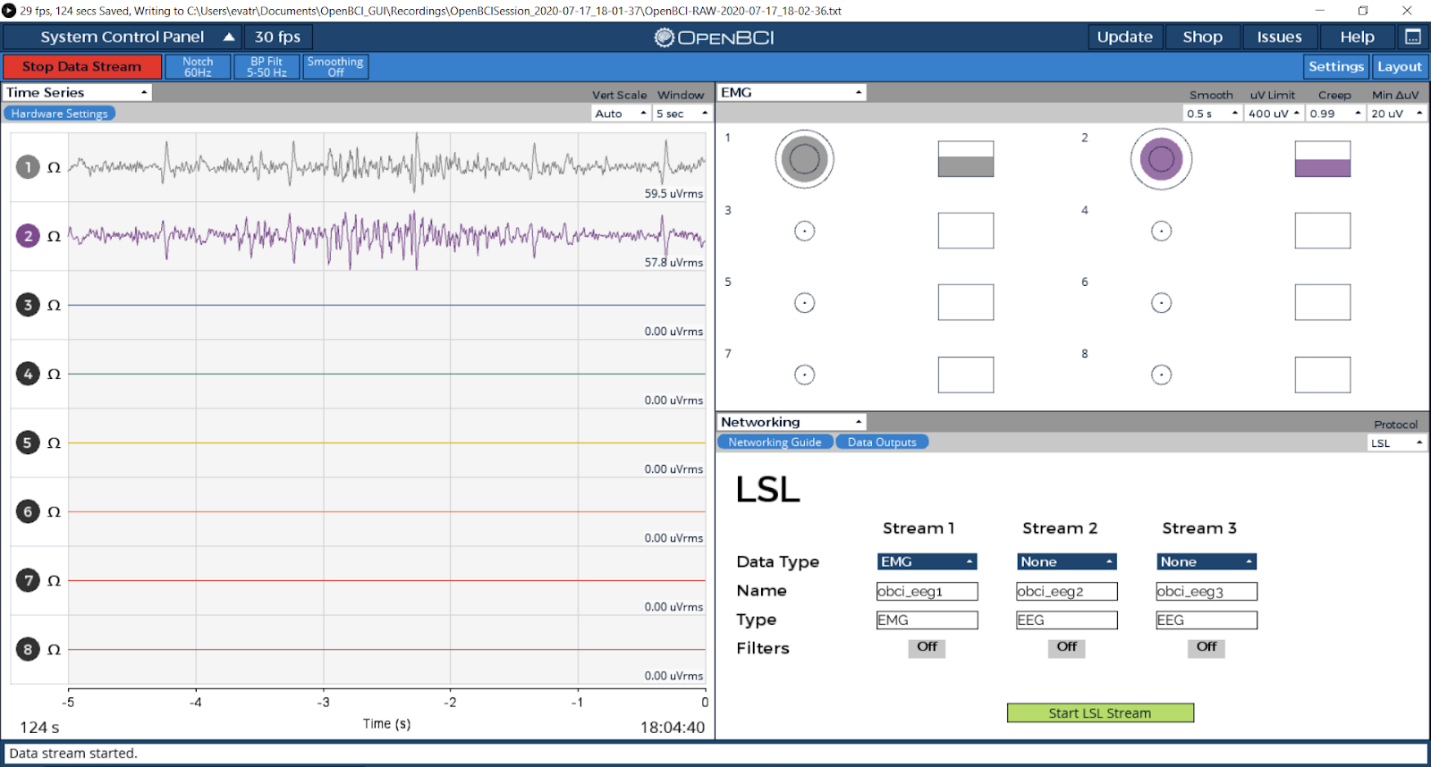
Important: Make sure your EMG widget is open before you start streaming.
Step 4: Using a Python Script to Read the Data and Scroll.
The Python script will search for the EMG data streams. Once it finds them, it will read and detect any spikes that correspond to muscle contractions. If a flex is detected and 10 milliseconds have passed since the last one, it will scroll up or down depending on which arm was flexed. The threshold for the time between flexes can be modified as needed to avoid debouncing.
Download the Python script from here by clicking on ‘Raw’ and copying it to a .py file in your Python folder. Once you’re streaming data from the GUI, go to the folder that you stored the script in from your command line, and run it using python.exe <script_name>.py
Open one of your favorite websites in your browser and scroll through it by flexing your arms. By modifying the time_thres and flex_thres parameters in the code, you can adjust the time to wait between flexes and the flex strength to your needs.
Try it out and send us a video of your final prototype!