OpenBCI Experiment
Welcome to the OpenBCI Puppies and Kittens Experiment, designed by Fan Li.
During this experiment, you will watch a video containing images of puppies and kittens, and press a button every time you see a puppy in the image.
Below are the instructions on how to do it. Full information on this experiment can be found in the OpenBCI Repository. Once you're comfortable with how the experiment works, you can modify the script to create your own experiments.
Equipment Required
-
Headwear, which can be:
-
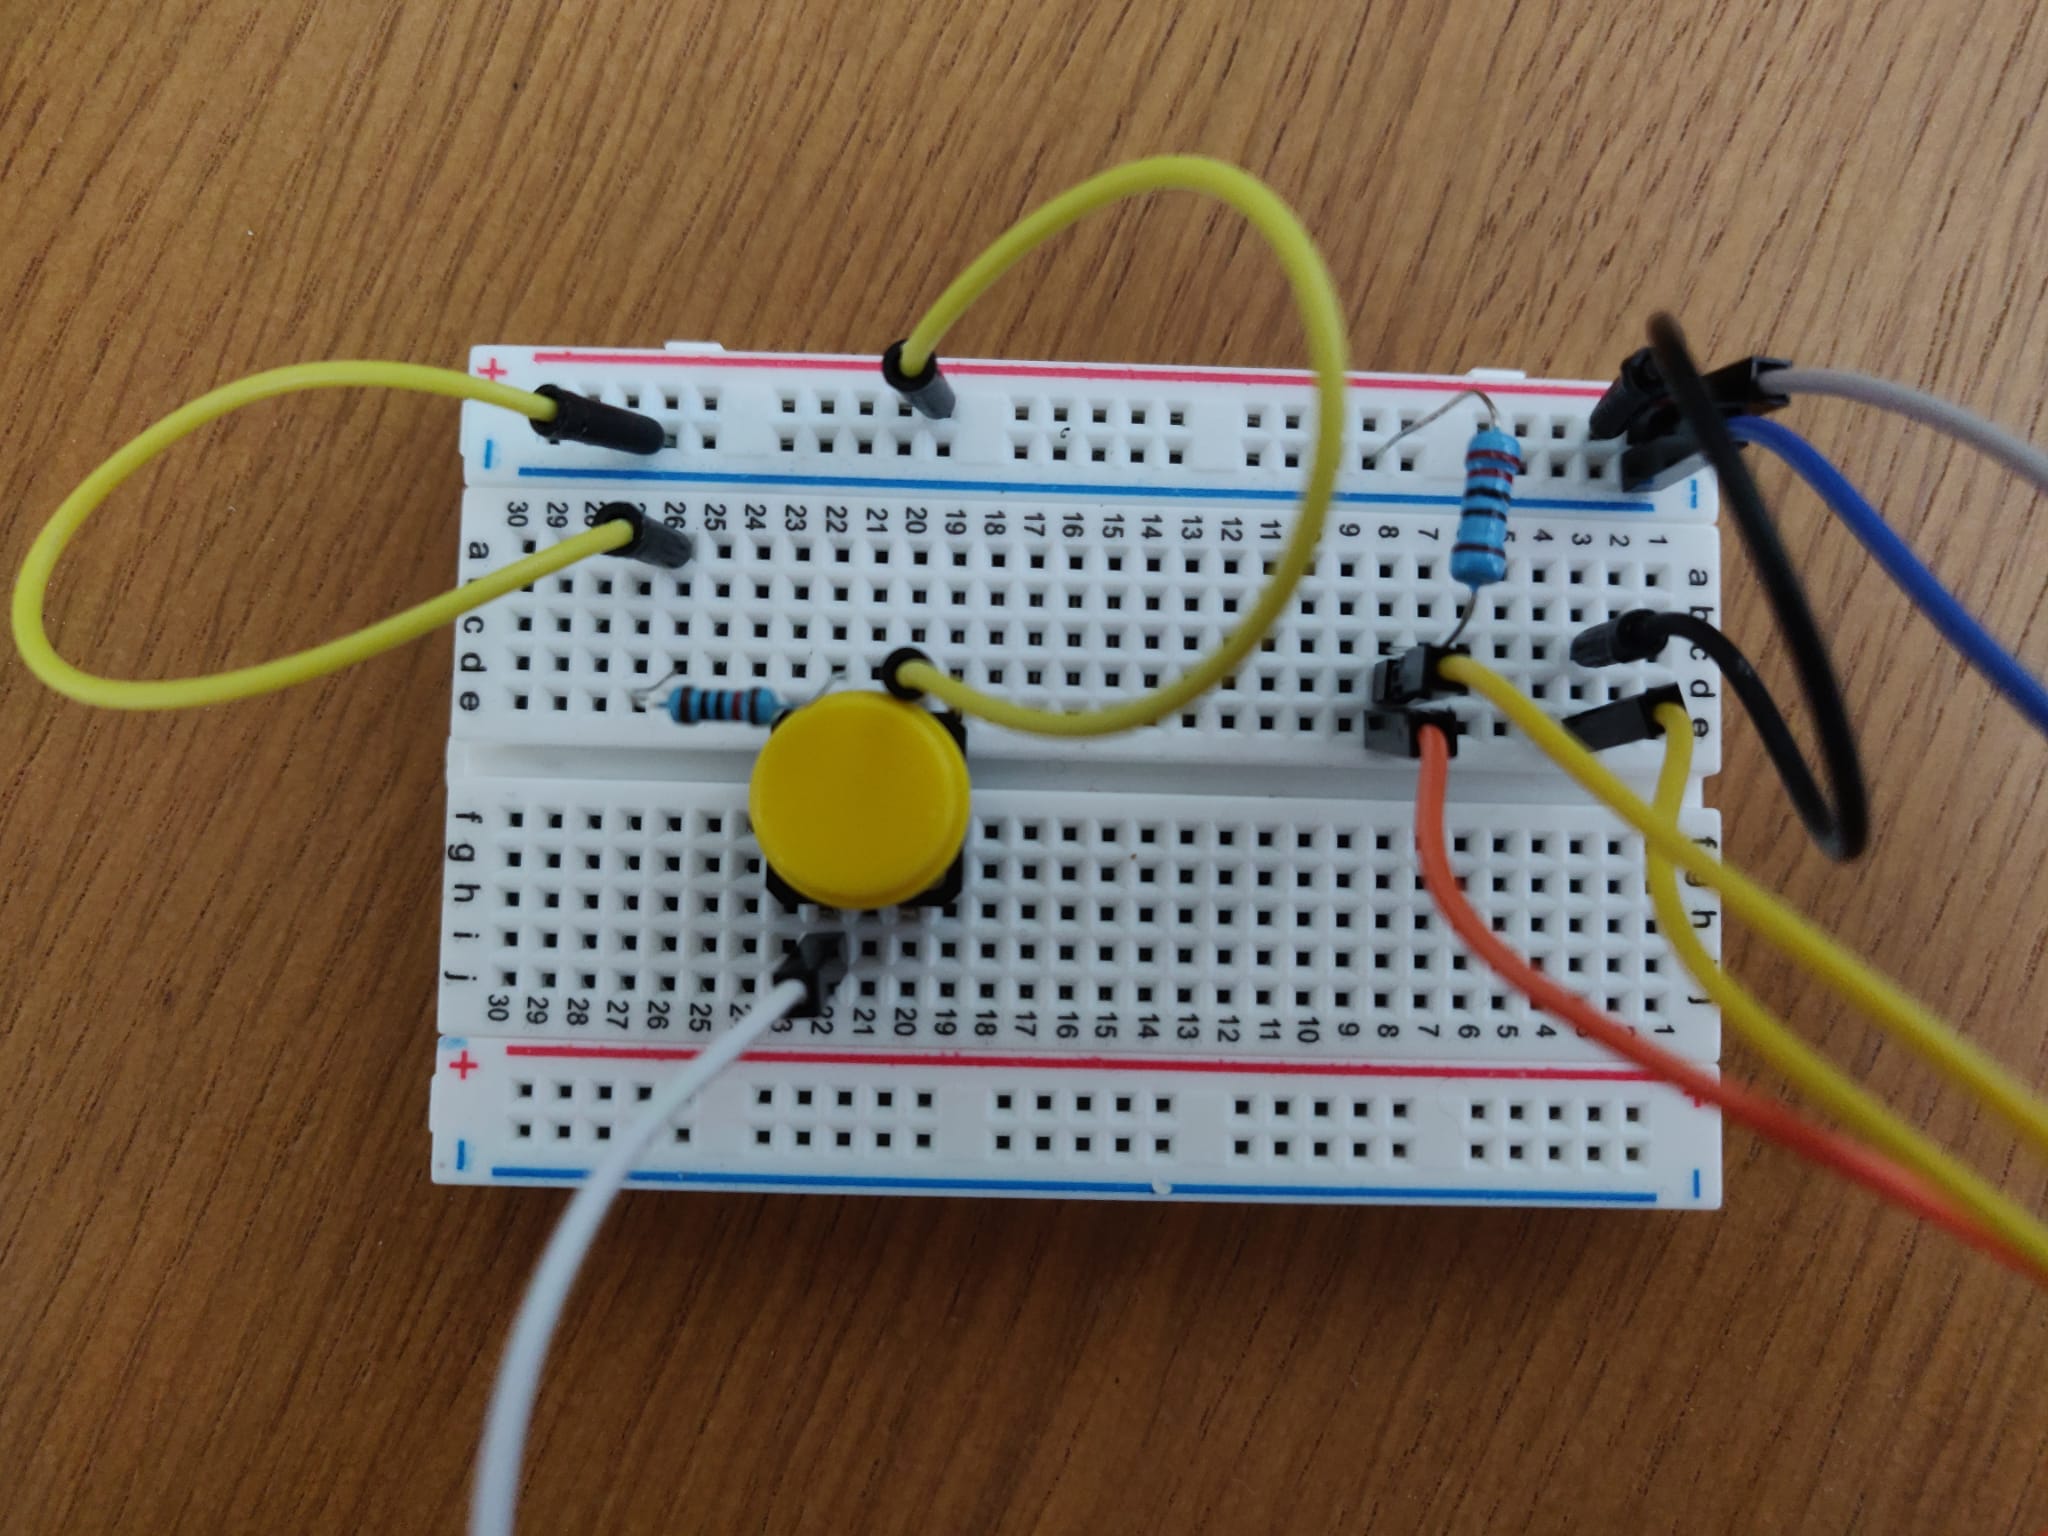
Breadboard. The breadboard includes a photocell circuit for the trigger and a button circuit for user feedback. The components needed for both are:
- 1x Breadboard
- 1x Photoresistor
- 1x 220 Ohm resistor
- 1x 1KOhm resistor
- 5x Jumper cables male to male (8 inch)
- Either 2x Jumper cables female to male (8 inch) for the photoresistor connection or 2x Jumper cables male to male (8 inch) if you can solder the cable with the photoresistor.
Step 1: Headwear, Board and Software Setup
First, connect the headwear to yourself and the Cyton board, and read from it using the GUI. If you are using the Ultracortex, follow this tutorial. If you're using the gold cup electrodes, follow this guide to learn how to connect each electrode, and connect them in the positions you would like to measure EEG from. A good guide to the eight positions commonly used can be found in the Ultracortex tutorial. If you're using an electrode cap, follow this tutorial to connect it.
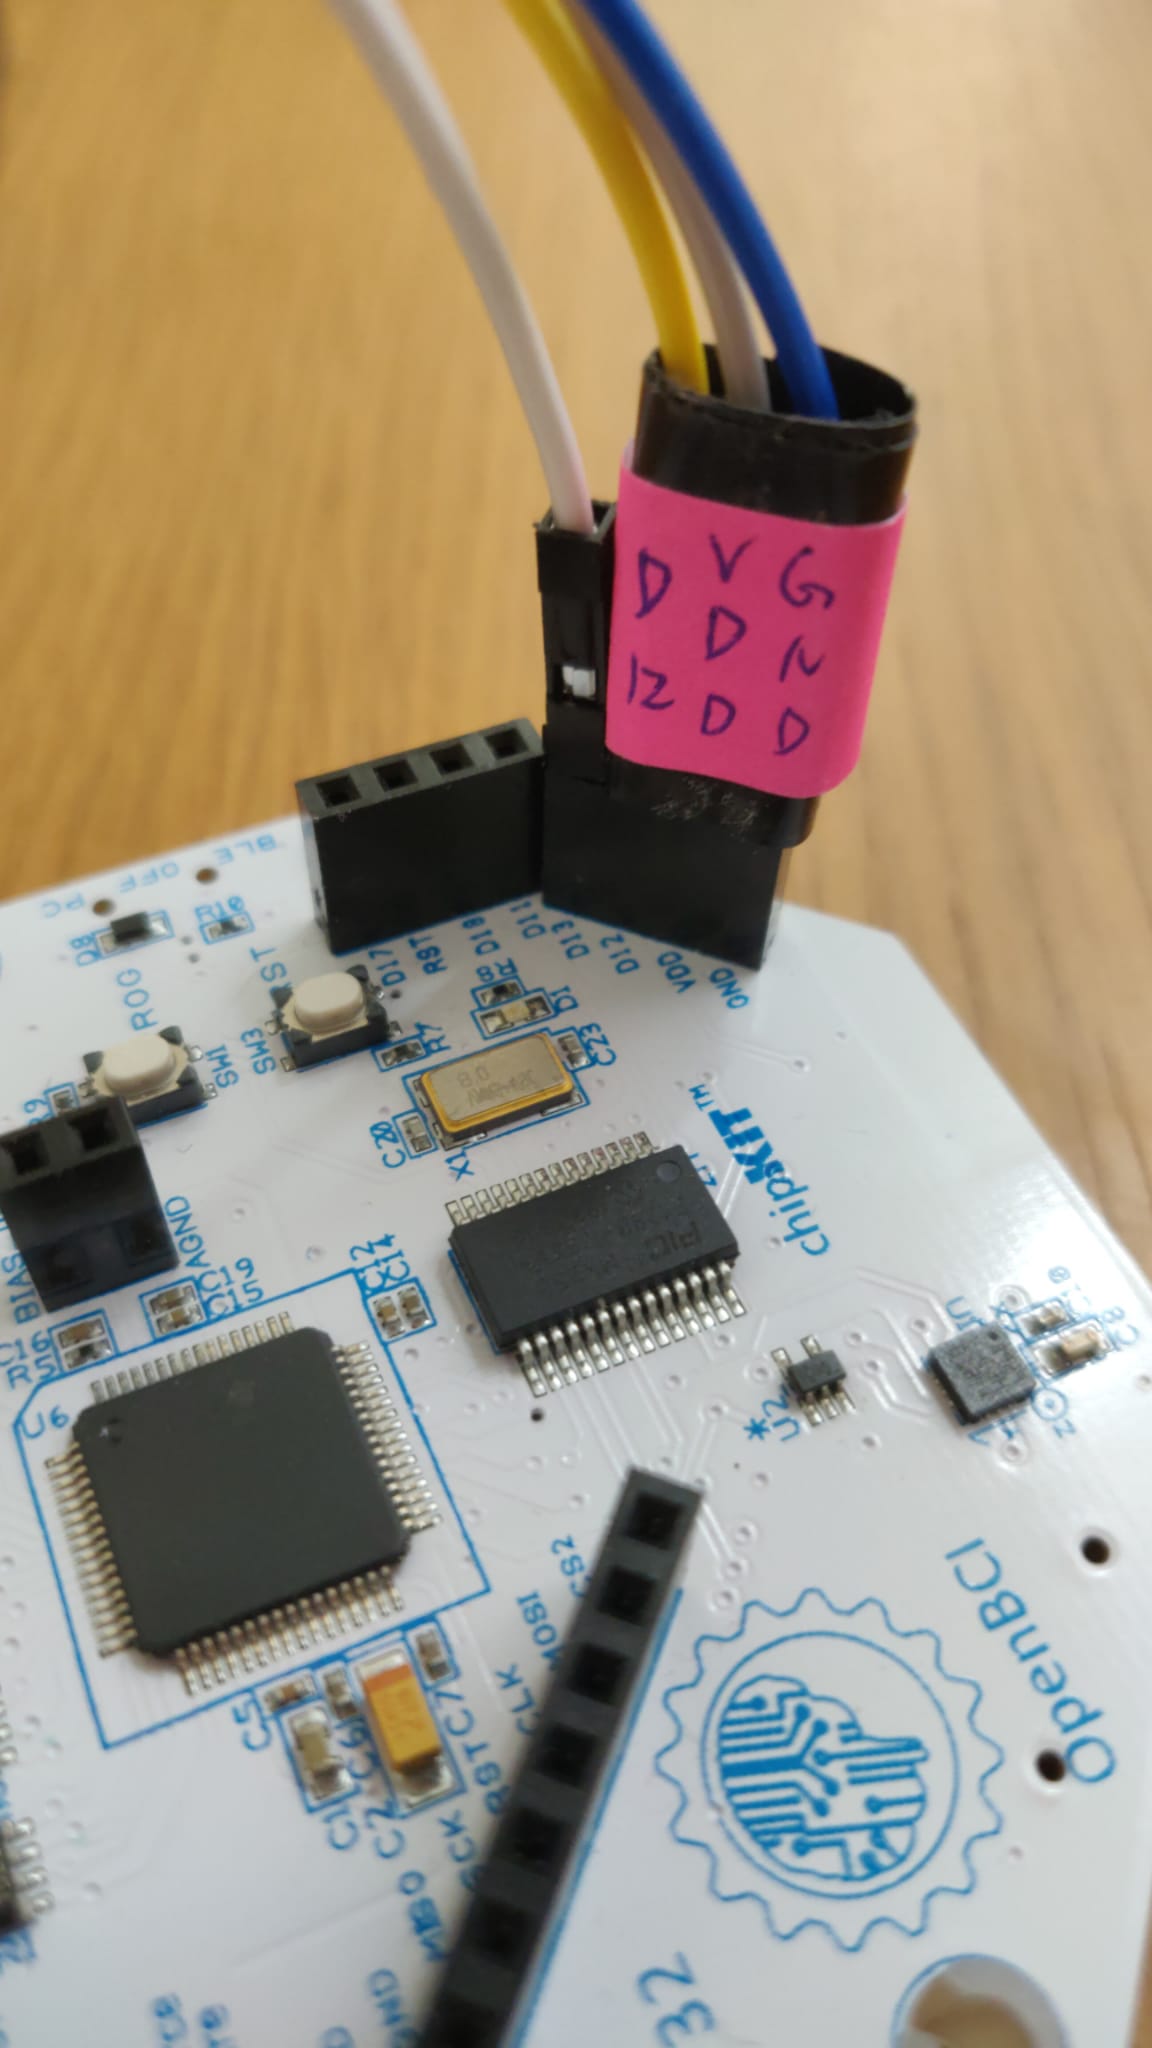
Step 2: Breadboard Setup
The diagram for the circuit with the photocell and the button can be found below.

Using the components listed above, assemble the breadboard. You can find an example of how to assemble a button circuit using Arduino here and an example of how to assemble a photocell circuit here. The final breadboard should look similar to the pictures below.

Next, connect the breadboard to the Cyton board as shown below. Place the breadboard beside your computer so that the photocell points to the lower-left corner of your screen, which is where the video trigger will be located.
Step 4: Run Experiment
Download this video. Once you're ready to start, press Start Data Stream in the GUI. Then, open the video and make it full-screen. Every time a puppy appears in the video, press the button. The video is around 3 minutes long. You're now ready to press play!
Step 5: Retrieve Data
Once you've finished watching the video, press Stop Data Stream. In your /Documents/OpenBCI_GUI/Recordings folder, you should find the recorded data for that session.
Step 6: Process Data
In this Python notebook, you'll find sample code to read, plot, and analyze the recorded data.
Step 7: Create your Own Experiment
Once you understand how to conduct an experiment, you can modify this Python script to make your own video. The current code reads the images stored in the Images folder, shuffles them, and creates a video with 4 different sessions. Each session displays the images at a different rate. Each image has an embedded trigger and is separated from the others by a fixation cross.
The video pattern was created in accordance to the diagram below obtained from the research paper Toward Emotion Aware Computing: An Integrated Approach Using Multichannel Neurophysiological Recordings and Affective Visual Stimuli by C. A. Frantzidis, C. Bratsas, C. L. Papadelis, E. Konstantinidis, C. Pappas and P. D. Bamidis, published in IEEE Transactions on Information Technology in Biomedicine, vol. 14, no. 3, pp. 589-597, May 2010.