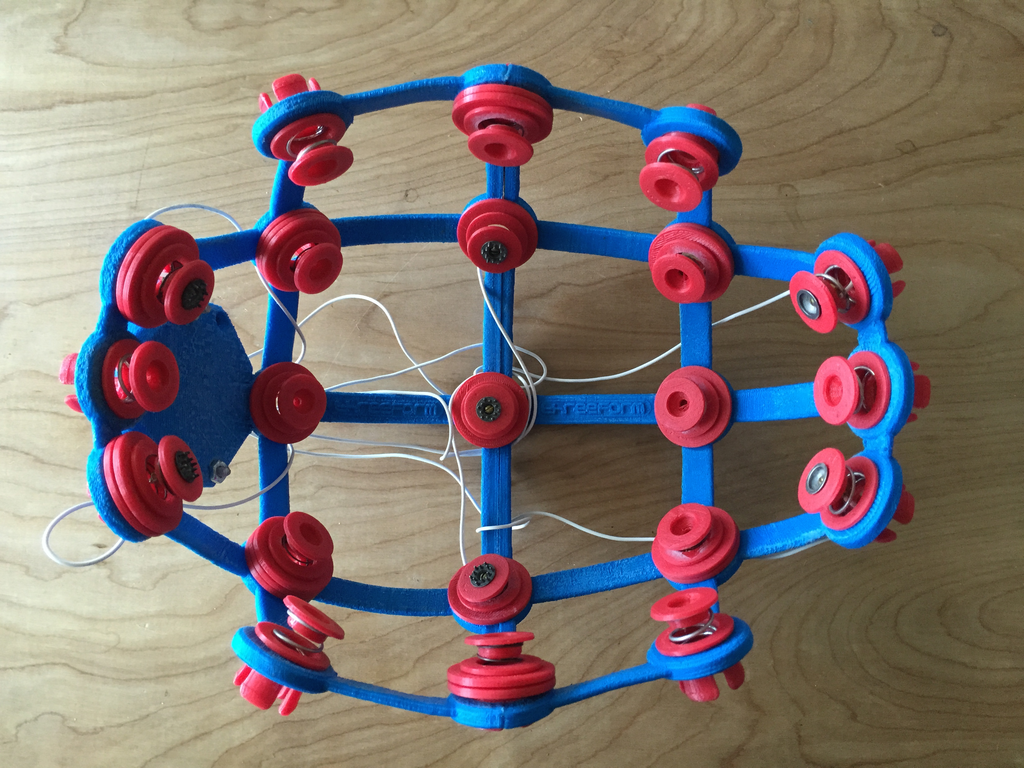
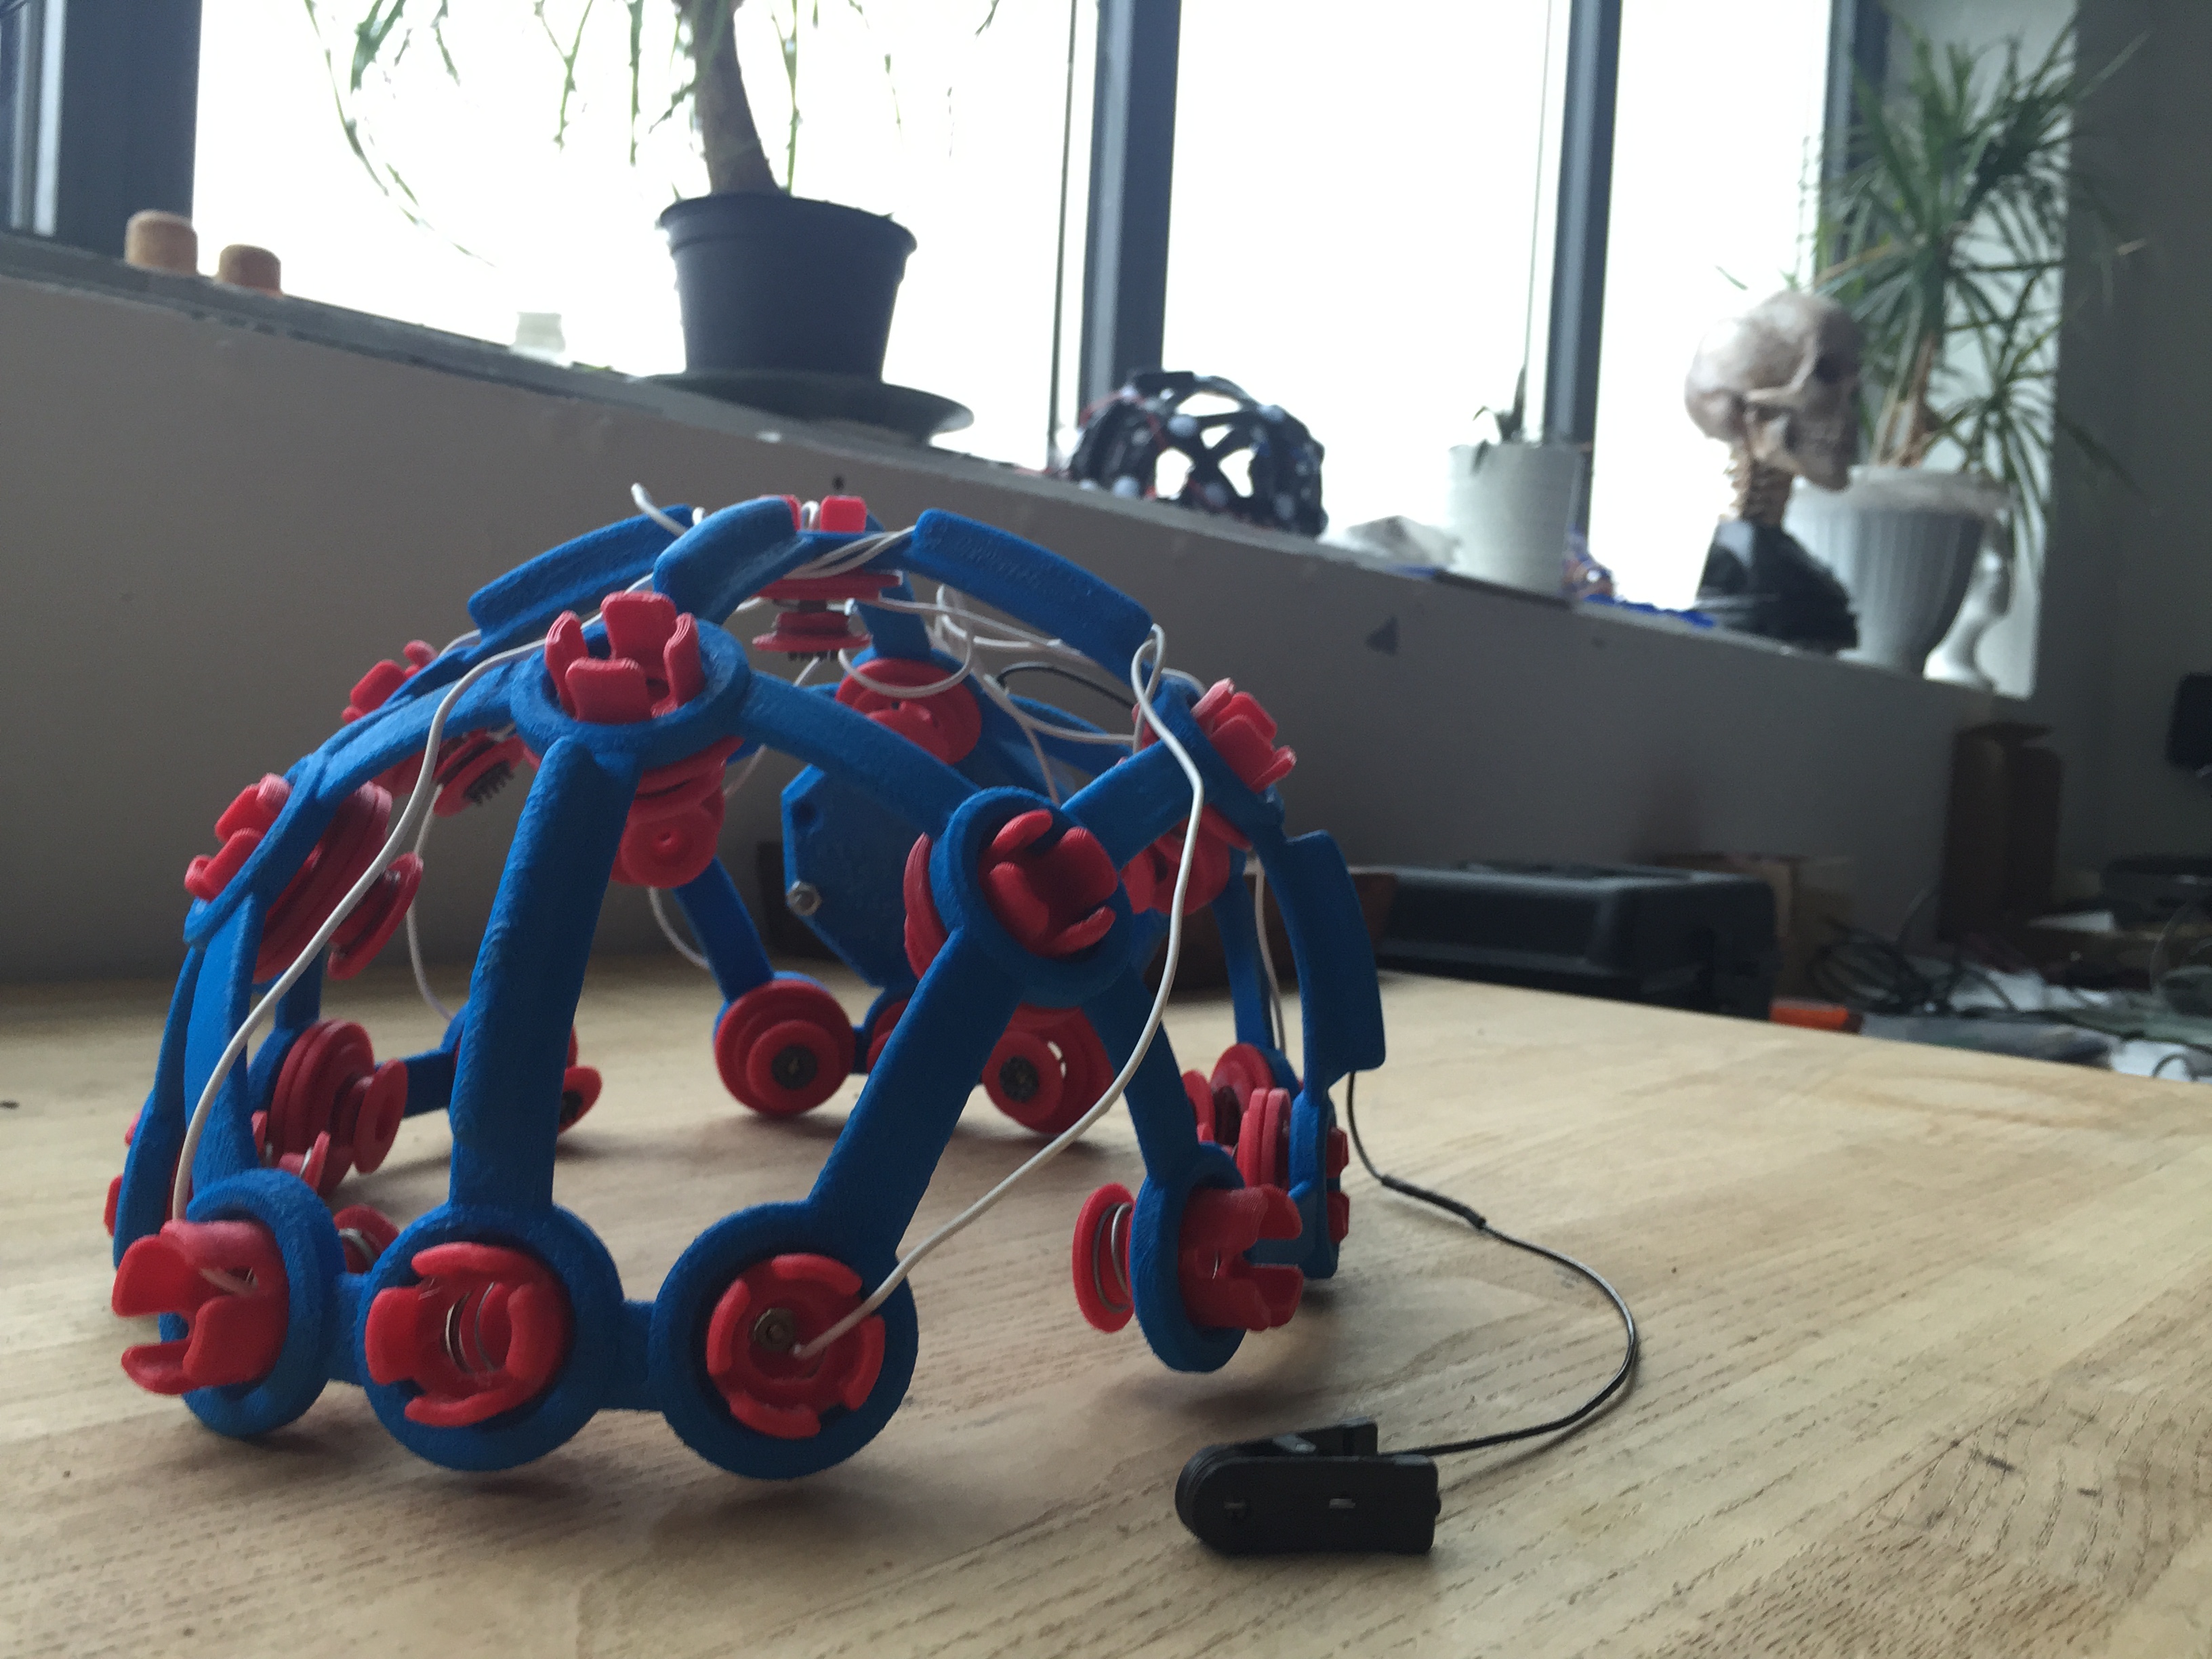
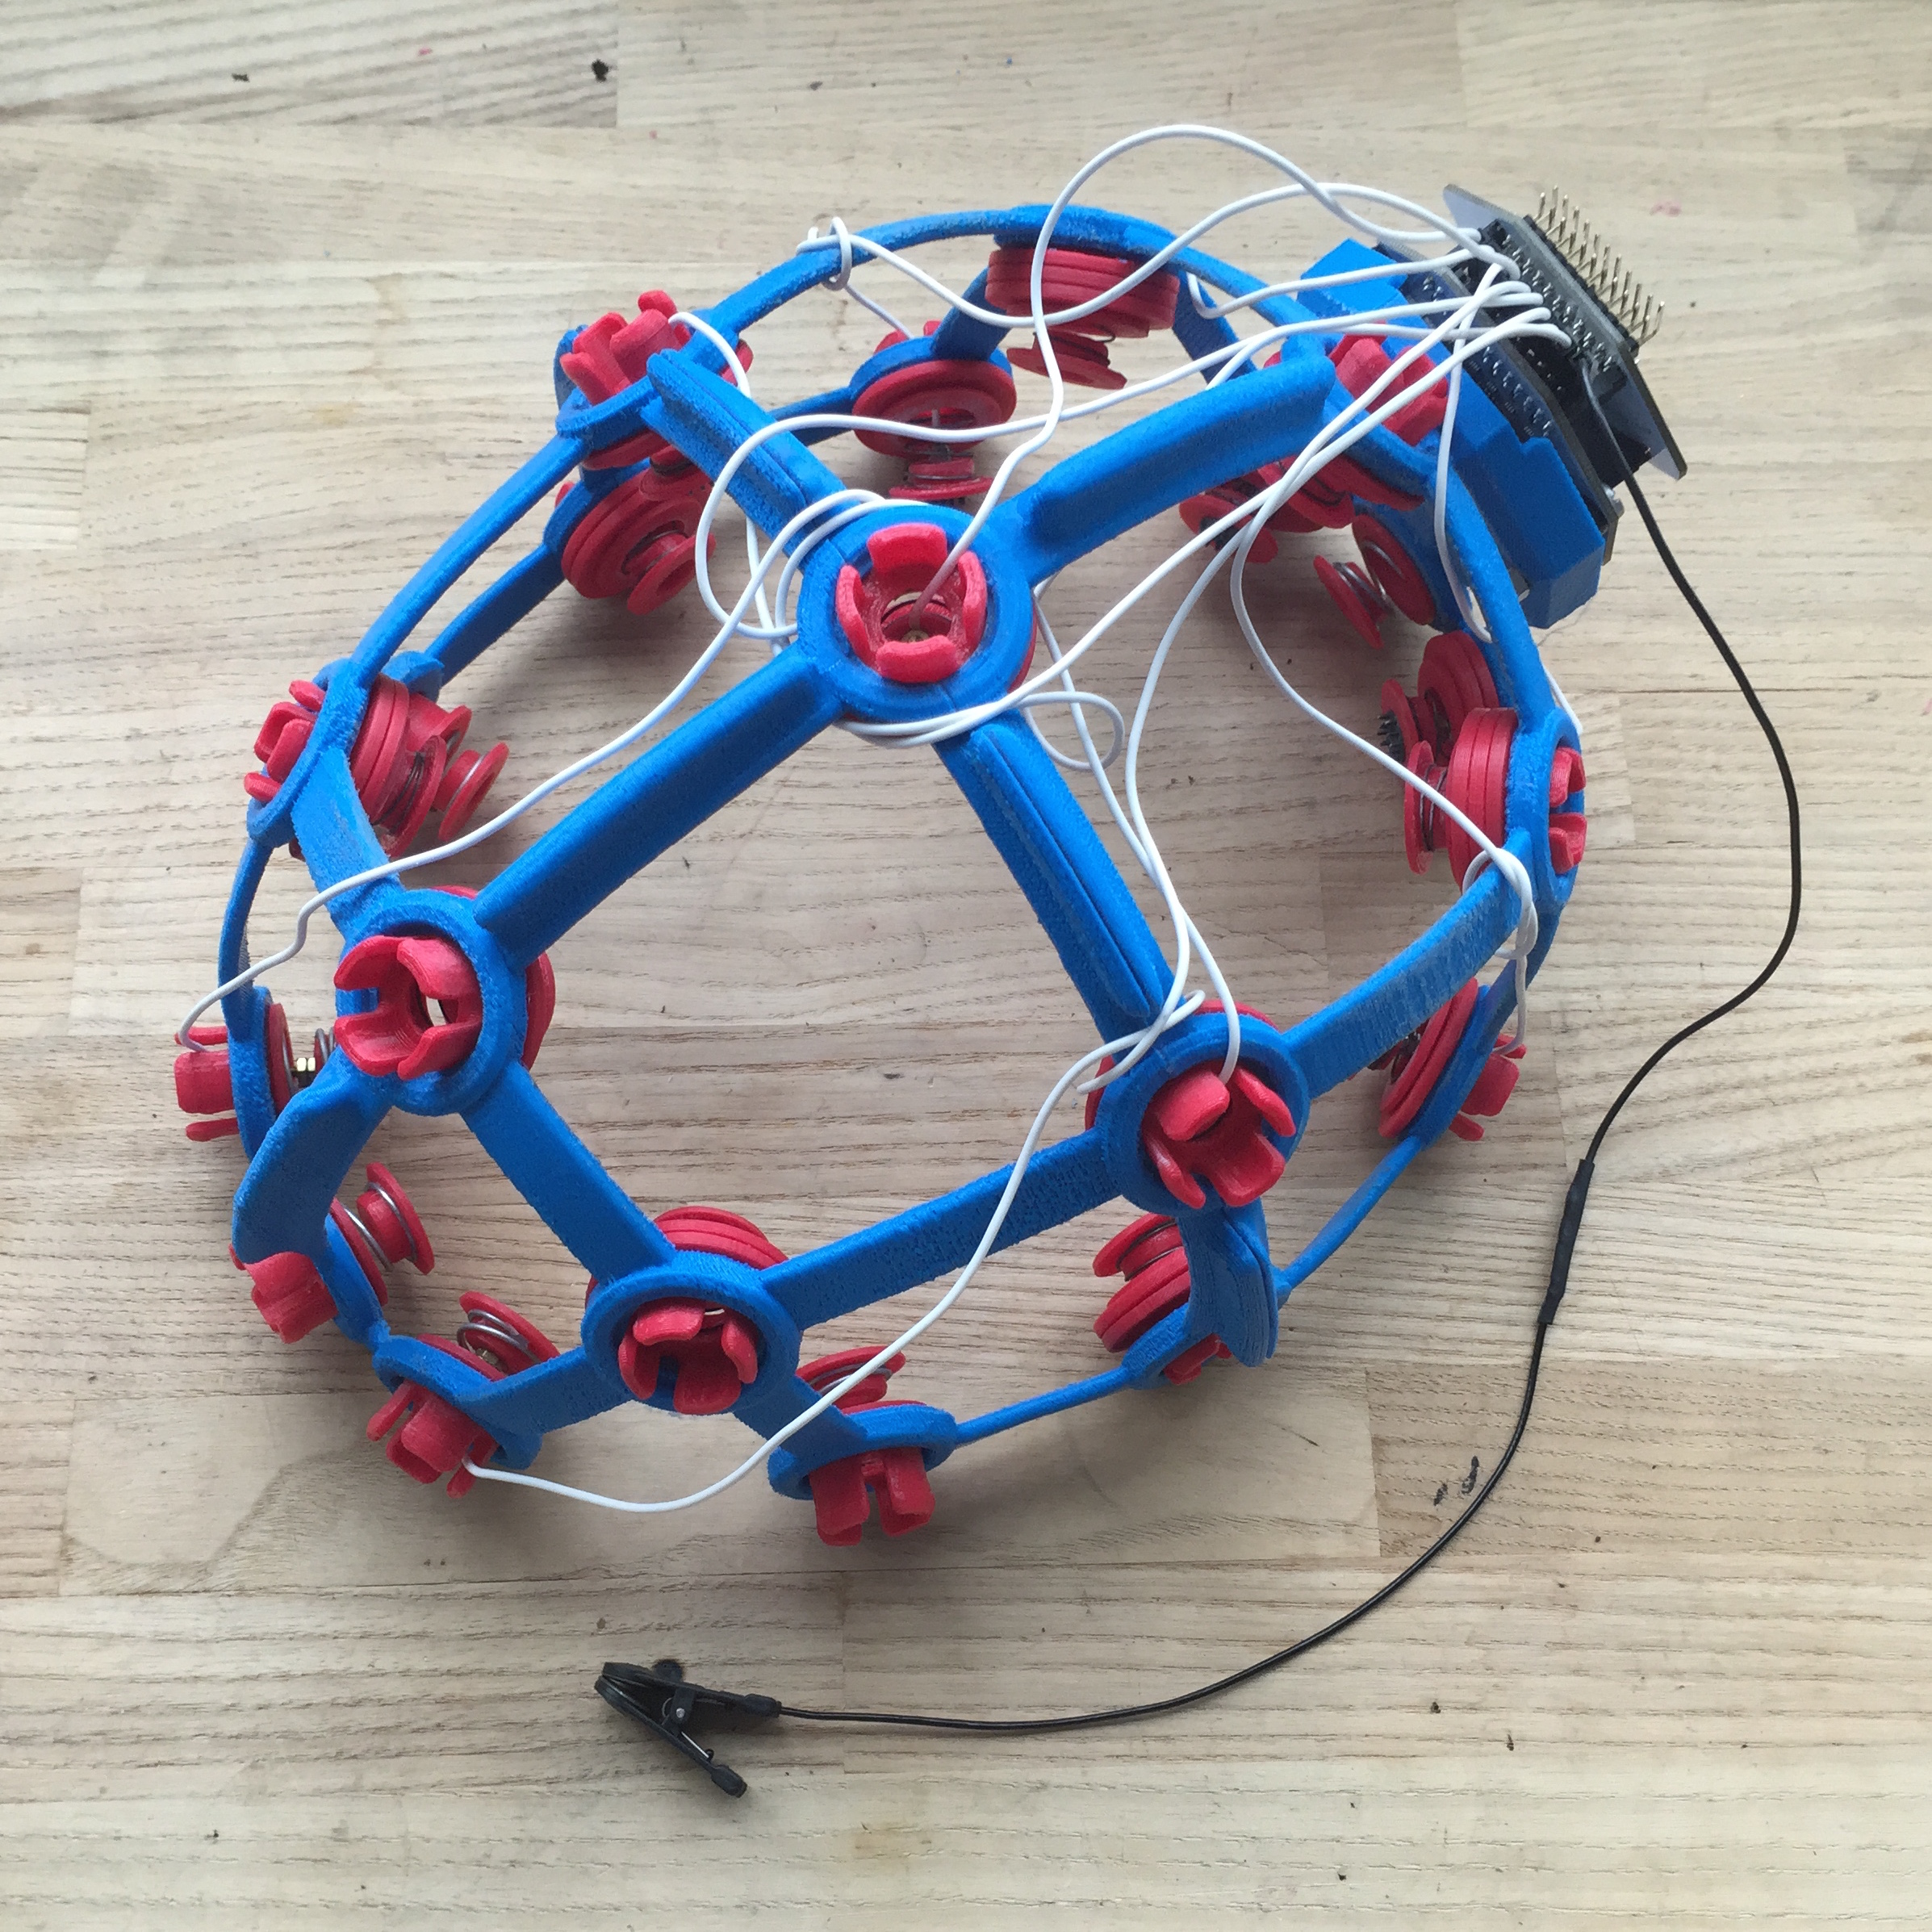
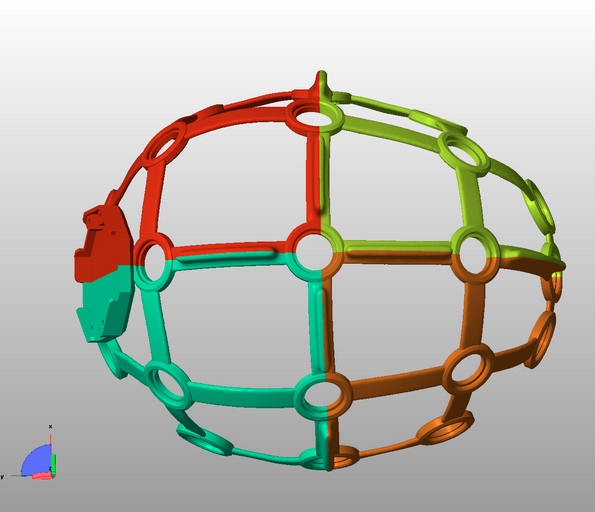
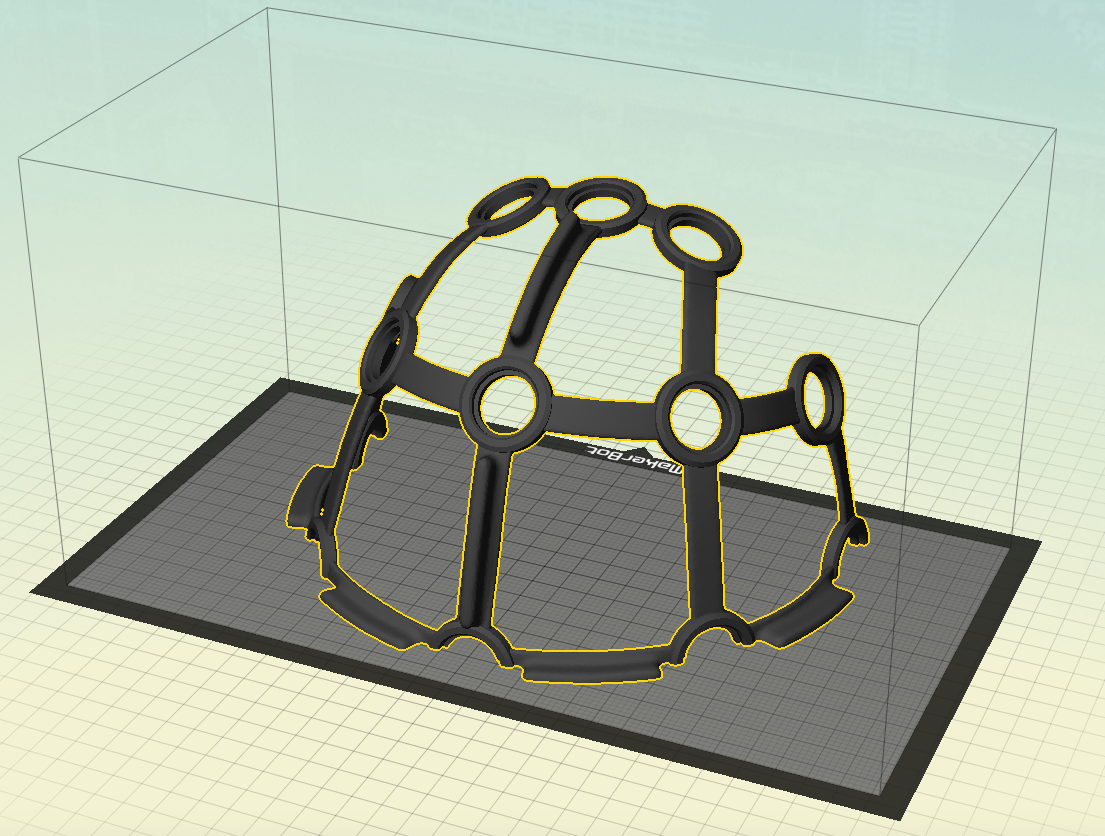
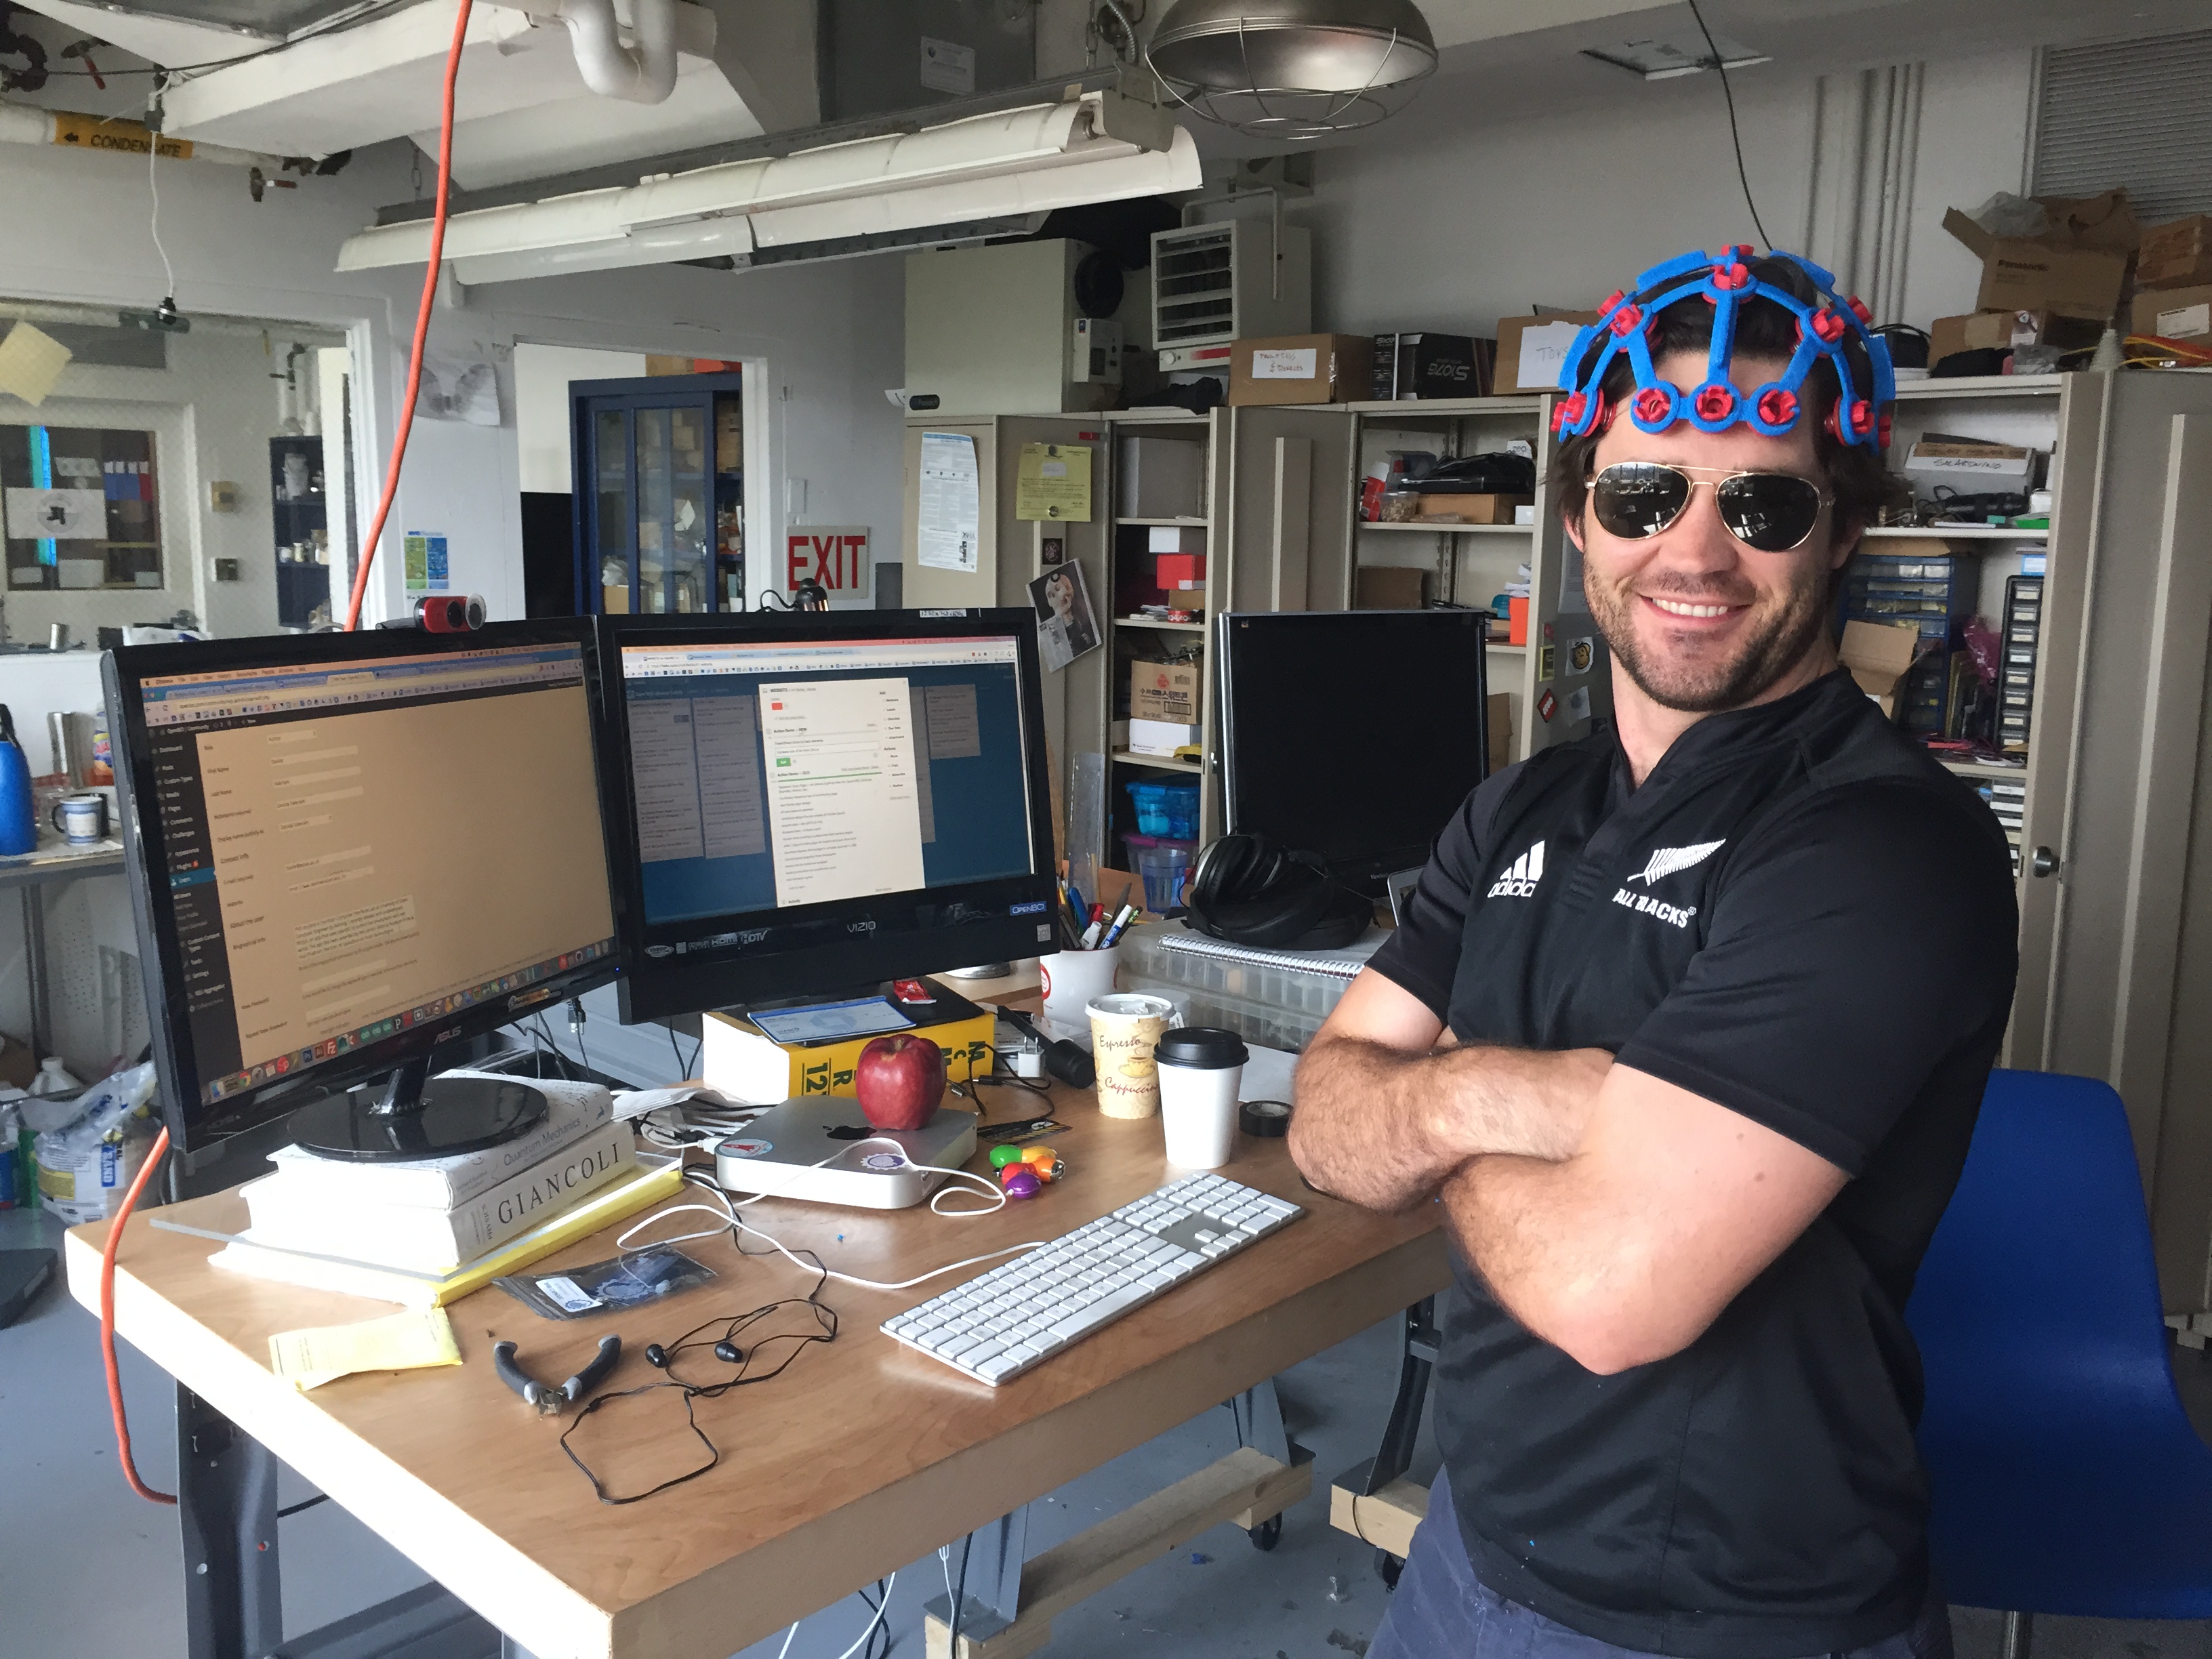
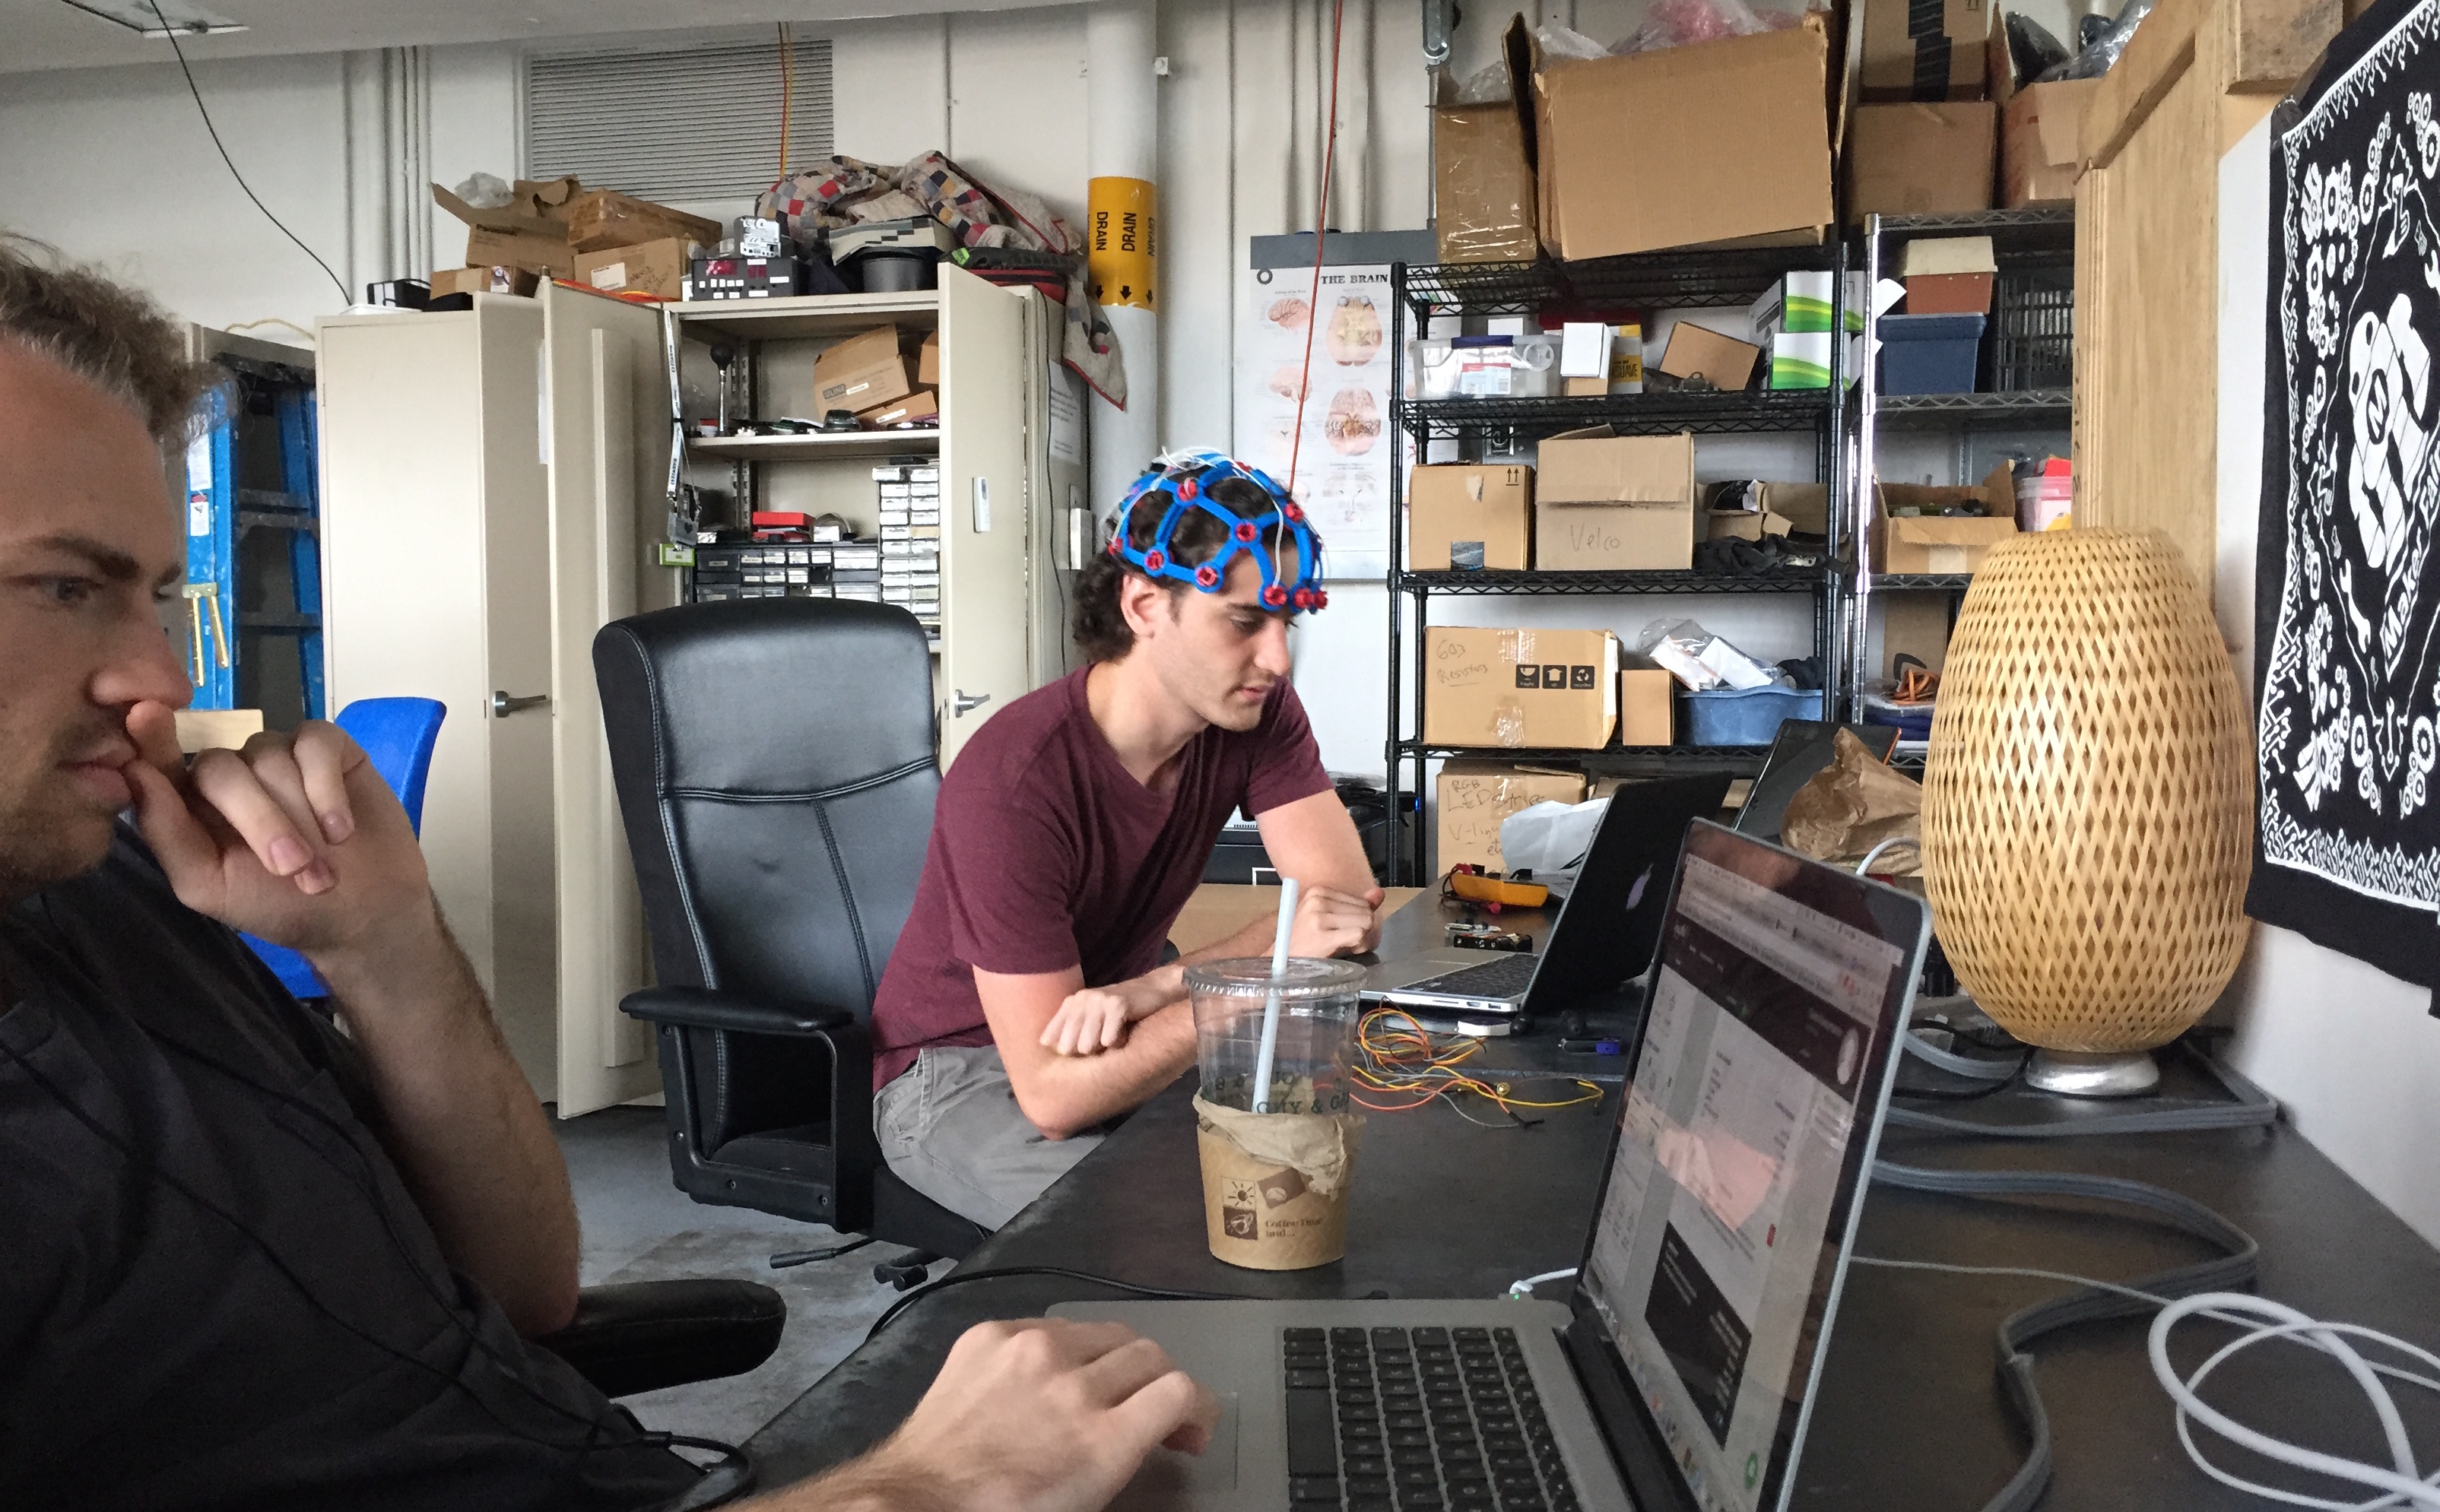
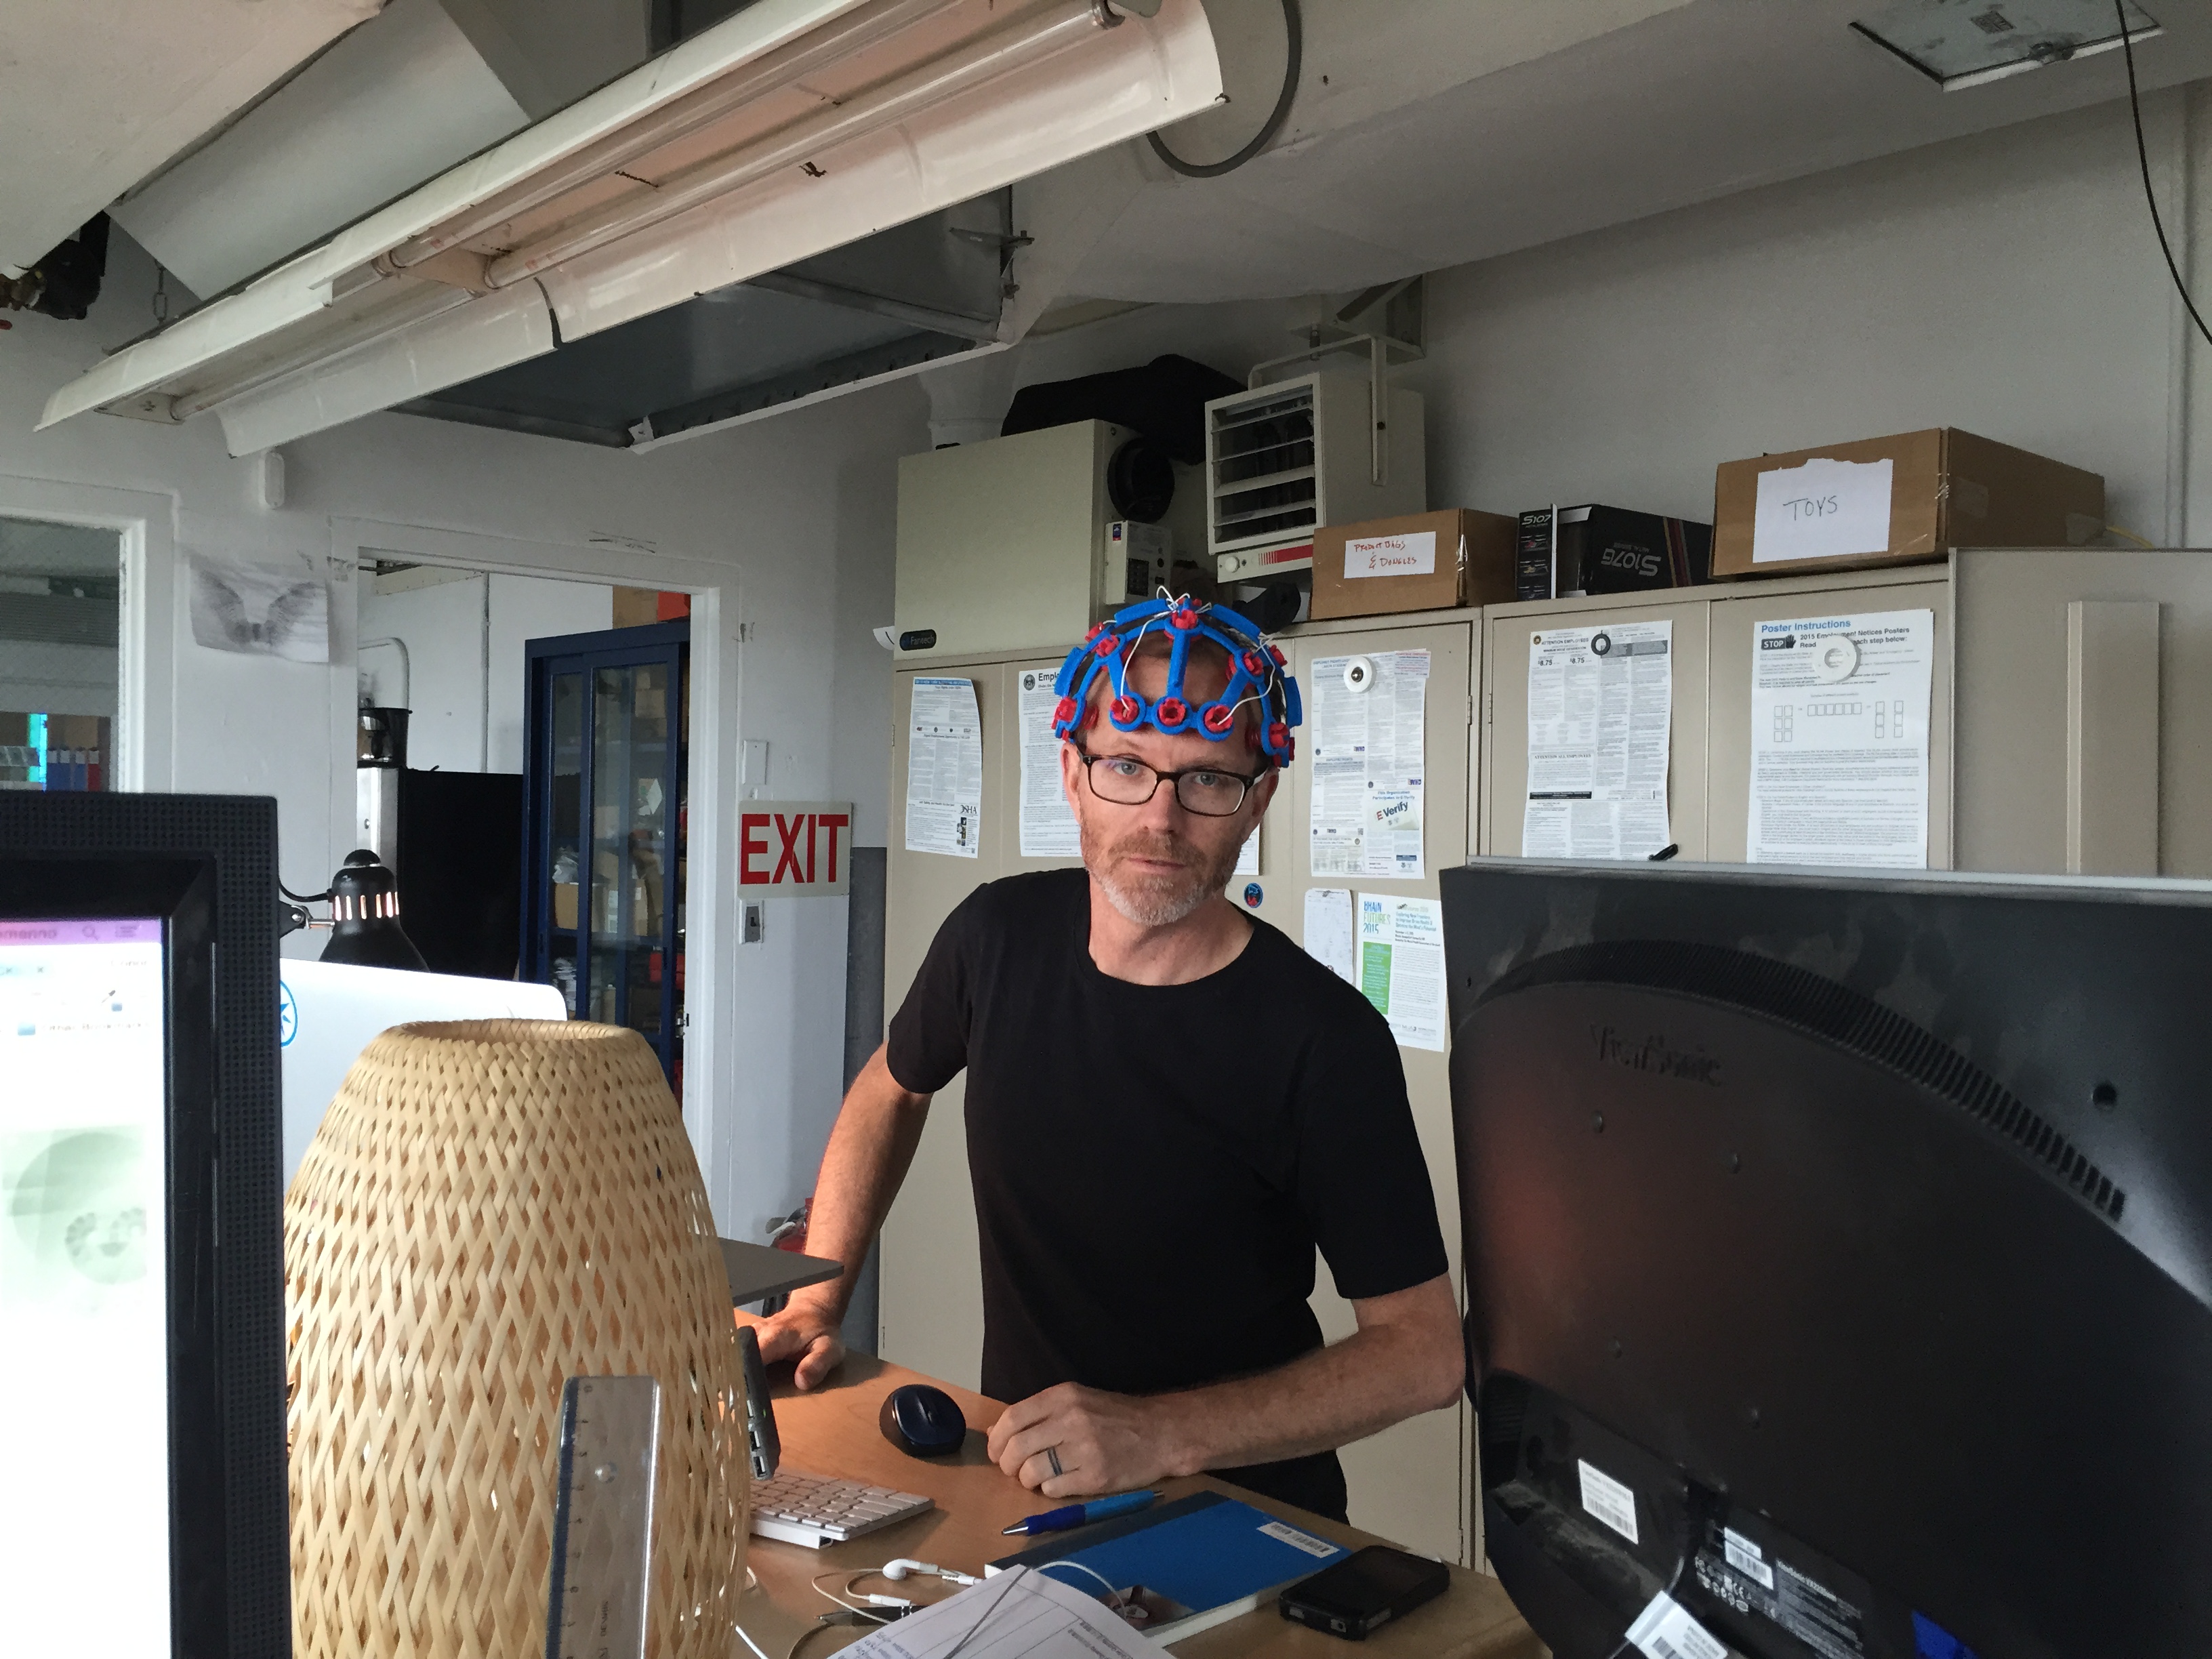
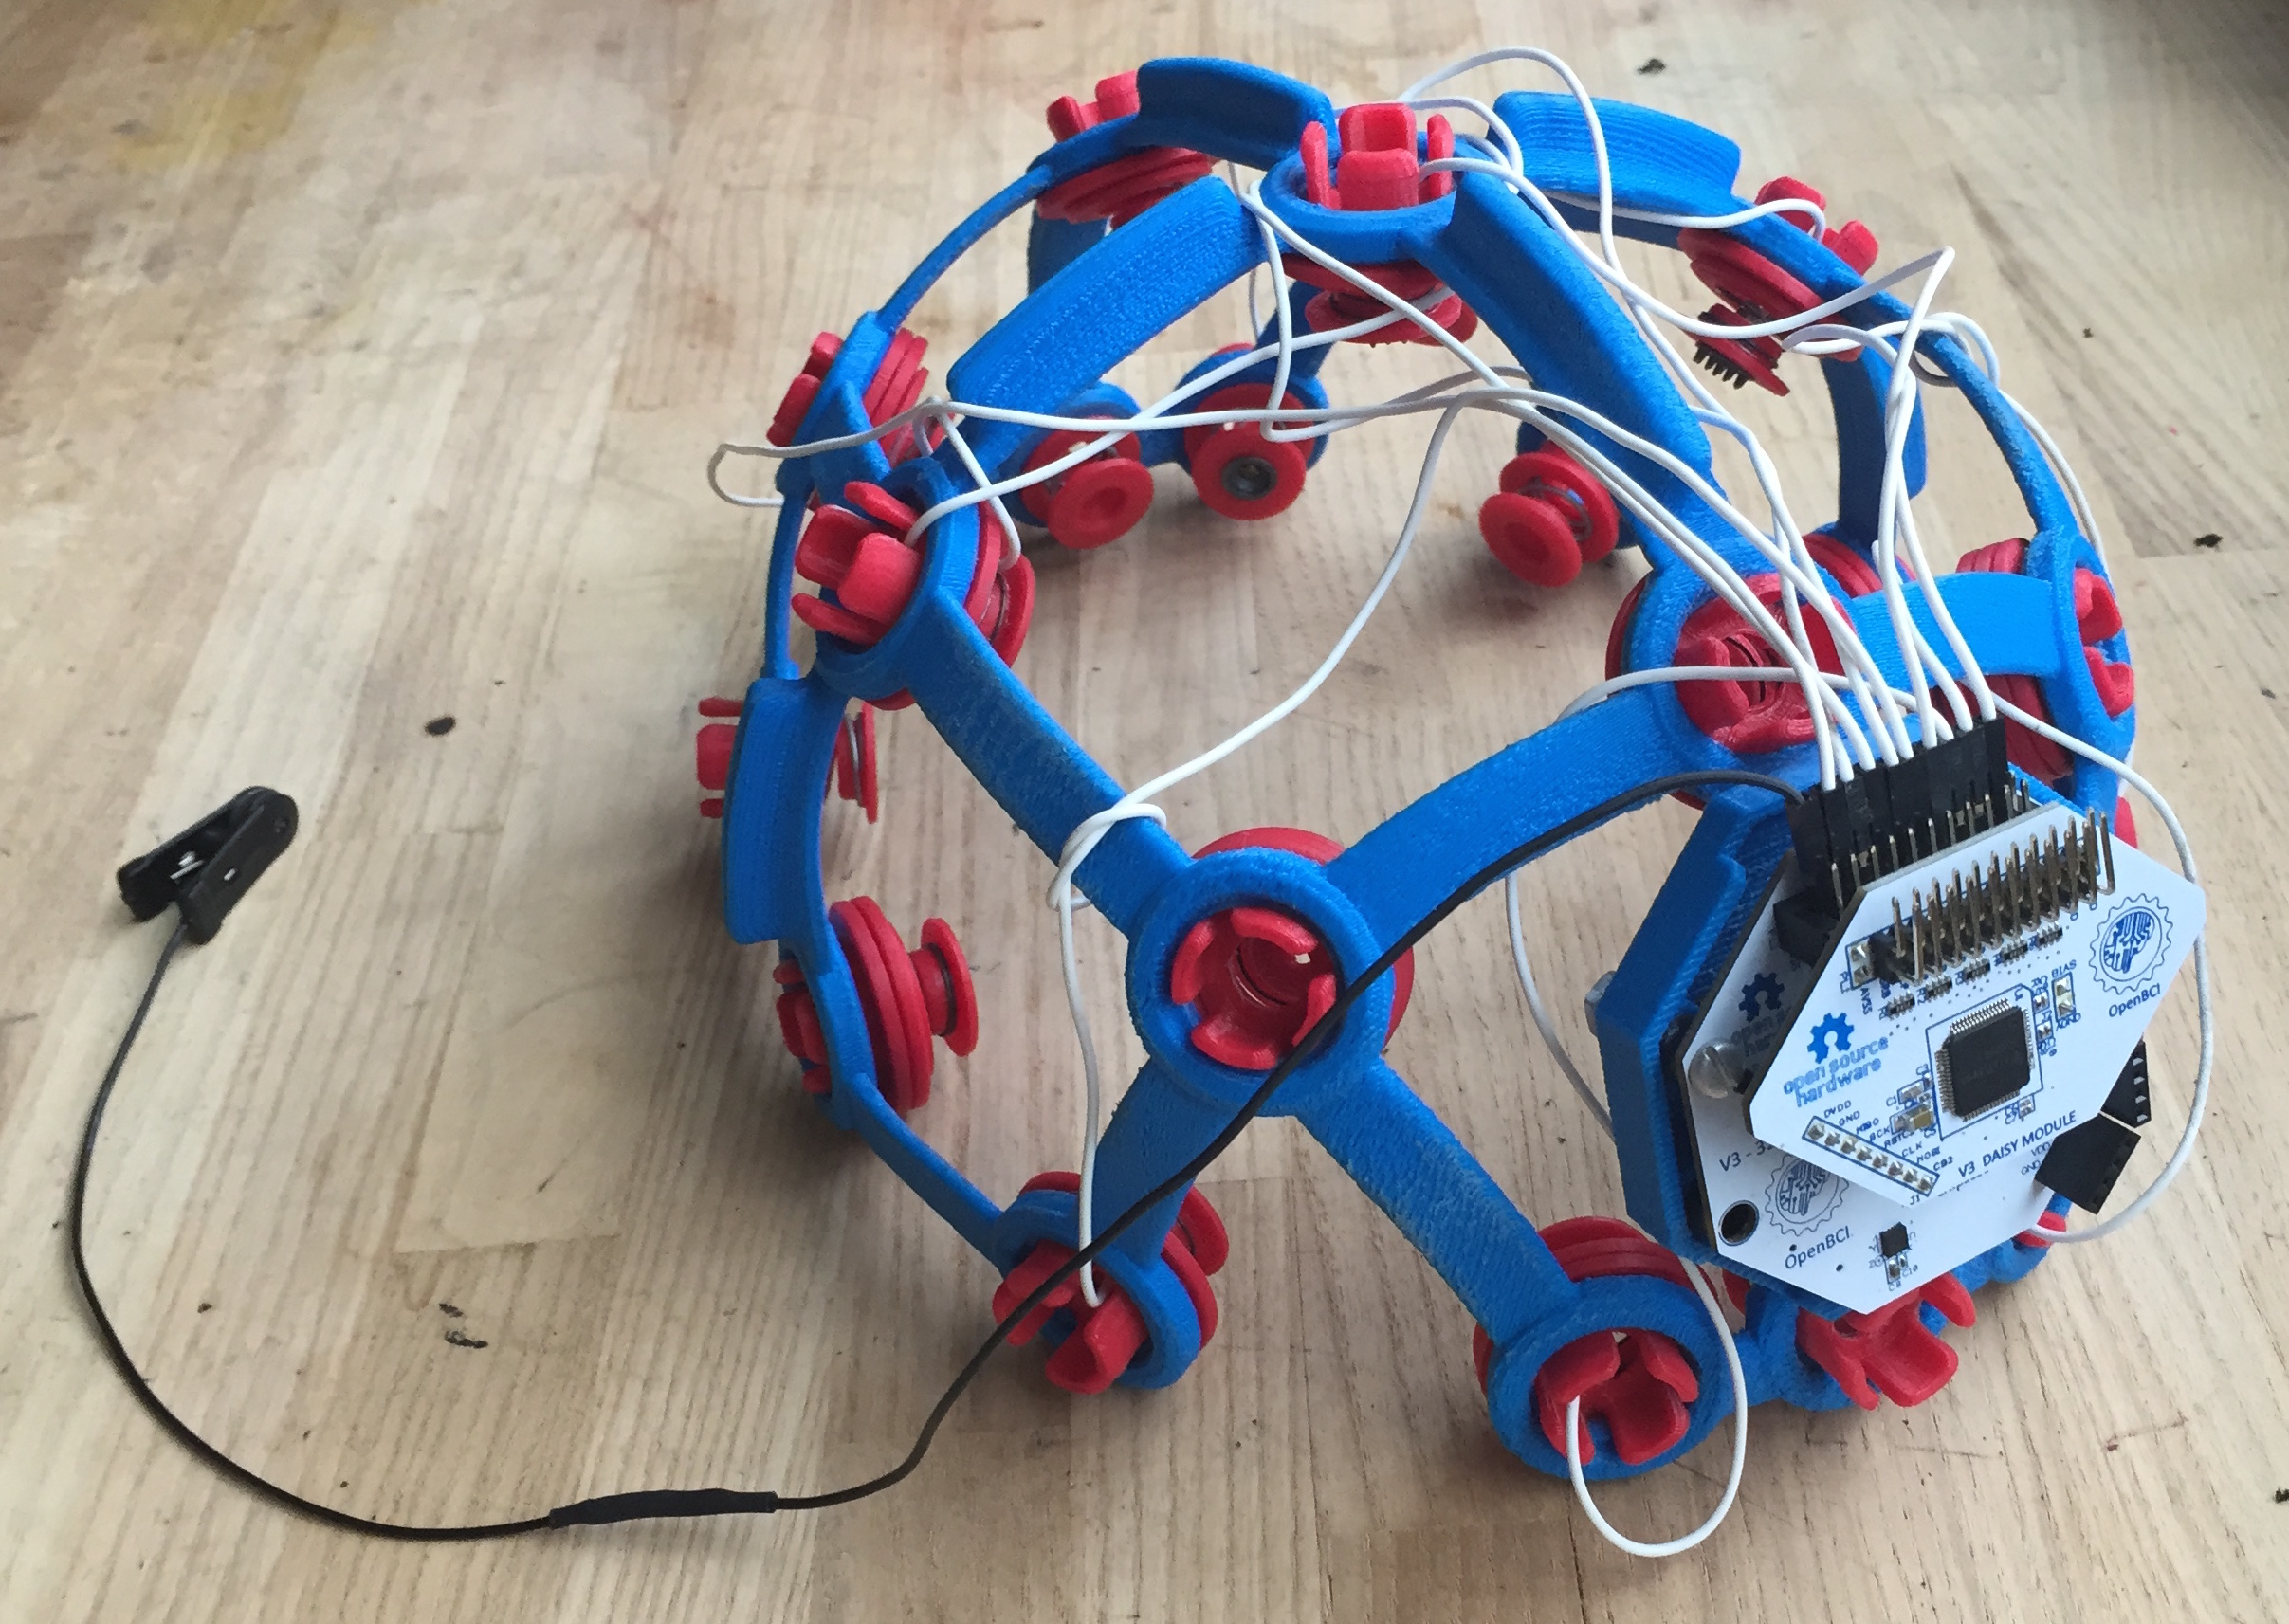
Ultracortex Mark 2
Print Settings (verified)
- Printer used: Makerbot Rep 2
- Material: PLA
For M2-Frame Components
- Resolution: Low (Faster)
- Raft: Yes
- Supports: Yes (even though this uses A LOT of extra material)
- Infill: 100% (we want it sturdy)
- Number of shells: 3
- Layer Height: 0.3mm
- Temperature: 235 C
- Speed while Extruding: 45 mm/s (you may be able to increase this depending on how well tuned your 3D printer is)
- Speed while traveling: 150 mm/s
For M2-Electrode-Mount Components
- Resolution: Low (Faster)
- Raft: No
- Supports: No
- Infill: 100% (we want it sturdy)
- Number of shells: 3
- Layer Height: 0.3mm
- Temperature: 235 C
- Speed while Extruding: 45 mm/s (you may be able to increase this depending on how well tuned your 3D printer is)
- Speed while traveling: 150 mm/s
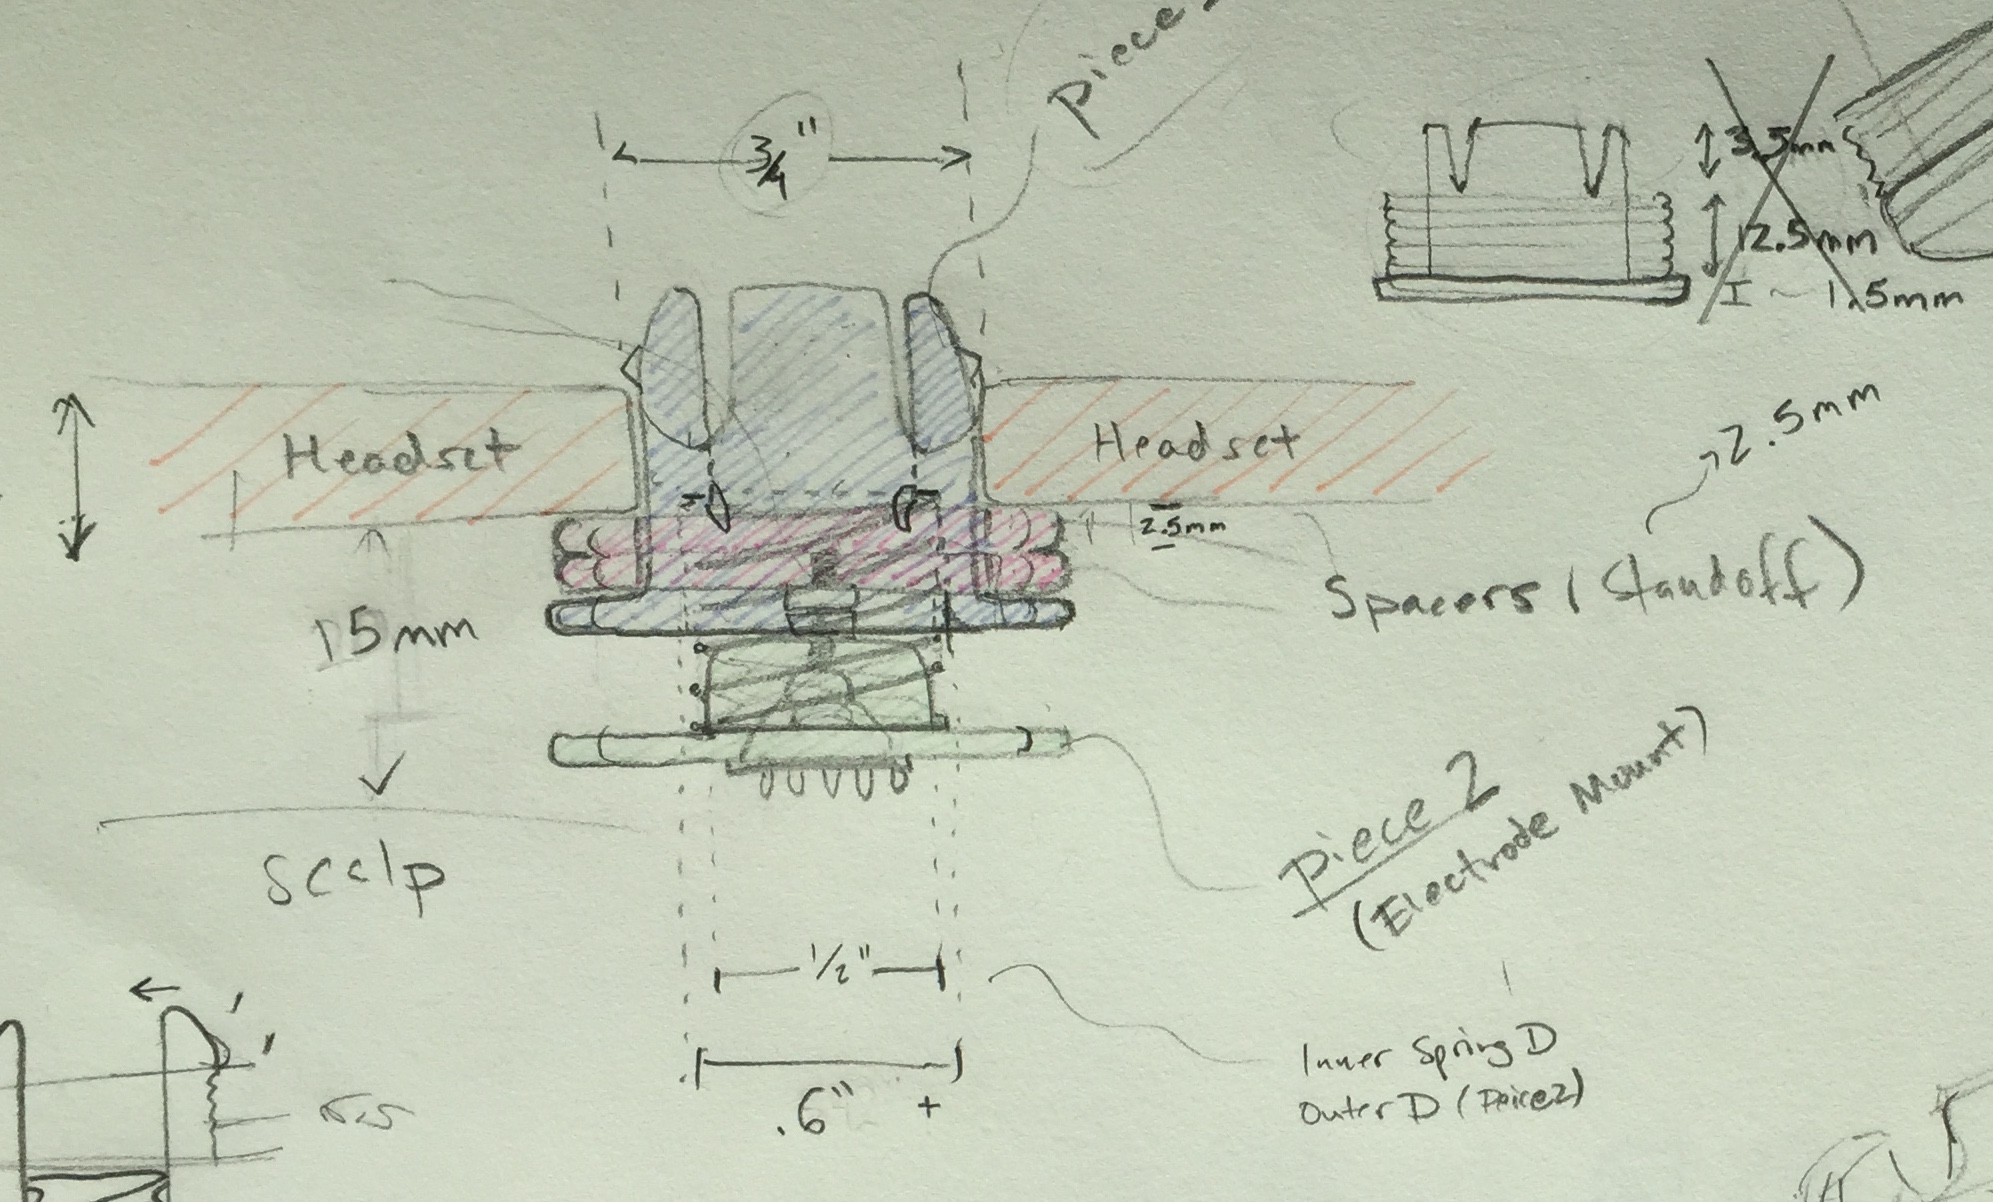
Spring Options
We are in the process of testing different springs to be nested
Spring 1 (tested)
McMaster-Carr > 1 9657K279 Steel Compression Spring, Zinc-Plated Music Wire, .500" L, .600" OD, .045" Wire, Packs of 12
Summary: The ~23 lb/in is too strong!
Spring 2 (tested)
centuryspring.com: Custom spring order of Part # B6-8
Summary: custom order... ~1 lb/in is too weak...
Spring 3 & 4 (untested, but potentially better)
Our working version of the headset uses Springs 1 & 2, but I would recommend trying the following instead:
Electrodes
Dry (spikey) electrodes to be installed in Ultracortex nodes with hair:
Dry (non-spikey) electrodes to be installed in Ultracortex nodes without hair (forehead, for instance):
Ear Clip electrode (for reference)
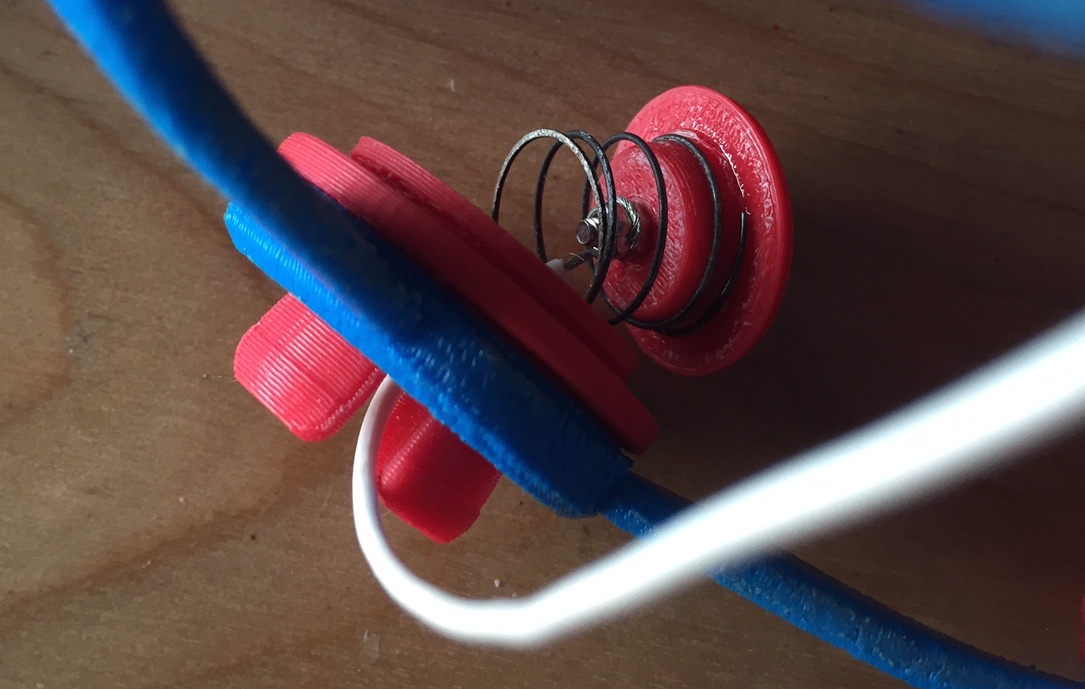
Nuts & Bolts for Connecting Electrodes
We use small stainless steel screws and hex nuts to fasten the FRI electrodes (listed above) to the 3D-printed electrode mount components & wiring that connects the electrodes back to the OpenBCI board. We used stripped Gold Cup Electrodes electrodes as the cabling, by removing the gold cup with a wire cutter and looping the exposed wire around the screw between the two tightened hex nuts (as seen in the picture below).
- Stainless Steel Pan Head Phillips Machine Screw, 2-56 Thread, 3/8" Length ($5.70 per pack of 50)
- Stainless Steel Hex Nut, 2-56 Thread Size, 3/16" Wide, 1/16" High
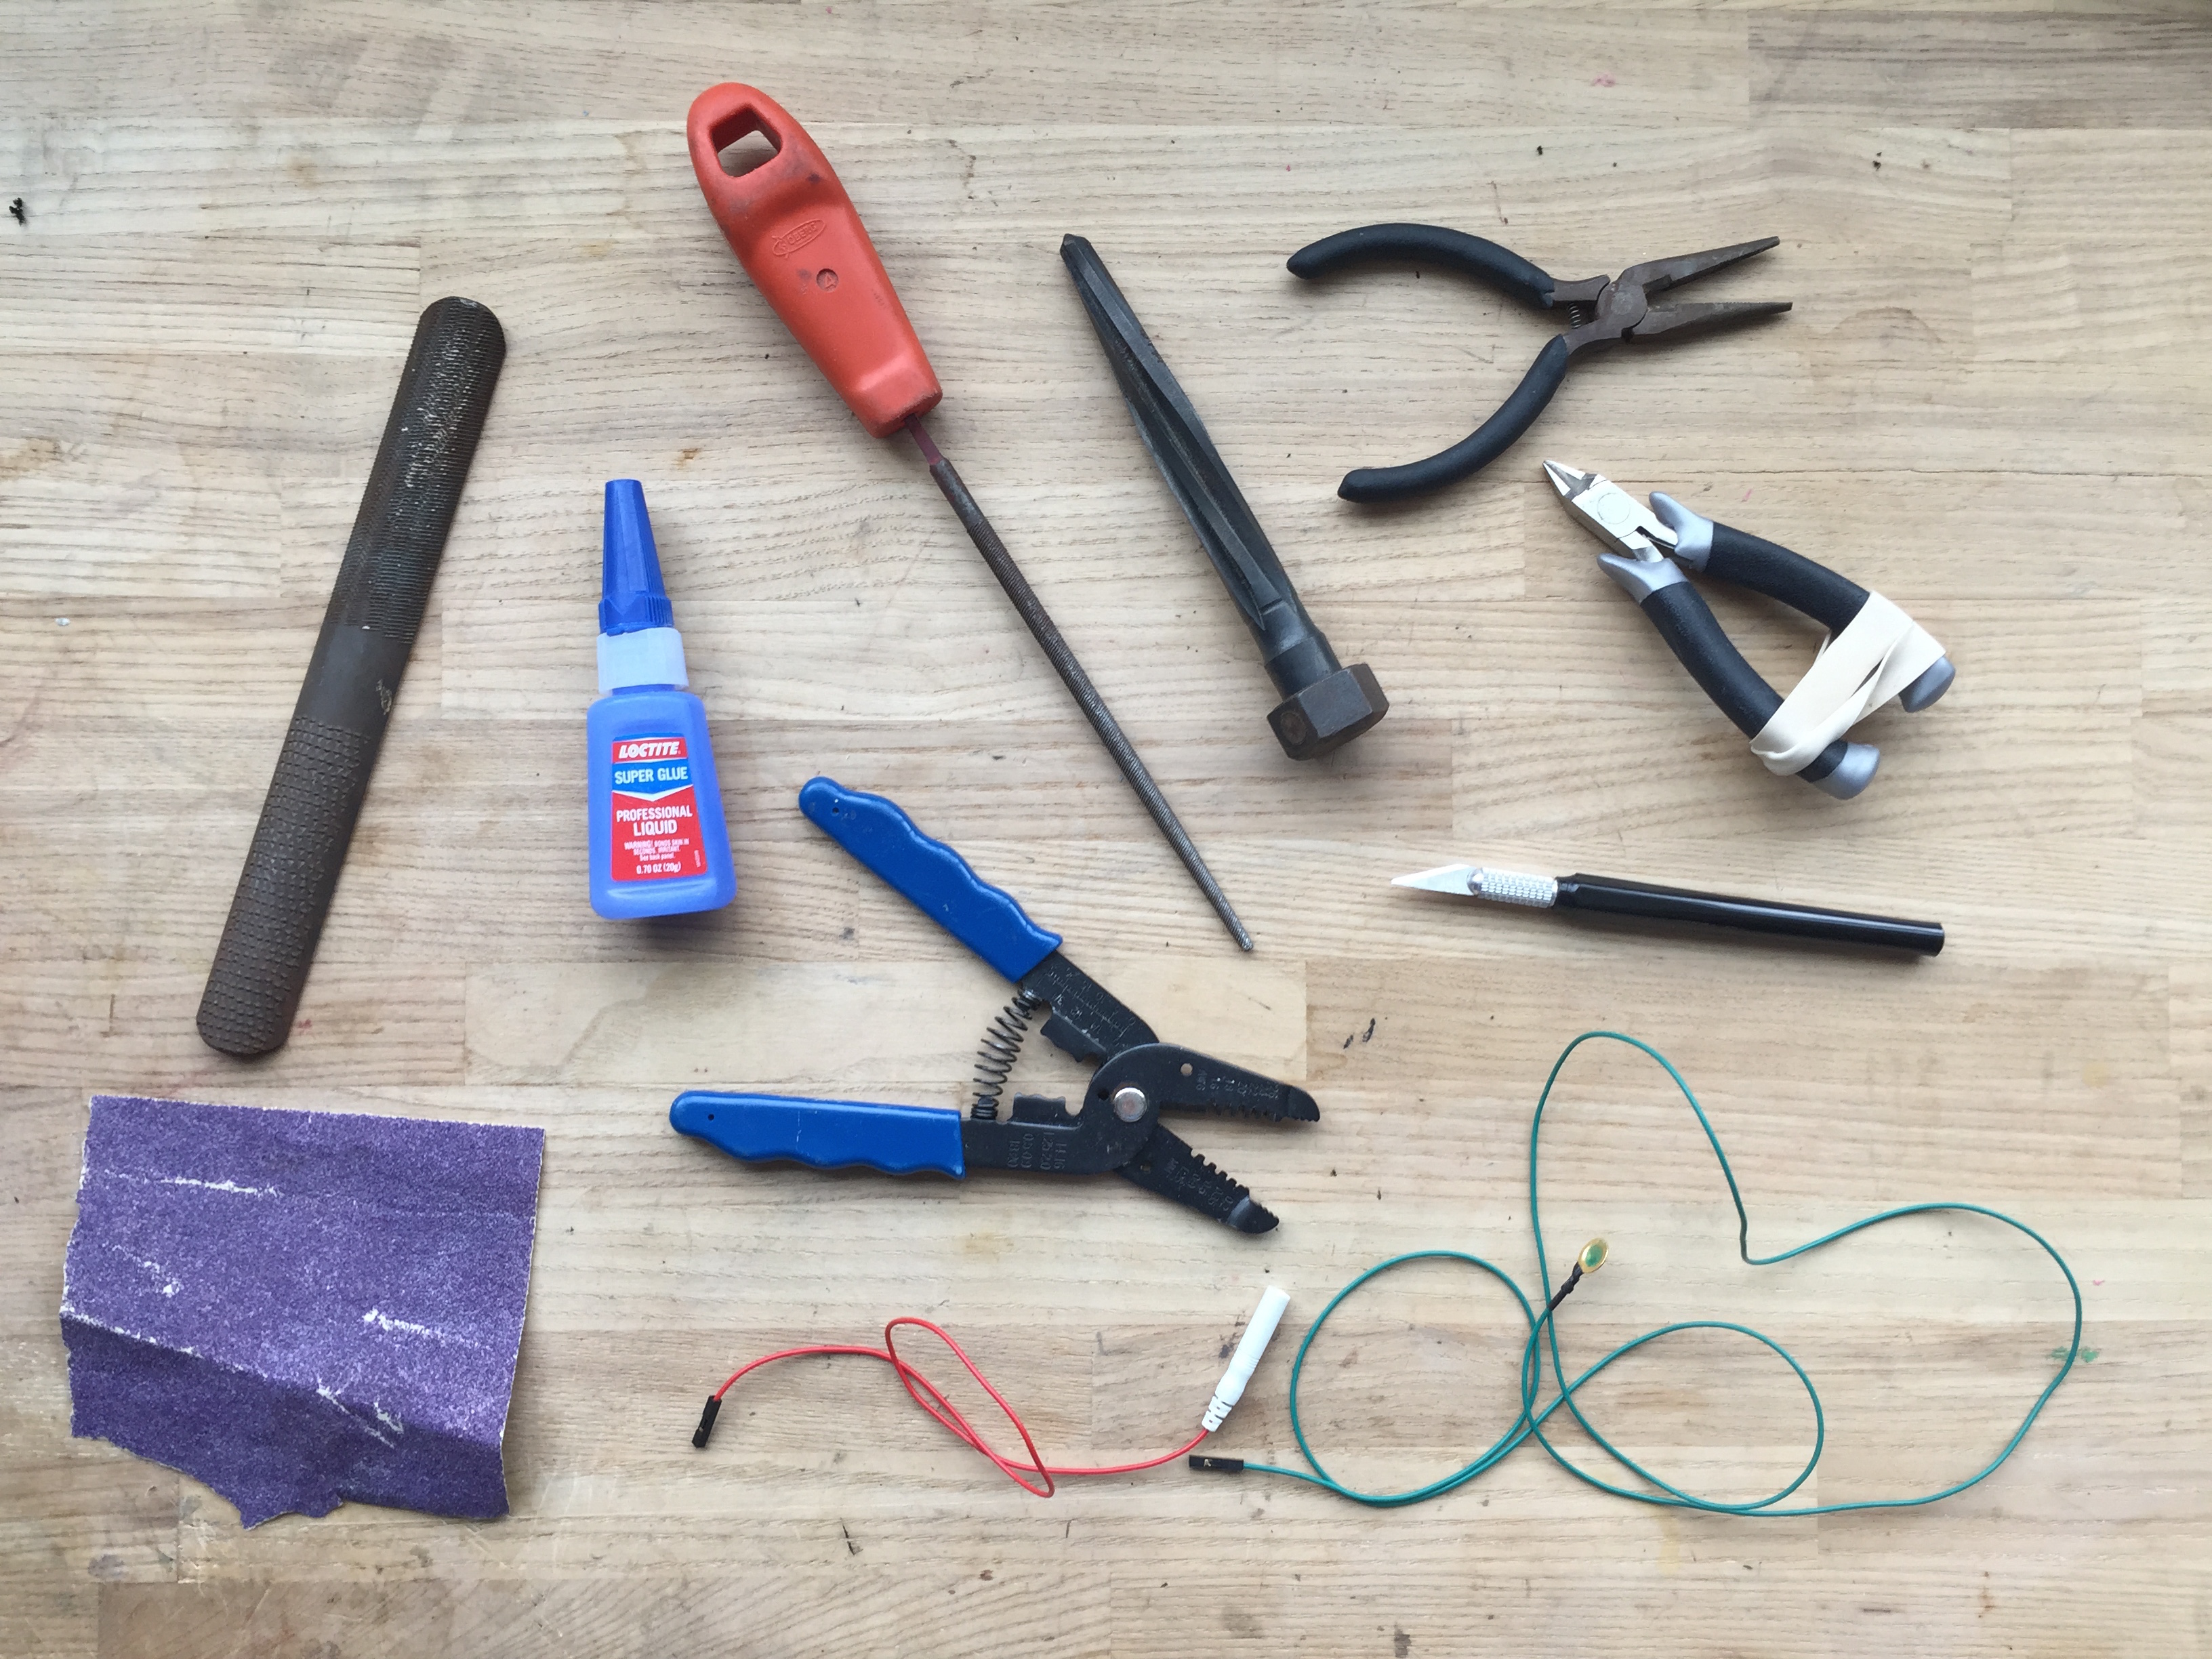
Other Helpful Information
- The following equipment/accessories were either necessary or very helpful in the assembly of this headset:
- Super glue
- Sandpaper
- Coarse flat & circular files
- Some sort of flexible wiring (terminating in a female header) to connect the electrodes back to the OpenBCI board. We used stripped Gold Cup Electrodes electrodes & stripped touch-proof connector cabling.
- An X-Acto/razor blade
- Wire cutters
- Needle-nose pliers
- The "M2_Electrode Mount A_01" part has a small lip on the inside (where the spring fits) that must be manually removed with an X-Acto/razor blade.
- Most of the tolerances between pieces are too tight, so assembly requires substantial filing and sanding.
- The "M2_Electrode Spacer_01" part is used to adjust for different head shapes and sizes.
- With this version (M2), we unfortunately only have one frame size, so this headset will not fit most heads, even with the spacers and springs.
- Before printing, make sure to re-orient the frame STLs so the flat sides of the model are on the platform.
Photos of Ultracortex M2