Ganglion Programming Tutorial
You do NOT need to program the Ganglion in order to use it. All OpenBCI boards ship ready to use out of the box. This guide is for users who want to upload their own firmware to the Ganglion or modify existing firmware.
This guide will walk you through how to update your Ganglion firmware. Downloading the latest binary and programming Over The Air (OTA) makes updating the Ganglion a breeze with a mobile device.
Download The Latest Builds
Ganglion OTA Firmware Programming
The Simblee is designed around a Nordic Semiconductor nRF51822. We use several apps that support the nRF51822 to perform the OTA update.
Ganglions shipped prior to February 27, 2017 will NOT program Over The Air (OTA) for the first time! If you purchased your Ganglion prior to this date, please follow the instructions in the Ganglion Hardware Programming section to program your Ganglion for the first time.
Install Applications
Install both of the applications listed below for your mobile device's operating system.
iOS
Android
Verify Ganglion Version
Turn on your Ganglion and turn on your phone's Bluetooth. Next, open the Lightblue (iOS) / nRF Connect (Android) app. The app will show you what Bluetooth peripherals are nearby. Your Ganglion may show up as either Ganglion, Simblee, or DfuTarg depending on your OS and firmware version. Tap the Ganglion peripheral, and the app will connect to and interrogate it.
In the Device Information, you will find the following:
- Manufacturer Name String
- Model Number String
- Hardware Revision String
- Firmware Revision String
- Software Revision String
You should see openbci.com as the Manufacturer, Ganglion as the Model Number, and x.x.x as the Software Revision String.
If the Software Revision String is earlier than 1.1.1, then you cannot perform OTA updates until you follow the instructions in the Ganglion Hardware Programming section.
Uploading the Firmware
Before completing this step, you should either download the precompiled binaries or compile the firmware from source as described in the Building from Source section.
Transfer this .zip file to your phone (e.g. via email, Dropbox, or Google Drive).
iOS
- Open the nRF Connect app and connect to the Ganglion. Use the name identified above.
- After connecting, select
DFUfrom the list of tabs at the top of the screen. - Click the
Open Document Pickerbutton at the bottom of the screen. - Select the
.zipfile you moved to your iOS device. - After loading the
.ziparchive, press the `Start`` button to upload the firmware.
Android
- Start the nRF Toolbox app and select the
Device Firmware Updatetool. - Tap the
Selectbutton, and select the file.zipfile you moved to your Android device. - Select the Ganglion device identified above.
- Start the upload.
Do not turn off your device while the firmware upload is in progress.
Ganglion Hardware Programming
Older Ganglions (pre-2017) must be programmed using hardware before OTA updates can be performed. Newer Ganglions can be programmed either OTA or using hardware.
What You Need
- FTDI Breakout or OpenBCI Cyton Dongle
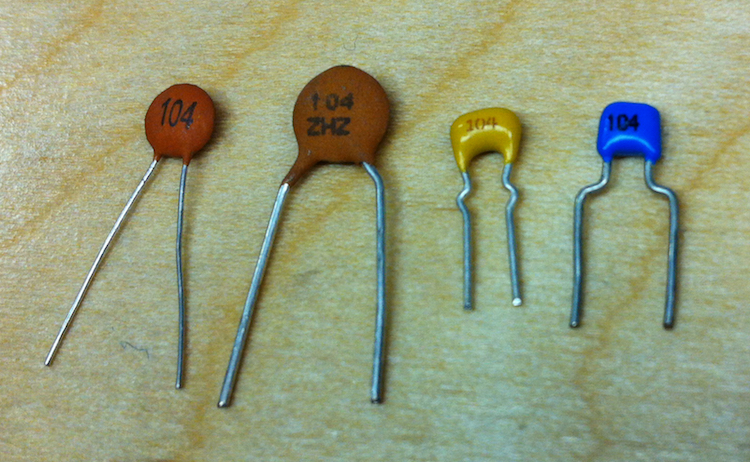
- 0.1uF Capacitor
- Jumper Wires
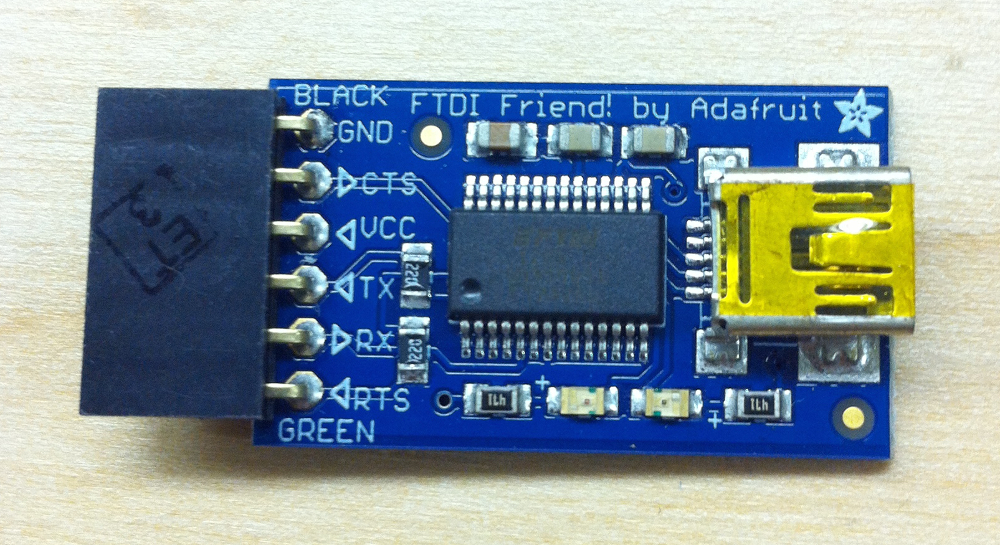
In this example, we use the Adafruit FTDI Friend. You can use any FTDI breakout, as long as it uses only 3V for logic levels. If you go to Adafruit to purchase one, you can also pick up some jumper wires, and 0.1uF Capacitors as well.
Wiring
The 0.1uF capacitor needs to be in between the RESET pin of the Ganglion and the RTS pin of the FTDI breakout. See the image below for a description of the required pin connections.
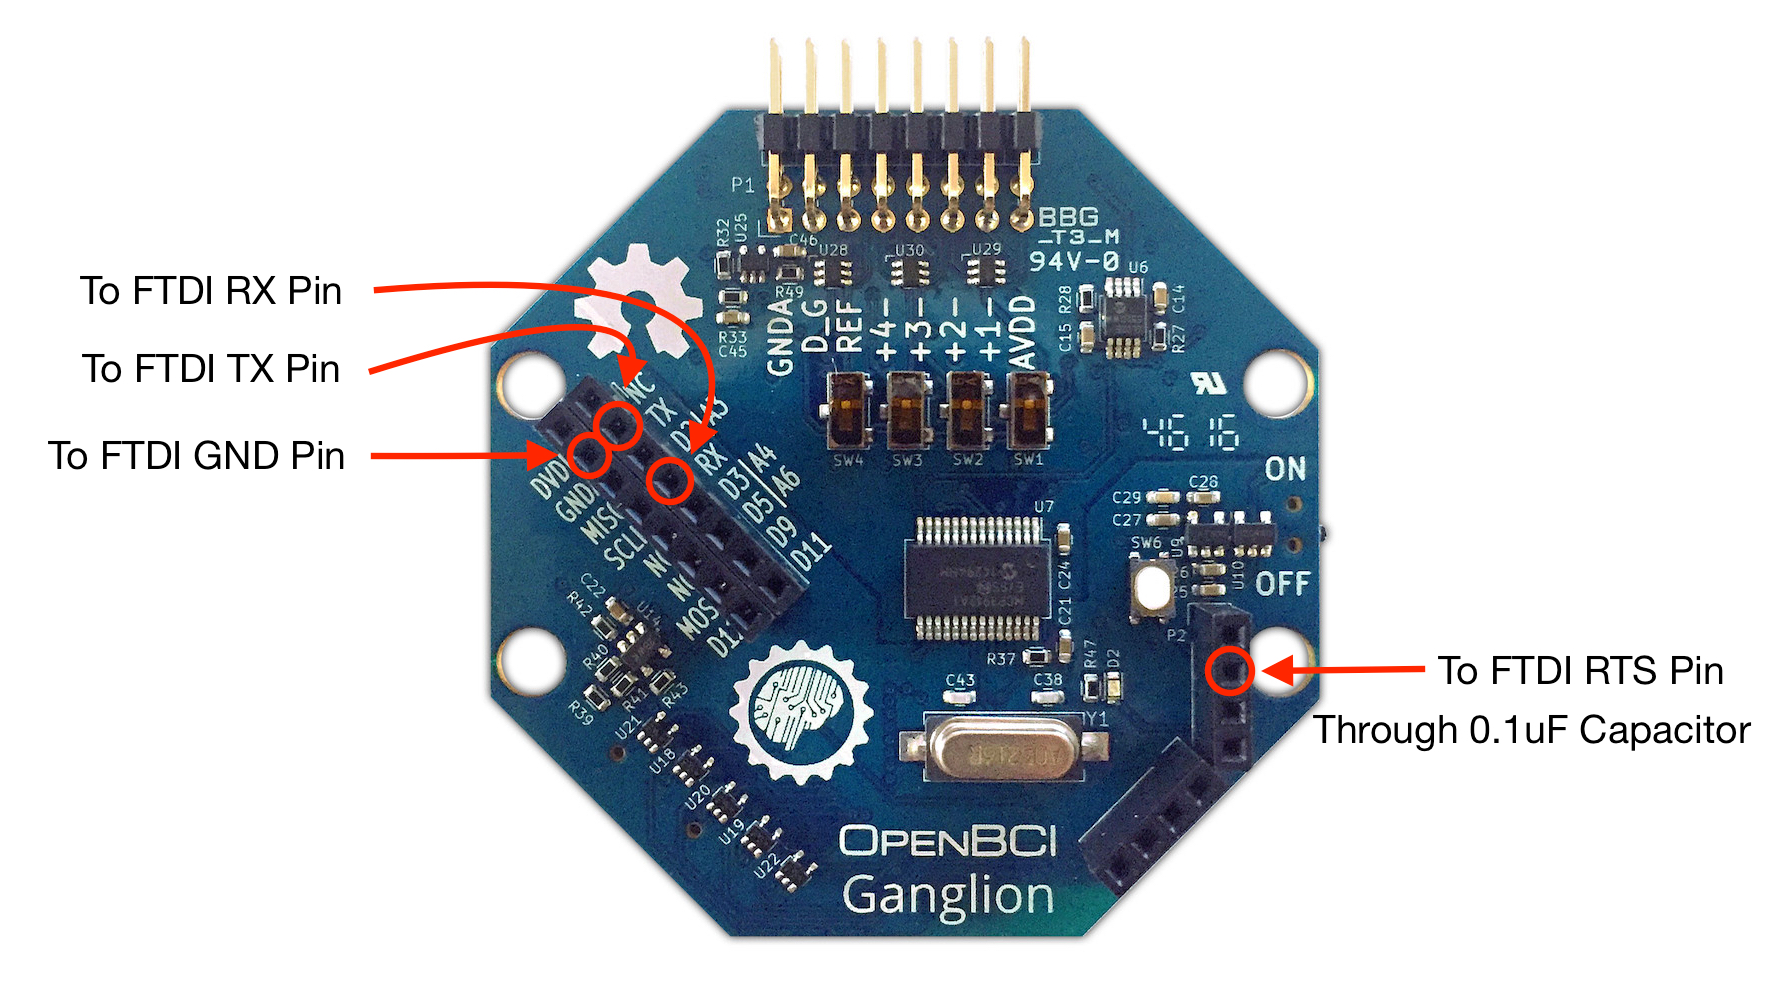
The Ganglion is a 3V device! You must never connect a voltage source higher than 3V to any of the pins.
Building From Source
The following instructions will get your computer and the Arduino IDE set up to create the a firmware .zip archive for updating OTA to your Ganglion device.
What You Need
Be sure to clone the repositories directly to your Arduino libraries folder. Alternatively, add the zipped libraries by navigating to Sketch -> Include Library -> Add .ZIP Library... and selecting the downloaded archives.
Add the Ganglion via Board Manager
- Navigate to
Preferences - Paste the following URL into the
Additional Boards Manager URLsfield
https://openbci-simblee.s3.amazonaws.com/package_simblee_index.json
- Navigate to
Tools -> Board -> Boards Manager... - Search for
Ganglionand install it - Select
Simblee Boards -> Ganglionfrom theTools -> Boardmenu
Select DefaultGanglion.ino from Examples
In the Arduino IDE go to File -> Examples -> OpenBCI_Ganglion_Library -> DefaultGanglion. This will open the Ganglion firmware source code sketch. If you can't see OpenBCI_Ganglion_Library then verify Ganglion is selected as board type.
Upload to Ganglion OTA Deployment
If you are using MacOS or Linux, you will need to make the nrfutil tool used by the Arduino buildchain executable.
On MacOS, open a terminal and paste in:
chmod u+x /Users/$USER/Library/Arduino15/packages/OpenBCI/hardware/Simblee/1.1.4/nrfutil_macosx
On Linux, open a terminal and paste in:
chmod u+x ~/.arduino15/packages/OpenBCI/hardware/Simblee/1.1.4/nrfutil_linux
To create the OTA files, first ensure your sketch is saved. Arduino may notify you that your sketch is read-only in which case you will need to select a new location to save it. Next, select Sketch -> Export compiled Binary. The Arduino IDE will take a few moments, and the IDE will create the .zip file you need for OTA in the sketch folder right beside where you saved your sketch.
If you are programming your Ganglion OTA, this file can be uploaded to your Ganglion using the instructions provided in the Ganglion OTA Firmware Programming section.
Upload to Ganglion Using Hardware
- Ensure you have completed steps in the Ganglion Hardware Programming section.
- Plug your dongle or FTDI Friend in and power up the Ganglion.
- Select the correct serial port from the
Tools > Portmenu for your OpenBCI Dongle or FTDI friend. If you don't know which port is correct, try unplugging the device and noting which port disappears from the menu. Plugging the device back in should cause the port to reappear. - With your wires all connected correctly, you should be able to click the
Uploadbutton and successfully re-program the Ganglion. Now you're ready to upload to Ganglion using OTA deployment!